
Last checked: August 2026 · Written by the player-led team at Badminton House
Quick Answer: Order to Learn Badminton Shots
Learn a relaxed grip and a legal serve first, then forecourt touch, lifts and drives, a clear, and finally the smash. Move on only when you can repeat the current task under its stated conditions.
Default
Six stages: grip and serve, forecourt touch, lift and drive, clear, defence, then smash and constrained games.
Gate
Use 8 clean outcomes from 10 attempts as a practical editorial threshold, then add movement, pace, or choice.
If you learned shots at drop-in in whatever order the shuttle demanded, start over with a build order. This plan is a coaching prescription, not a claim that one universal sequence is mandatory. The BWF itself says there is no absolutely definite introduction order, while still offering a useful beginner sequence that puts short forecourt actions before forehand overheads. BWF Coach Education Level 1 guidance also frames progression as simple to complex, slow to fast, and predictable to unpredictable.
Related reading: Use our badminton shot types guide as a glossary. This article tells you when each family enters practice.
In This Guide
Use gates, not a calendar
The best order to learn badminton shots is to add one demand at a time: first contact, then direction, then movement, then decision-making. A gate prevents a new problem from hiding an old one, so you can tell whether the miss came from the swing, the feet, or the choice.
A stage is ready to advance when the result is repeatable, not when one perfect shot appears. For this article, use an editorial pass test of eight clean results from ten attempts. “Clean” means the task’s stated outcome happened and the player finished balanced enough to be ready again. That number is deliberately a usable club-practice rule, not a BWF certification standard. Change it for your group if the feed is difficult, the athlete is new to racket sports, or the task has a very small target.
The important part is the ladder. BWF’s coaching manual moves practice from copying a stroke, to a suspended shuttle, to hand feeding, racket feeding, predictable rallying, then uncertainty and game conditions. It also says not to progress until players are reasonably competent at the current level. That is why this plan asks you to keep a feed stable before asking your body to travel, and to keep movement stable before asking your brain to choose among shots.
Run each stage for ten to fifteen focused minutes rather than trying to finish an entire level in one night. Record the gate in a note: date, task, result, and the one cue that helped. A useful cue is observable, such as “racket starts in front” or “recover to base,” rather than “play better.” If you miss the gate, simplify the feed or target. Do not add speed to a pattern that has no shape yet.
This is also how two players can practise together without one waiting around. The feeder has a job: send the same gentle, reachable shuttle ten times. The hitter has a job: meet the defined landing or contact outcome. Swap after ten. Once both can pass, alter only one variable. Move the feed one step farther away, raise its height, or ask for recovery. Never alter all three at once.

Stages 1–2: grip, serve, and forecourt touch
Start with a relaxed grip and a legal serve, then teach gentle forecourt contact before any big overhead swing. This order gives a beginner a short, visible contact task and a repeatable way to begin rallies, while the underarm forecourt actions prepare the body for later overhead work.
Stage 1: ready grip and a simple serve
Begin with the basic forehand grip, racket held in front, and a deliberately relaxed hand. BWF says a relaxed grip makes grip changes easier, improves power, and reduces fatigue. Practise changing from basic grip to a thumb grip with the racket in front of the body, then return to basic grip. The goal is not a frozen textbook pose. The goal is to be able to prepare the racket face for the next shuttle.
Add a simple backhand serve or forehand high serve only after that ready position looks repeatable. Pick a generous service-box target and serve ten shuttles. The gate is eight legal serves that travel upward over the net and land in the correct receiving service court. Under the current Laws, the whole shuttle must be below 1.15 metres at the instant the racket hits it. Read the details in the BWF Laws of Badminton, Law 9.
Do not make a new player chase a pinpoint serve immediately. A legal, repeatable start is useful because it lets two beginners start a drill without a coach. If the serve repeatedly fails at the net, check the upward flight and contact before adjusting force. If it flies long, shorten the swing and keep the target in view. The stage ends when the player can reset their stance and produce the same general flight ten times, not when they can disguise it.
Stage 2: forecourt touch before footwork
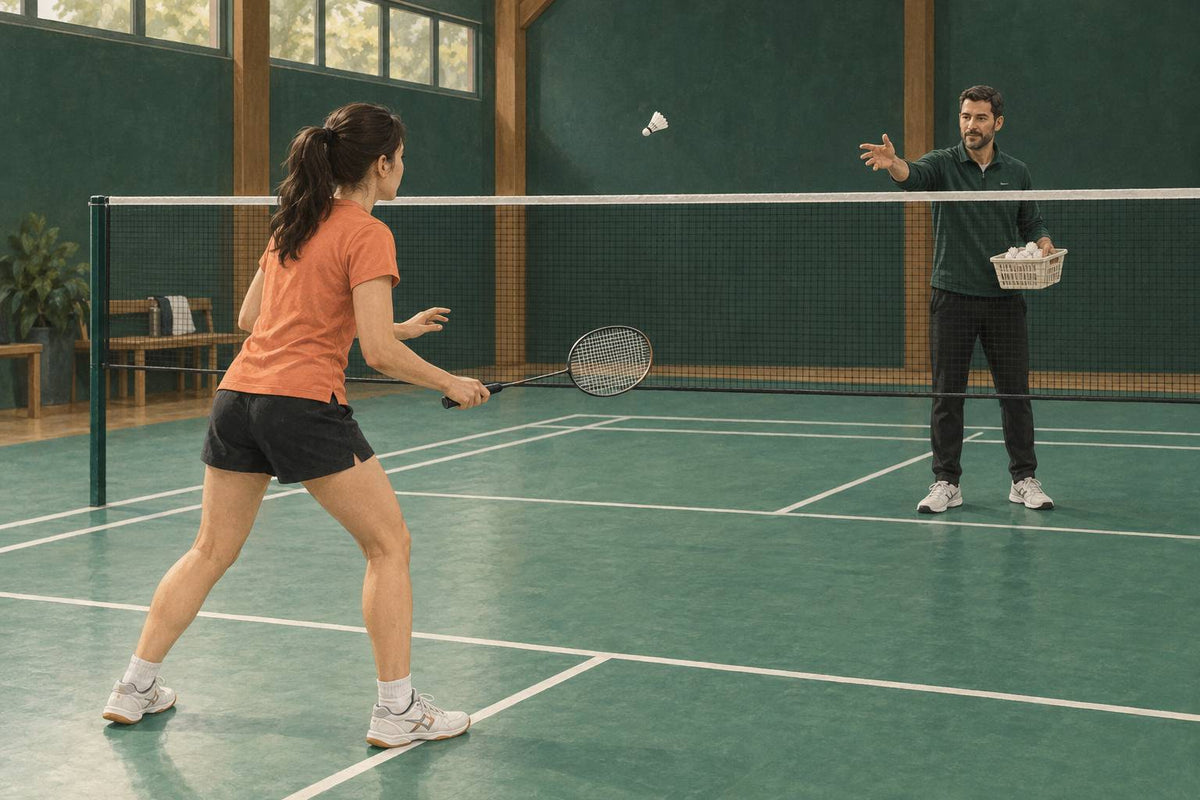
Stand close enough to the net that reaching is easy. A partner hand-feeds a shuttle to the forehand side; the hitter uses a compact push to send it gently toward a floor target. BWF’s introductory forehand net-shot practice begins exactly with a basic grip, a hand feed, and a target without a net, then moves to feeds over the net. The reason to begin here is practical: the player can see the racket face, contact, and flight without a long swing or a late arrival.
Gate one is eight of ten gentle pushes landing on or near the target with no net. Gate two is eight of ten clearing the net and landing in the opponent’s forecourt from a stationary position. Only then add a single step into a lunge and a recovery step out. Keep the feeder’s placement kind. A wildly drifting feed tests scrambling, not touch.
The common temptation is to add spinning net shots straight away. Leave that for later. A beginner needs an open racket face, a controlled reach, and a recovery position before trying to create tumble. If their contact rises too high, make the target closer to the net. If it goes into the net, ask them to present the racket earlier instead of flicking harder.
Stages 3–4: lift, drive, then clear
After forecourt touch is reliable, add the shots that move the shuttle away from pressure: the lift, the drive, and the clear. Teach them in controlled feeds before live exchanges, because each adds reach or pace while keeping a clear tactical job: send the shuttle deep, keep it flat, or buy recovery time.
Stage 3: lift and drive from a stable base
Use the same forecourt position to learn a lift. Have the feeder place the shuttle below net height. The hitter sends it high and deep enough that a partner at the far side could receive it comfortably. The first gate is eight of ten high, playable lifts with the hitter recovering to a ready position. Do not demand a back-line target yet. Height creates time, and time lets a learner recover.
Next use a midcourt hand feed for a drive. The racket stays in front, the swing stays compact, and the target is a broad strip through the middle rather than a painted line. Gate: eight of ten drives travel over the net without rising into an easy attack, and the hitter can stop balanced after each contact. Then alternate lift and drive in a known pattern: lift, drive, lift, drive. The next progression is a feeder call of “high” or “flat” before the shuttle arrives.
These are editorial gates, chosen to make the transition visible. The BWF manual supports the underlying progression principle, not these exact targets. If drives pull the wrist into a tight grip, return to a stationary shadow action and reopen the fingers. If lifts are flat, reduce the target distance and rebuild the upward path. Accuracy in an easier task gives you a better next drill than ten rushed misses.
Stage 4: clear before smash
Learn the forehand clear before the smash because it teaches the overhead preparation, high contact, rotation, and recovery without demanding a downward winner. BWF’s clear progression includes a shuttle held by hand, a suspended shuttle, and then a hand-fed shuttle. Its smash section says those basic forehand-overhead practices benefit the smash. This is the strongest reason to resist beginning with full-power hitting.
Start below full court. A partner holds a shuttle slightly above and in front of the hitting shoulder. The player turns side-on, reaches high, and sends it forward with a relaxed action. Gate one is eight of ten solid contacts with the shuttle travelling forward and the player landing balanced. Progress to a suspended shuttle, where the goal is to repeat the same contact point. Then use a gentle underarm feed to send a high clear into a large rear-court zone.
The final clear gate is eight of ten feeds travelling high enough to give the hitter time to recover and deep enough to move a receiver back from a normal starting position. The precise depth can match your court and partner. What matters is a high, useful trajectory plus recovery, rather than a hard flat shot that lands short. Once the player can clear under a predictable feed, add one step back before the hit. Only after that survives should you ask them to decide between clear and drop.
Stages 5–6: defence, smash, and constrained games
Add defence and the smash after the player can control an overhead clear, then use restricted games to make the new shots appear under pressure. The smash is an attacking option from a prepared overhead position; it should be a variation of a stable action, rather than the first long swing a beginner owns.
Stage 5: block and recover
Feed gentle downward or flat shuttles to the body and racket side. The player starts with the racket in front and blocks the shuttle back over the net, then recovers. Gate one is eight of ten blocks that cross the net with a compact action. Gate two is a predictable sequence of four feeds where the player blocks, takes a recovery step, and is ready before the next shuttle. This stage makes the later smash honest: you learn what a defender sees and why a steep, controlled attack matters more than a wild swing.
Do not turn this into a hard-smash drill. The feeder should provide a safe, readable feed. The learner is practising a short response and a ready racket, not courage. When the block rises too high, reduce the racket swing. When it lands in the net, make the feed slower and let the player present the face earlier. Add pace only after the pattern survives at the current speed.
Stage 6: smash as a controlled variation, then play
Now take the Stage 4 clear preparation and ask the player to direct a high, well-fed shuttle down into a broad midcourt target. Gate one is eight of ten smashes that clear the net, land in the target area, and leave the hitter balanced. The measure is direction and recovery, not noise or maximum pace. A beginner who starts here often throws the racket at the shuttle, loses the contact point, and cannot recover for the return. The clear-first route gives that swing a usable shape.
Finish with games that protect the learning goal. Play half-court singles where a rally point counts only after both players have made one clear. Or play a serve-and-rally game where the first attacking shot must be a controlled drive, net shot, or smash from a high feed. Use a bonus point when the new shot is played successfully, whether it wins the rally or creates the next opening. This follows BWF’s later practice ideas while keeping games present from the beginning.
A final gate is practical: in two short games, can the player choose the stage’s shot at least three times without abandoning the ready position? If yes, continue with more uncertainty. If no, return to the last predictable drill that worked. The point is not to march through named shots. It is to build a player who can recognise a reachable shuttle, make one controlled action, recover, and play the next shuttle.


Leave a comment
This site is protected by hCaptcha and the hCaptcha Privacy Policy and Terms of Service apply.