
Last updated: June 2026 · Written by the team at Badminton House
Quick Answer: Badminton Shot Types
Learn the five core shot families first — clear, drop, drive, lift, and smash — then use net shots, pushes, kills, and serves to solve specific rally situations.
Default
Best starting point: build your rally toolkit around clears and lifts to send opponents deep, drops and net shots to bring them forward, and drives or smashes when you can apply pressure.
Control
Choose drops, net shots, and pushes when you want to pull your opponent into the front court, create movement, or force a lift you can attack.
Pressure
Choose smashes, drives, and net kills when the shuttle is high enough or flat enough to attack; for serves, start the rally with a plan instead of just putting the shuttle in play.
Badminton can feel messy when every rally throws a different problem at you: the shuttle is too deep, too tight to the net, too flat at your body, or sitting up just high enough to attack. Learning the main badminton shot types gives you a simple map for those moments instead of guessing.
The core toolkit starts with the clear, drop, drive, lift, and smash. From there, players add net shots or hairpins, lobs, pushes, net kills, and serves. Each shot has a distinct flight path and tactical job: send your opponent deep, bring them forward, keep the shuttle flat, apply attacking pressure, or start the rally with a plan.
This guide breaks down what each shot does, when to use it, and how the choices connect. The goal is not just to memorize names — it is to understand why a clear buys time, why a tight net shot can force a lift, why drives matter so much in doubles, and why your serve is the one shot that appears in every rally.
Build your shot toolkit around the right racket. As you learn whether your game leans toward power, control, speed, or all-round play, browse our badminton rackets — pricing is in CAD, and Badminton House offers free Canadian shipping on orders over $200.
In This Guide
Badminton Shot Types at a Glance

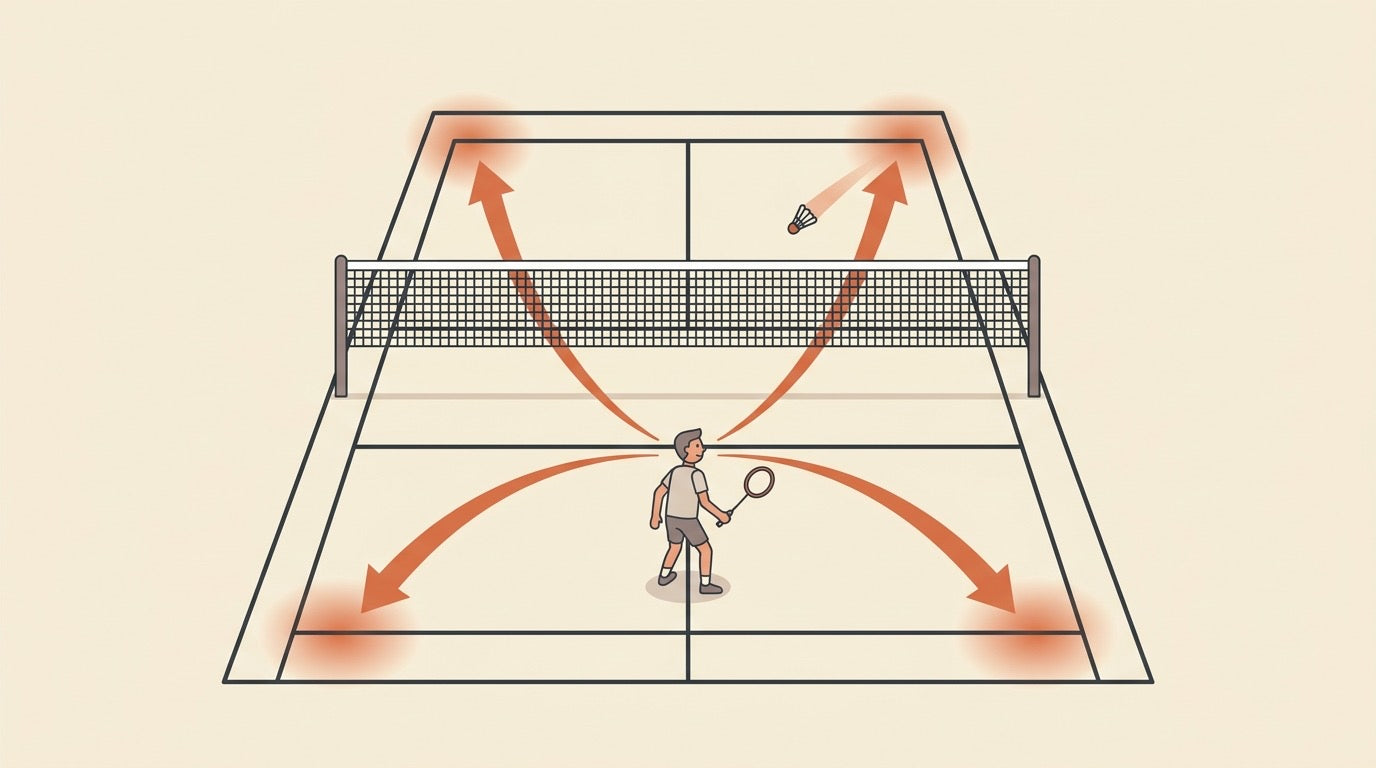
Badminton shot types are easiest to understand by grouping them by what they do to your opponent: send them back, bring them forward, keep the shuttle flat, attack downwards, or start the rally. The five basic shot groups are the clear, drop, drive, lift, and smash, and these shots can be played with forehand or backhand technique.
Use this table as a quick catalogue before we break down each family in more detail.
| Shot type | Typical trajectory | Tactical purpose | Good cue |
|---|---|---|---|
| Clear | High overhand shot travelling deep toward the back court. | Moves the opponent back and can buy time when you are under pressure. | Think height plus depth, not just power. |
| Drop | From the back court, clears the net and falls near the front court. | Brings a deep opponent forward and changes the rally pace. | Make it look like a harder stroke, then use less force. |
| Smash | Fast, downward-angled attacking shot from mid court or back court. | Applies finishing pressure and forces a difficult defensive return. | Contact the shuttle above and in front of your body. |
| Drive | Fast, flat shot that travels just over the net. | Keeps the shuttle low, especially in doubles, and can force an upward reply. | Use a short, sharp wrist action. |
| Net shot / hairpin | Soft touch shot played close to the net so the shuttle just crosses and drops quickly. | Forces the opponent to lift, which can set up your next attack. | Prioritize control and touch over swing size. |
| Lob / lift | High underhand shot from near the net toward the opponent’s back court. | Escapes net pressure and pushes the opponent away from the front court. | Lift high enough to recover, but deep enough to avoid an easy smash. |
| Push | Guided shot that travels just above the net and lands short in the front court. | Pressures the front court without giving the opponent much height to attack. | Use gentle wrist control rather than a big swing. |
| Serve | Starts the rally; common basic options include high, low, and flick serves. | Controls the first tactical problem your opponent has to solve. | In doubles, the low serve is the default because it limits the opponent’s attacking reply. |
Practising these shots? Bring enough shuttles for repetition: clears, drops, drives, lifts, and net work all improve faster when you can hit sets instead of chasing one birdie. Shop badminton shuttlecocks in CAD, with free Canadian shipping on orders over $200.
Clear, Lob, and Lift: Send Them Deep
Clears, lobs, and lifts all share the same broad tactical idea: send the shuttle high and deep so your opponent has to move back. They are especially useful when you are under pressure, late to the shuttle, or need time to recover your base position.
A clear is a high shot that travels toward the opponent's rear court. Some players also use lob to describe this high, deep pattern. A net lift is different in starting position: it is played from close to the net and arcs the shuttle high into the opponent's back court.
| Shot | Trajectory cue | When to use it |
|---|---|---|
| Clear | High overhand shot that travels deep behind the opponent. | Use it to reset the rally, move an opponent back, or buy time when you are defending. |
| Lob | High, deep flight toward the rear court; often used similarly to a clear in beginner language. | Use it when your opponent is positioned forward and you want to force them back. |
| Net lift | Underhand shot from near the net that arcs high into the back court. | Use it when you cannot keep the shuttle tight at the net and need to escape pressure. |
The key cue is depth before perfection. A short clear or lift can give the opponent an easy attacking chance, while a deep one gives you space to recover. For Canadian club players drilling in busy gyms, this is often the first defensive habit worth building: send the shuttle far enough back that you are not feeding mid-court attacks.
Need the backhand version? If your deep shot breaks down on the non-racket side, use our badminton backhand clear technique guide for a dedicated walkthrough.
For practice, keep the goal simple: clear or lift high enough to get past the opponent and deep enough to make them move. Once you can do that reliably, you can start choosing whether the next shot should reset the rally, change pace, or set up an attack.
Drop, Net Shot, and Push: Bring Them Forward
If clears and lifts push your opponent back, these three shots do the opposite: they make the opponent move forward, bend low, and hit up. The drop shot starts from the rear court, the net shot or hairpin happens tight to the net, and the push guides the shuttle just above the tape into the front court.
The tactical goal is simple: make your opponent lift. Once the shuttle is lifted, you or your partner can look for the next attacking shot instead of defending from a low position.
| Shot | Where it starts | What it does | Best use |
|---|---|---|---|
| Drop shot | Back court | Clears the net and drops into the front court. | Use it when the opponent is deep and you want to pull them forward. |
| Net shot / hairpin | Close to the net | Tumbles or drops the shuttle just over the tape. | Use it to force a lift and set up the next attack. |
| Push | Front or mid-front court | Uses a gentle wrist action to guide the shuttle just above the net so it lands short in the front court. | Use it after a wide serve or when there is space in front of the opponent. |
Drop shot: the rear-court shot that looks like more power is coming
A drop shot is played from the back court and made to clear the net before falling into the front court. A good one starts with the same shape as a clear or drive, then uses much less force so the shuttle comes down short instead of travelling deep.
- Fast drop: descends quickly and lands near the front court, rushing the opponent before they can take the shuttle high.
- Slow drop: falls closer to the net for a more subtle, touch-based option.
- Risk trade-off: the closer the shuttle drops to the net, the harder it is to return, but the greater the risk that it will not cross.
For a step-by-step technique breakdown, see our badminton drop shot guide.
Net shot or hairpin: win the tape, force the lift
A net shot is a soft, controlled stroke played close to the net. The goal is to make the shuttle tumble over and drop quickly on the opponent’s side. When the shot is tight, the opponent often has to lift or clear, which gives you a chance to attack the next shuttle.
The hairpin idea is exactly what it sounds like: the shuttle travels up and over the tape, then falls almost straight down. It is less about power and more about a relaxed hand, precise racket face, and good touch at the front of the court.
Touch practice tip. In your next Canadian club-night warm-up, spend a few minutes trading soft net shots before you start smashing. The target is not speed; it is making the shuttle cross just above the tape and fall quickly.
For more detail on racket face, spin, and control, read our badminton net shot technique guide.
Push: a small wrist shot that finds front-court space
The push is not a big swing. It uses a gentle wrist motion to guide the shuttle just above the net so it lands short inside the front court. In doubles, it is especially useful after a wide serve: the straight net shot and push are both difficult to handle because the receiver has been pulled away from the centre.
Think of the push as a placement shot. You are not trying to hit through the opponent like a drive, and you are not trying to spin the shuttle as tightly as a hairpin. You are guiding the shuttle into a space that makes the opponent lift, reach, or take the shuttle below net height.
For doubles patterns and front-court examples, see our badminton push shot technique guide.
Smash, Drive, and Net Kill: Apply Pressure
These are the badminton shot types you use when the rally is no longer neutral. The smash is the powerful downward attacking shot, the drive is the fast flat mid-court counter-attack, and the net kill is the close-net spike you use when your opponent’s net shot sits too high.
| Shot | Typical contact area | Trajectory | Best use |
|---|---|---|---|
| Smash | Mid-court or rear court | Fast and downward | Finish the rally or force a weak block |
| Drive | Mid-court | Fast and flat, just over the net | Counter-attack, especially in fast doubles exchanges |
| Net kill | Very close to the net | Short, steep, and downward | Punish a net shot that floats too high |
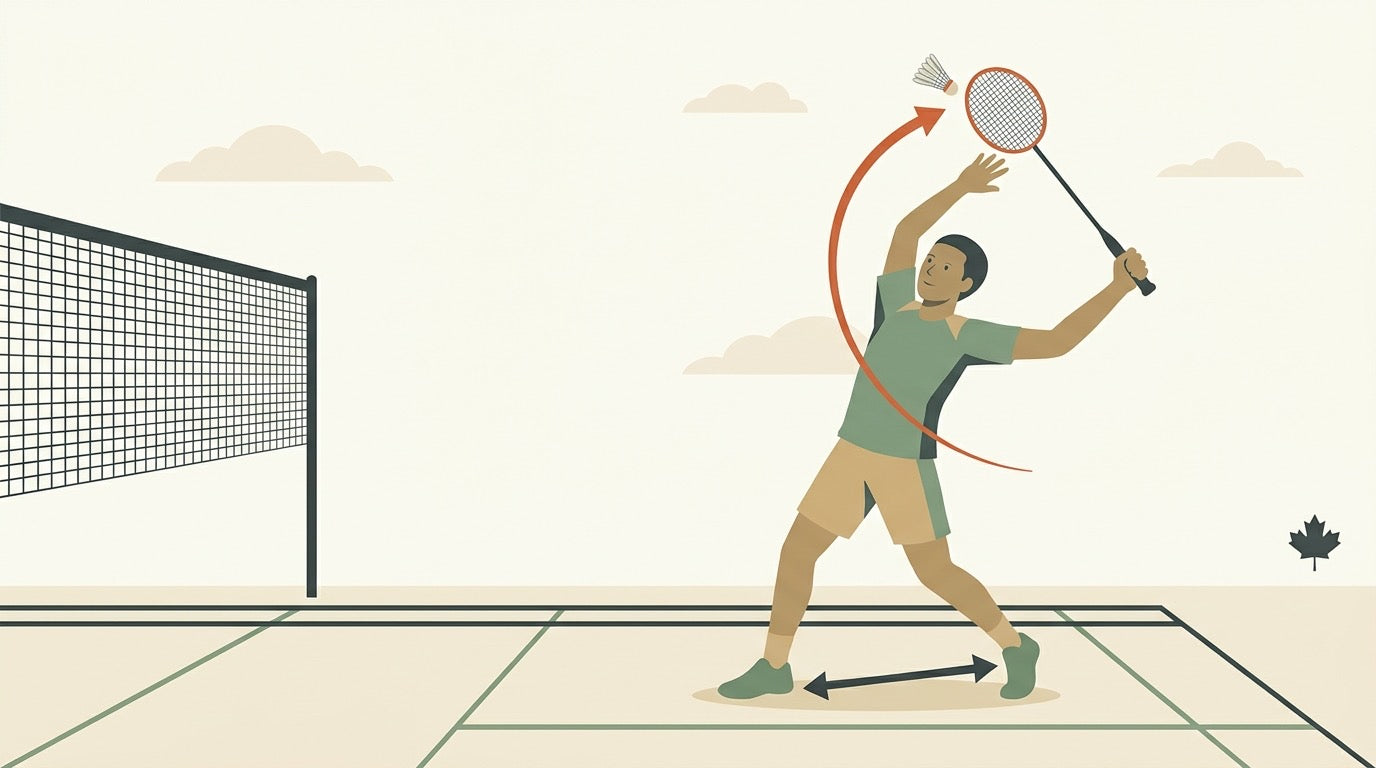
Smash: turn height into downward pressure
A smash is an attacking stroke played downward with speed and power. The contact point should be above and in front of the body, with timing, body rotation, arm action, and wrist coordination all contributing to the shot. It is not just “swing harder”; a steep, well-timed smash is usually more useful than a flat one that gives the defender an easy counter.
Use the smash when the shuttle is high enough that you can contact it in front and send it down. If you are late, off-balance, or taking the shuttle behind your shoulder, a clear, drop, or half-smash may keep the rally under control better than a full-power swing.
For a deeper technique breakdown, see our badminton smash guide. If you are comparing rackets around a power-oriented game, you can also browse the Yonex Astrox Series for attacking-racket context.
Drive: win the flat exchange
A drive is a fast, flat shot played from mid-court to mid-court. It can be played forehand or backhand, and when it is hit cleanly it keeps the shuttle low enough that the opponent may be forced to lift or play upward.
Drives matter most when the rally speeds up. In doubles, they help you avoid lifting unnecessarily, pressure the front player’s body, and turn defence into attack with a short, sharp racket action. The key is compact preparation: racket up, grip relaxed, then a quick squeeze through contact.
For practice cues and common mistakes, read the full flat drive technique guide.
Net kill: punish the loose net shot
A net kill is played close to the net when the shuttle sits high enough to be hit down into the opponent’s court. It is different from a net shot: instead of tumbling the shuttle over softly, you are taking the early opening and ending the rally before the opponent can recover.
The big mistake is over-swinging. Because you are close to the tape, the racket path has to be controlled. Move in early, keep the racket head above the hand where possible, and use a short punching action so you do not hit the net or send the shuttle long.
If you want to build the timing and footwork for this shot, use our net kill rush technique guide.
Serve: Start the Rally with a Plan

The serve is different from every other badminton shot type because it appears in every single rally. You do not need a spectacular serve to win club matches, but you do need a serve that is legal, repeatable, and chosen for the situation.
The three basic serves to understand are the high serve, low serve, and flick serve. In simple terms: the high serve is used in singles only, the low serve is used in both singles and doubles, and the flick serve is used in doubles when you want to punish an opponent who is crowding your short serve.
| Serve type | Where it fits | Tactical idea |
|---|---|---|
| High serve | Singles only | Send the shuttle high and deep so the opponent starts from the rear court rather than attacking immediately from the front. |
| Low serve | Singles and doubles | Keep the shuttle tight over the tape to limit the receiver’s attacking options. In doubles, this is the default serve because it helps stop the receiver from attacking downward right away. |
| Flick serve | Doubles | Make it look like a low serve until contact, then send it higher to catch a receiver who is rushing forward. |
Legality cue: before contact, make sure you contact the shuttle below the waist and keep the racket shaft pointing downwards, with the racket head below the racket hand.
For Canadian club players, the biggest practical takeaway is simple: do not treat the serve as a formality. Decide what you want the receiver to do. In singles, a high serve can buy court position; in doubles, a low serve can start the rally neutral or slightly in your favour; and a flick serve works best as a change-up, not as a serve you use every point.
For step-by-step technique, read our complete badminton serve guide. If you mainly play doubles, go deeper with the low serve and flick serve guide.
Cross-Skills and Racket Fit by Playstyle

Once you know the main badminton shot types, the next step is learning how they connect. A clear, drop, drive, smash, push, and net shot are not isolated techniques — they work because your opponent has to read your preparation, your racket face, your timing, and your body position.
That is why disguise matters so much. A good drop shot can be prepared to look like a drive or clear, then played with less force so the shuttle falls near the front court. The more your preparation looks the same across different shots, the less time your opponent has to react. If you want to build that skill deliberately, read our full guide to badminton deception and shot disguise.
Think in patterns, not single shots. A clear can buy time, a drop can pull your opponent forward, a net shot can force a lift, and that lift can set up your smash.
Grip comfort affects how quickly you can change shots
Shot variety depends on fast grip changes. Drives need short, sharp reactions. Net shots need a soft hand. Smashes and clears need a clean overhead contact. If your handle feels awkward when switching between forehand, backhand, net, and defensive positions, it becomes harder to keep your preparation relaxed and your shot choice hidden.
That does not mean every player needs the same handle size. A doubles player who lives in fast drive exchanges may prefer a setup that feels easy to turn in the fingers, while a singles player who hits many clears and smashes may prioritize a secure feel through bigger swings. Use our G4, G5, and G6 badminton grip size guide if you are unsure whether the handle size is helping or fighting your technique.
Racket balance should match your rally identity
Racket balance changes how your shot toolkit feels in real rallies. Head-heavy rackets are built for players who rely on clears and smashes. Even-balance rackets suit all-round players who mix power and control. Head-light rackets help players who need quick reactions, fast drives, defensive blocks, and sharp net play.
| Playstyle | Shot types it supports | Racket fit |
|---|---|---|
| Power attacker | Clears, steep smashes, attacking lifts, rear-court pressure | Head-heavy balance helps add power on clears and smashes. |
| All-rounder | Clears, drops, drives, pushes, controlled net play | Even-balance rackets fit players mixing power and control. |
| Speed and defence player | Drives, blocks, pushes, net kills, quick defensive replies | Head-light rackets improve manoeuvrability and make quick reactions easier. |
If you are deciding between major racket families, our Yonex vs Victor vs Li-Ning racket guide explains the brand-level differences in a Canadian buying context. For a deeper balance-first breakdown, compare your style with the live options in our badminton rackets collection.
Stock changes, so check the live collection for current CAD availability before you choose a model. When your order qualifies, Badminton House offers free Canadian shipping on orders over $200.
Shop Badminton Rackets — Match Your Shot Style
10% off first order · Free shipping on $200+ · 14-day returns
The practical takeaway: choose shots based on what your opponent gives you, disguise them with the same preparation whenever possible, and use a racket setup that supports your natural rally pattern. The best players are not just collecting more shot types — they are making every shot look connected until the shuttle has already left the strings.
Which Badminton Shot Should You Choose?
Use this as a rally decision helper. Start with the problem in front of you, then choose the shot that changes your opponent’s position, reduces their attack, or creates your next opening.
| Situation | Choose this shot | Why it fits |
|---|---|---|
| You are late, stretched, or need time to recover | Clear, lob, or lift | A clear or lob sends the shuttle high and deep, buying time to get organized and recover back toward base. |
| Your opponent is pinned near the back court | Drop shot | A drop brings the shuttle close to the net and is especially useful when the opponent is positioned deep. Make it look like a drive, clear, or attacking stroke until late. |
| You are close to the tape and want to make them lift | Net shot or hairpin | A tight net shot tumbles just over the net and can force the opponent to lift, setting up a stronger attacking chance. |
| The opponent’s net shot sits too high | Net kill | A net kill is made close to the net and spikes a loose shuttle down into the opponent’s court. |
| You want to attack from mid court or back court | Smash | The smash is a powerful downward-angled attacking shot used to finish rallies or force a weak reply. |
| The rally is flat, fast, and happening through mid court | Drive | A drive is quick, flat, and often used in doubles to keep the shuttle low or pressure the opponent into lifting. |
| You are starting a doubles rally | Low serve first, flick serve as a variation | The low serve is the doubles default because it limits the opponent’s attacking options. Use the flick when the receiver is rushing your low serve. |
| You are starting a singles rally | High serve or low serve most of the time | High serves are used in singles, while low serves are used in both singles and doubles. Save surprise serves for a clear tactical reason. |
| Your opponent is reading your strokes early | Disguise the same preparation | If the opponent can predict you, they get more time to react. Make drops look like clears or drives, then change the final touch. |
Racket fit note: If your go-to choice is smash or deep clear pressure, browse the Yonex Astrox Series or the full badminton rackets collection; the Astrox attacking rackets listed in the collection were $299.99–$349.99 CAD and sold out at the time of checking, so treat the collection page as the current availability reference.
Get Canadian badminton gear advice + restock alerts
Join the Badminton House list for buying checklists, restock alerts, and practical gear advice for Canadian players.
By subscribing, you agree to receive Badminton House emails and can unsubscribe anytime.
We play badminton too, so if you are unsure which shot to build first, how to structure your next practice, or what gear fits your rally style, send us a note. We are happy to help Canadian players choose a practical next step: contact Badminton House for advice.
Ready to practise the full shot toolkit?
Keep shuttles on hand for clear, drop, drive, serve, net, and smash drills.
Shop ShuttlecocksCanadian badminton specialty shop
Leave a comment
This site is protected by hCaptcha and the hCaptcha Privacy Policy and Terms of Service apply.