Last updated: June 2026 · Written by the team at Badminton House
Quick Answer: Badminton Net Play Strategy
Choose your net shot from the shuttle’s contact height first: kill when it is high and close, play tight and straight when it is neutral, and use safe replies when it is low.
Default
Play straight and tight: most net shots should go straight because it keeps you better positioned to cover the reply and helps force a weak lift you can attack.
High
Kill or tap: when the shuttle is high near the tape, commit early, keep the shot steep, and finish before your opponent can recover.
Low
Wait one more shot: if the kill would be flat or the shuttle is below the tape, use a tight spin net, straight net, push, or emergency cross instead of feeding an easy counter-kill.
Most net mistakes do not happen because you lack a favourite shot. They happen because you choose that shot at the wrong height. A shuttle taken above the tape can be killed, tapped, or hooked; a shuttle taken low below the tape usually needs a safer spin net, straight net, push, or lift. Good badminton net play strategy starts with reading the contact point before your racket moves.
That matters whether you are playing singles at a Canadian drop-in, front-court doubles at club night, or trying to stop giving away easy net kills in league play. The net kill is the primary finishing shot at the net, but a tight spinning net shot can be just as decisive when the kill would be too flat. The goal is simple: force a weak lift you can attack, without feeding your opponent an easy counter-kill.
Build touch with gear that suits your hand. Browse badminton rackets for Canadian players, with prices listed in CAD and free Canadian shipping on orders over $200.
In This Guide
- Why Net Shot Selection Matters More Than One Favourite Shot
- Read the Forecourt in Zones: High, Neutral, and Low
- Attack Zone: When to Kill, Tap, or Hook
- Safe Zone: When to Spin, Play Straight, or Push
- The “Wait One More Shot” Rule
- Positioning That Unlocks Better Net Choices
- Gear Note: Rackets That Support Touch at the Net
- Which Net Shot Should You Choose?
Why Net Shot Selection Matters More Than One Favourite Shot
Good badminton net play strategy is not about having one beautiful favourite shot. It is about reading the shuttle at the moment you contact it: is it above the tape, level with the tape, or already dropping below it? Is it tight to the net, or has it travelled a little deeper into the forecourt?
That reading matters because the same stroke idea can be brilliant from one contact point and risky from another. When the shuttle is high and close to the tape, aggressive replies become available because you can play downwards. When the shuttle is low and below the tape, forcing an attack usually means forcing the shuttle upward first — and that can either hit the net or sit up for your opponent to kill.
The net-play goal is simple: make the opponent lift weakly so you or your partner can attack next, while avoiding two expensive mistakes — dumping the shuttle into the net or feeding an easy kill.
A net kill is the obvious example. It is one of the most decisive finishing shots at the net, but it only works when the opportunity is recognized early and the contact lets you keep the shuttle steep. If the shuttle is too low or your kill becomes flat, the shot stops being a clean finisher and starts giving the opponent a chance to react.
The opposite mistake is being too passive when the shuttle is there to be finished. If you always play a soft net shot because it feels safe, you let the opponent survive rallies that should have ended. Smart net selection is the balance: attack when the contact height gives you a real downward option, and play safe when the tape position tells you the attack is not there yet.
This is also why tactics and technique need to be separated. The stroke mechanics of spinning, tumbling, and controlling the shuttle are covered in our badminton net shot technique guide. This guide is about the decision before the stroke: choosing whether to kill, tap, hook, spin, push, or wait for the next ball.
For Canadian club players, that decision often makes the difference in fast doubles exchanges and patient singles rallies alike. The player who chooses from the shuttle’s height and position will usually create more weak lifts than the player who chooses from habit.
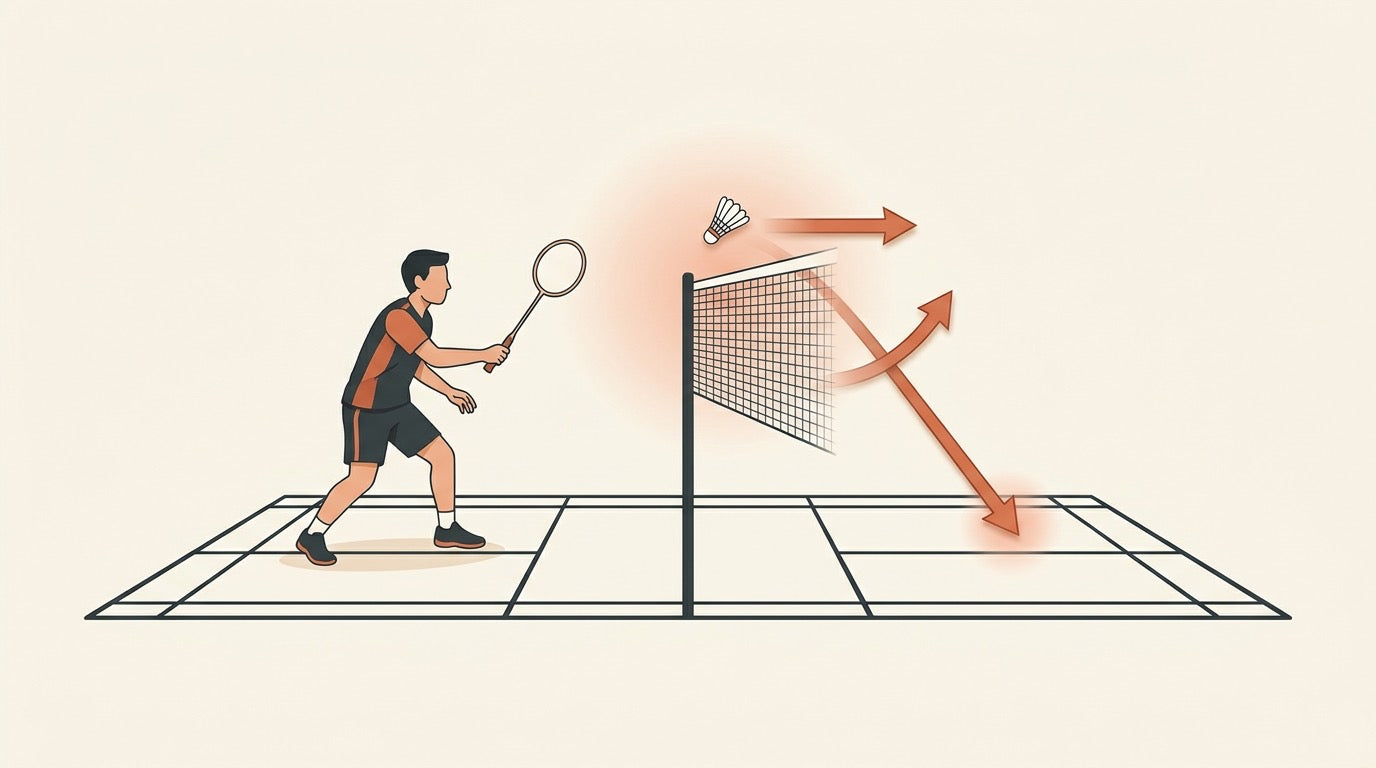
Read the Forecourt in Zones: High, Neutral, and Low

Good badminton net play strategy starts before you choose the shot. First, read where the shuttle is in relation to the tape. Is it above the net, level with the tape, or already dropping below it? That single read tells you whether you can attack, hold, or simply survive the exchange.
Think of the forecourt as three practical zones: high, neutral, and low. You are not measuring distance with your eyes; you are judging whether your racket can contact the shuttle early enough to send it downwards, softly over the tape, or safely away from danger.
| Forecourt zone | What you see | Best shot family | Main risk |
|---|---|---|---|
| High | Shuttle is close to the tape and can be contacted early. | Kill, tap, sharp hook, or downward push. | If the kill becomes too flat, the opponent may block or flick it over you. |
| Neutral | Shuttle is around tape height, but not clearly killable. | Straight net, controlled spin, push, or hold-and-place. | Trying to force a winner can feed the opponent an easy net kill. |
| Low | Shuttle is below the tape or falling away from the net. | Safe straight net, soft spin if close enough, push, lift, or emergency cross net. | The shuttle must travel upwards, so a loose reply can be killed. |
High zone: attack only if the shuttle can go down
When the shuttle is high and close to the tape, you have the most aggressive options. A net kill is the obvious finisher, but the key is not just height; it is whether you can keep the shot steep. If your contact is late and the shuttle has to travel flat, the winner becomes much less safe.
This is also where a sharp hook or tap can be useful. If the opponent is leaning one way, you do not always need maximum power. A short, controlled finish into open space or towards the body can be better than a flat swing that gives them a reaction chance.
Simple read: if your racket can meet the shuttle above tape height and send it down, think attack. If it cannot travel down, downgrade the choice before you donate a counterattack.
Neutral zone: make them lift, do not rush the winner
Neutral net balls are the ones that tempt club players into mistakes. The shuttle looks close enough to attack, but the angle is not quite there. In this zone, your goal is usually to force a lift rather than finish immediately.
A straight net shot is the safest default because it keeps your recovery simple and lets you cover the most likely replies. A controlled spin net can be strong when you are close enough to the net, but the touch must stay soft. Too much slicing adds power, and that extra power can make the shuttle sit too high.
This is where technique and tactics meet. For the stroke mechanics behind the tumble, see our badminton net shot technique guide. For this strategy section, the important decision is whether the shuttle is close enough to spin without lifting it into your opponent’s hitting zone.
Low zone: accept the safe shot early
When the shuttle has dropped below the tape, the rally has changed. You can still play a good shot, but you are no longer choosing from the same attacking menu. The shuttle must rise before it can cross the net, so your priority is to avoid giving the opponent a comfortable kill.
If you are close to the net, a soft spinning reply can still work. But spin has a limit: it only works properly from near the net. If the opponent’s block or push carries longer into the forecourt, a tight spinning net shot becomes much harder because you are contacting from farther away. In that case, a straighter net, a push into space, or a lift may be the smarter choice.
There is also an emergency situation: if you are forced to take a very good tumbling net shot extremely low, a normal lift may land short enough to be smashed. That is when an emergency cross net can become a gamble worth considering, but it should feel like a rescue option, not a default pattern. If you want to build that specific skill, our cross-court net shot guide explains the hook idea in more detail.
The distance rule: close blocks allow spin, longer pushes demand simpler choices
A common mistake is treating every net reply as if it can be tumbled tightly. It cannot. When your opponent plays a soft block that lands near the net, you can arrive close enough to use spin. When they play a longer block or push, you are farther from the tape, so the same spinning attempt becomes less tight and more vulnerable.
Use this quick checklist during rallies:
- Close and high: kill, tap, or hook if you can keep the shuttle travelling down.
- Close and neutral: straight net or soft spin to make the opponent lift.
- Close but low: soft net if possible, otherwise push or lift safely.
- Longer and high: consider a downward drive or push instead of forcing a tight net shot.
- Longer and low: simplify. Straight net, push, or lift; do not chase perfect spin from the wrong distance.
This is why footwork matters so much to net play. The earlier you arrive, the higher and closer your contact becomes. If you are often reaching the shuttle late, work on the first step and lunge patterns in our badminton footwork basics guide; better movement gives you better shot choices before your racket even touches the shuttle.
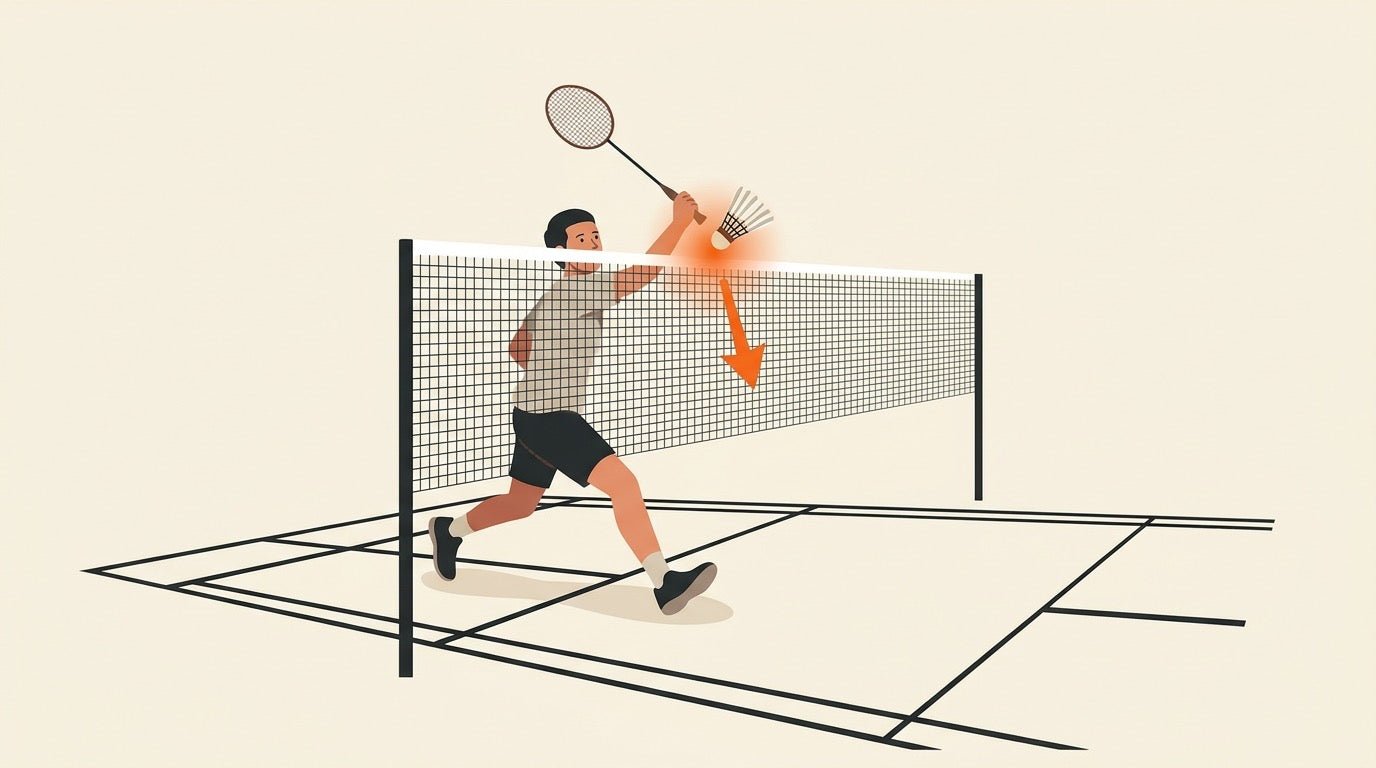
Attack Zone: When to Kill, Tap, or Hook
The attack zone is the fun part of badminton net play strategy: the shuttle is early, high, and close enough to the tape that you can threaten a direct winner. In this zone, your mindset changes from “keep the rally safe” to “finish it or force the weakest possible reply.”
A net kill is the main finishing shot at the net. When the chance is there, you need to recognize it early and commit fully forward. If you hesitate because you are worried about recovery, the shuttle drops lower, the angle disappears, and what should have been a winner turns into a risky flat hit.
Attack-zone rule: if you can take the shuttle above tape height and play it steeply down, kill it. If the contact is only slightly above the tape and the kill would travel flat, choose placement, a controlled tap, or a sharp hook instead.
Choose the Net Kill When the Angle Is Steep
The clean net kill happens when your racket is already up, your body is moving forward, and the shuttle is still high enough to send sharply downward. That steep angle matters. A steep kill is very hard to return; a flat kill gives your opponent a chance to react, block, or flick the shuttle over you.
- Go for the kill when the shuttle is high enough to hit down, close enough to the net that you do not need a long swing, and early enough that your opponent is still under pressure.
- Keep the racket preparation compact. The goal is not a big smash motion; it is fast contact in front of you before the shuttle falls.
- Commit forward. Net kills require total commitment to the forecourt position. Half-committing often means arriving late and hitting flat.
Choose the Tap When the Kill Is There, but Not Clean
A tap is the smarter aggressive choice when the shuttle is still attackable but the full kill would be too flat. You are still playing down and still taking the shuttle early, but you are reducing the risk of driving the shuttle straight into the tape or giving your opponent a comfortable reaction shot.
This is especially useful when the shuttle is just above net height. If you cannot make the shot steep, placement becomes more important than power. Aim directly at the opponent’s body or into open space rather than hitting near the racket, where a quick block can come back.
Choose the Sharp Hook When the Straight Kill Is Covered
The sharp hook is the aggressive angle option. It belongs in the same attack-zone family as the kill: you want early contact, high contact, and enough control to make the shuttle travel away from the opponent’s ready racket. Use it when the straight option is being watched and the angle can create a decisive opening.
Do not turn every forecourt chance into a cross-court attempt. Cross-court net choices are riskier because they open your court to a straight reply, and they do not give you the same safe coverage as a straight net shot. If you want the hook-specific mechanics and decision points, read our full badminton cross-court net hook guide.
| Attack choice | Use it when... | Main risk |
|---|---|---|
| Net kill | The shuttle is high, close to the tape, and you can hit steeply down. | If it becomes flat, the opponent may return it or flick it over you. |
| Tap | The shuttle is attackable, but the full kill angle is not steep enough. | Too much force can turn it into a flat shot that sits up for a reaction block. |
| Sharp hook | You take the shuttle early and high, and the straight lane is covered. | The cross angle opens court space if the opponent reads it. |
| Tight spin net | The kill would be too flat, but you are close enough to the net to play a tight spinning shot. | Too much slice adds power and can send the shuttle too high. |
The key is not aggression for its own sake. The best forecourt attackers are selective: they kill when the shuttle is high enough, tap or place when the kill is slightly flat, and use the hook only when the angle is worth the risk. That discipline is what turns net pressure into points at club nights, leagues, and tournament matches across Canada.
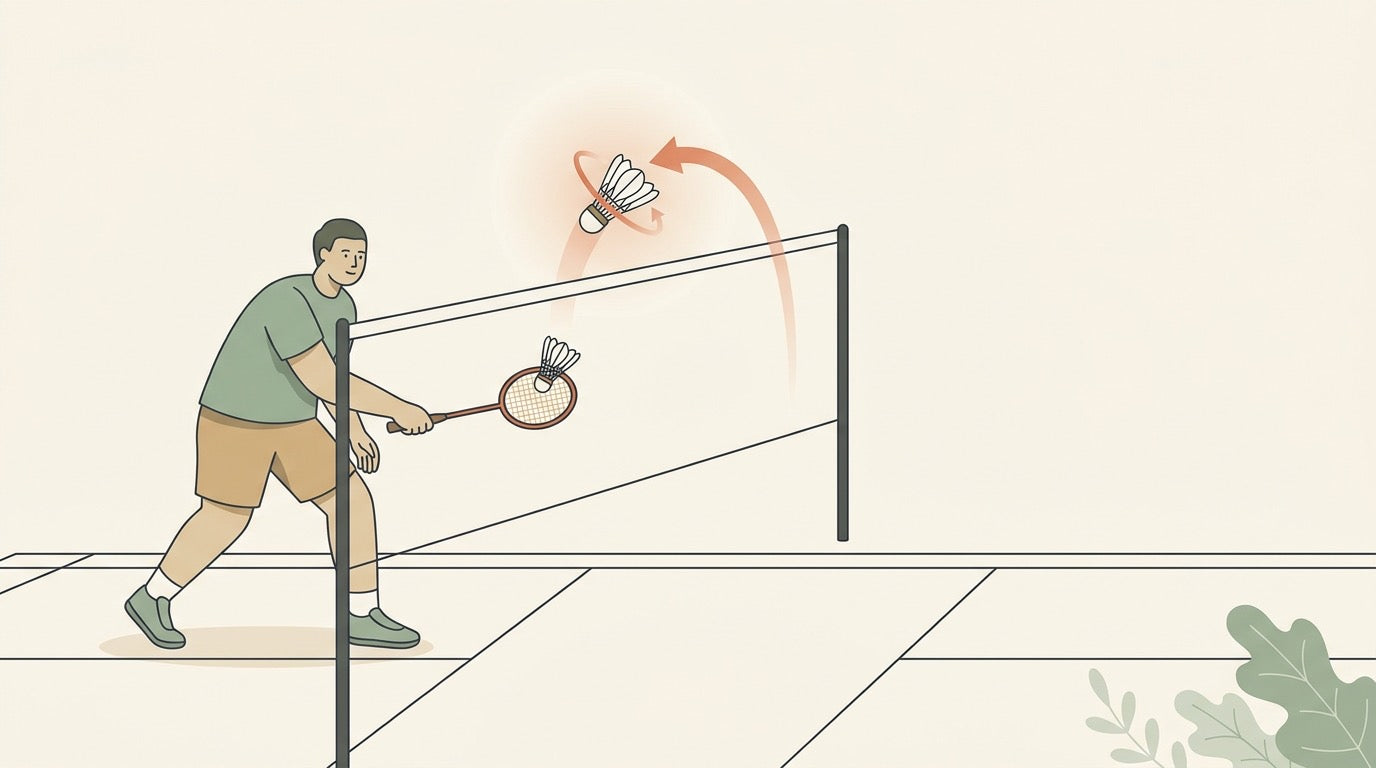
Safe Zone: When to Spin, Play Straight, or Push
The safe zone is the forecourt situation where the shuttle is no longer high enough to attack cleanly: you are contacting it lower, near tape height, or below the tape. This is where many Canadian club players lose points by trying to force a kill that is not really available. The better badminton net play strategy is to keep the rally under control, make the shuttle fall tight, and force the weak lift you can attack on the next shot.
In this zone, your main choices are a tight spinning net shot, a straight net shot, or a push. None of these are passive when used well. A very tight spinning net shot can be as decisive as a net kill, especially when your opponent is not already close to the tape. The difference is that you are winning by making the shuttle unplayable or forcing the lift, not by hitting down immediately.
Safe-zone rule of thumb
If the shuttle is below tape height, stop thinking “finish” and start thinking “make the next shot easy to finish.”
Choose the spinning net shot when you are close enough to keep it tight
Spin is strongest when you can play the shuttle from near the net. From that distance, a subtle slicing action can make the shuttle tumble, making it harder for your opponent to lift cleanly or play back tight. The key word is subtle: too much slicing adds power, and that extra power can send the shuttle too high.
Use the spinning net shot when:
- You are close to the net and can contact the shuttle with a controlled, soft touch.
- Your opponent is not already waiting at the tape.
- You can make the shuttle pass the tape and fall tight instead of floating upward.
A good spin net does not need to be dramatic. If the shuttle tumbles tightly enough, your opponent may be forced to lift, which gives you or your partner the attacking shot you wanted in the first place. For the hand-action details, see our badminton net shot technique guide.
Choose the straight net shot as your safer default
Most of the time, the safer default is the straight net shot. Playing straight keeps your court coverage more stable because you are better positioned for the most likely replies. Cross-court net shots open more space and are harder to cover if your opponent replies straight.
Straight does not mean predictable if your quality is good. A straight net shot that lands tight to the tape still asks a difficult question: can your opponent lift without giving you an attack, or play back tight without feeding your net kill?
| Safe-zone choice | Use it when | Main risk |
|---|---|---|
| Spinning net | You are close enough to the net to make the shuttle tumble and fall tight. | Over-slicing adds power and sends the shuttle too high. |
| Straight net | You want the safest court coverage and a tight reply that pressures the lift. | If it sits up, your opponent can step in and attack. |
| Push | The shuttle is too low or too far from the tape to spin tightly, but you can guide it past the front player or into open space. | If the push is loose, it can become an easy interception. |
Choose the push when tight is no longer realistic
A push is the honest option when the shuttle is too low, too far from the tape, or arriving too awkwardly for a high-quality net shot. Instead of forcing a spin net that floats, use a controlled push to move the shuttle into space and stop your opponent from camping on the tape.
In doubles, this is especially useful when the front player is waiting for your soft net reply. A push can change the rhythm without giving away the attack, provided you keep it controlled. In singles, it can buy time and move your opponent off the forecourt before the next exchange.
The common mistake: slicing harder to make it “spinnier”
More slice does not automatically mean more quality. A subtle slicing motion can create spin or a tumbling effect, but too much slicing turns into extra power. That is when the shuttle climbs, sits above the tape, and gives your opponent the exact kill you were trying to avoid.
Think of the safe-zone touch as a controlled guide, not a hit. If you need to add height so the shuttle clears the tape and falls back tighter, add only enough height to do that. Too much height gives your opponent time to move forward and kill it.
Practice cue: play three straight tight nets before trying one spinning net. If the straight version is not staying below the opponent’s hitting zone, adding slice will usually make the mistake bigger.
For this section of your net game, judge success by the next shot you create. If your safe-zone reply forces a lift, prevents a net kill, or moves your opponent out of position, it has done its job. You can browse badminton rackets in Canada if you are comparing frames for touch and feel, but the decision still starts with contact height, court position, and shot quality.
The “Wait One More Shot” Rule
The “wait one more shot” rule is tactical patience at the tape: if your net kill would travel too flat, do not force it. Play the tightest spinning net shot you can, move in behind it, and make the opponent deal with the next shuttle under pressure.
Rule in one sentence. If the first kill is not steep, use a tight net shot to keep the attack alive, then close the net and threaten the real kill on the next reply.
This matters most in doubles, where a good net shot is not just a “safe” shot. It maintains the attack by forcing a lift, which lets your partner continue the smash pressure. If the opponents try to answer with another net shot instead, your job is to already be moving in, racket up, ready to kill the next shuttle.
The mistake is admiring the spin. Many players play a nice tight net shot, then pause in the forecourt to see whether it worked. By the time the opponent dabs the shuttle back, they are late, reaching, and forced into another soft net shot or lift. The right habit is: play the net shot, recover forward, and make the opponent feel that any loose reply will be finished.
What “move in” actually means
After the tight net shot, your movement should be small but assertive. Do not crash into the tape or stand so close that you cannot adjust. Step in enough that your racket is threatening the tape, your elbow stays lifted, and your racket face can meet a reply early. The aim is to cover the net reply first, while still being balanced enough not to foul the net or overrun the shuttle.
- Racket up immediately: do not drop the racket after playing the spin. The next shot may be the actual winning chance.
- Body slightly behind the shuttle: if you crowd the net, you lose the ability to adjust when the reply tumbles or sits up awkwardly.
- Eyes on the tape: read whether the opponent is lifting, netting again, or trying to push past you.
- Partner awareness: in doubles, your pressure at the net invites the lift; your partner must be ready to continue the attack from the rear court.
For the stroke mechanics behind the tight spinning shot, see our badminton net shot technique guide. For the movement side, the same first-step discipline from badminton footwork basics is what lets you take the next reply early instead of lunging late.
Club-night drill: net shot, close, kill
Try this at a Canadian club night when you have a spare court or a cooperative warm-up partner. It turns the “wait one more shot” idea into an automatic habit.
- Feeder starts with a soft block or net feed. The hitter plays a tight straight net shot, not a kill.
- Hitter moves in immediately. Racket stays high, body balanced, and the racket leg leads the forward pressure.
- Feeder chooses one of two replies. Either lift, so the rear-court player or hitter can attack, or play a soft net reply so the hitter can finish with a steep kill.
- Reset after three shuttles. Rotate roles so both players practise the touch shot and the forward follow-up.
Keep the drill honest: if the first net shot is loose and high, the feeder should kill it. That feedback teaches the difference between patient pressure and simply giving away the attack. A tight net shot can be decisive, but only if it drops close enough to force a lift or a weak net reply.
You can also connect this with drop-shot patterns. A slow drop or soft block often creates the first forecourt exchange; the “wait one more shot” habit tells you what to do when the shuttle is tempting but not quite killable. For setup ideas, read our badminton drop shot technique guide.
Gear note for touch practice
Net patience is a skill first, but racket feel matters when you are trying to hold the shuttle tight without adding extra power. Browse our badminton racket collection for current CAD pricing and availability. Badminton House offers free Canadian shipping on orders over $200.
Positioning That Unlocks Better Net Choices

Good badminton net play strategy starts before your racket touches the shuttle. If you arrive early, you can meet the shuttle higher and closer to the tape, which opens up the kill, tap, or hook. If you arrive late, the same shuttle drops below tape height and your best choice often becomes a safer spin net, straight net, push, or lift.
The trap is thinking “closer to the net” always means “better net play.” It does not. Standing too close can make it harder to adjust your feet, and it can stop you from contacting the shuttle high enough to play downwards. The better habit is to start balanced, move in explosively, and arrive with your racket already prepared.
Position first, shot second. Use your first step and recovery habits to create a high contact point, then choose the net option. For the movement base behind this, see our badminton footwork basics guide.
The ready position that gives you options
When you expect a net reply, keep the elbow lifted and the racket head ready in front of you. From there, move forward explosively with your racket leg leading. That body shape helps you take the shuttle early instead of reaching late from a stretched position.
- Racket up: a prepared racket shortens the swing, which matters when the shuttle is tight to the tape.
- Elbow ready: a high, active elbow makes it easier to control a small tap, kill, or soft spin instead of poking at the shuttle.
- Racket leg forward: leading with the racket leg helps you close space quickly and stabilize for a controlled contact.
- Not glued to the tape: leaving a little working space lets you adjust if the shuttle is wider, flatter, or slightly deeper than expected.
How your position changes the shot menu
| Your arrival | Likely contact point | Better net choice |
|---|---|---|
| Early and balanced | High, close to the tape | Kill, tap, or sharp hook if the shuttle can be played downwards. |
| Early but too close | Cramped or jammed | Small tap only if clean; otherwise reset with a tight straight net or controlled push. |
| Late but still near the net | Neutral to slightly low | Spin net or straight net to force a lift instead of forcing a flat kill. |
| Late and stretched | Low, below tape height | Safe straight net, push, lift, or emergency cross net if the angle leaves no better option. |
Use your drop shot to create the net exchange
Many strong net chances are created by the shot before the net shot. A well-placed drop can pull your opponent forward, produce a block or soft reply, and give you time to move in behind it. That is why drop-shot quality and net positioning are linked: the drop sets the exchange, then your footwork decides whether you can take the next shuttle high enough to attack.
If your drops sit too high or land too deep, your opponent has more time to come forward and may take the shuttle early against you. If your drop forces a softer reply, you are more likely to arrive in the forecourt with the shuttle still above or near tape height. For the stroke side of that setup, read our badminton drop shot technique guide.
A simple positioning cue for rallies
After you play a net shot, do not admire it. Move in enough to threaten the next net reply, but keep enough space to adjust. Your goal is to make your opponent feel that another net shot will be killed, while still being ready if they push, lift, or play wider than expected.
Practical cue
Arrive with the racket leg leading, racket head up, and enough distance from the tape that you can still make one small adjustment. If you feel jammed, you are probably too close. If you are reaching below the tape, you probably arrived too late or started too far back.
Gear can help with touch, but it cannot replace positioning. If you are comparing rackets for better feel around the forecourt, browse the badminton racket collection; prices are listed in CAD, and Badminton House offers free Canadian shipping on orders over $200.
Gear Note: Rackets That Support Touch at the Net
A racket will not choose the right net shot for you, but the right feel can make your choices easier to execute. Net play depends on taking the shuttle early, controlling the face angle, and keeping touch soft enough that a spin net or tight straight net does not sit up for a kill.
For forecourt-focused players, prioritize a racket setup that feels predictable in the fingers and stable on short, compact movements. If the head feels too slow for your timing, you may arrive late and lose the high-contact options this guide is built around. If the stringbed feels too lively for your touch, your safe net shots can drift too high.
- For touch: choose a frame and string setup that lets you feel the shuttle on soft net shots rather than only rewarding big rear-court swings.
- For interceptions: make sure the racket feels quick enough to take the shuttle early when a kill, tap, or hook is available.
- For consistency: avoid changing racket feel too often if you are building confidence with spin nets, straight nets, and pushes.
Canadian gear note: Badminton House is a Canadian online badminton store with CAD pricing, fast shipping across Canada, and free Canadian shipping on orders over $200. Browse the current badminton racket collection for available racket options; the listed Yonex Astrox models may be sold out, so use the collection page for the latest status rather than relying on a specific model recommendation here.
Which Net Shot Should You Choose?
Use this as a quick recap during practice: read the shuttle height first, then decide whether you are finishing, forcing the lift, or escaping pressure.
| If you see this cue | Choose this | Do not choose this |
|---|---|---|
| The shuttle is high, close to the tape, and you can move forward explosively. | Net kill or tap. Take it early, commit forward, and keep the shot steep. | A hesitant kill, or a flat kill near the opponent where they can react. |
| The kill is available, but only as a flat downward drive. | Tight spinning net. Wait one more shot so the next reply can be killed properly. | Forcing a flat kill that can be flicked over your head. |
| The shuttle is close to the net, but below ideal killing height. | Spin or straight net. Use subtle slicing, then move in to cover the net reply. | Too much slicing power that sends the shuttle high enough to be killed. |
| The shuttle is deeper in court but still high enough to play downwards. | Downwards drive or push. Attack the space instead of trying to manufacture a tight net shot from too far back. | A spin net attempt from too far away, where spin is much harder to control. |
| You are neutral at the forecourt and your opponent is not already on top of the net. | Straight net as the default. It keeps you better positioned to cover the reply angles. | A casual cross-court net shot, because it opens your court to the straight reply. |
| You are forced to take a very good tumbling net shot extremely low. | Emergency cross net. It is a gamble, but it may be better than feeding a half-court lift. | A weak lift that lands short enough for the opponent to smash. |
For the technique side of the spin option, see our badminton net shot technique guide. If you are missing the shuttle too low, the fix is usually movement before touch, so pair this with badminton footwork basics.
Gear note for Canadian players. Touch at the net starts with timing and racket preparation, but your frame still matters. Browse our badminton rackets collection for current options and restocks; the listed Yonex Astrox 100 ZZ Kurenai, Dark Navy is $299.99 CAD and the Yonex Astrox 100VA Game Grayish Beige is $349.99 CAD, with both currently marked sold out. Badminton House offers free Canadian shipping on orders over $200 when you are ready to build out your kit.
Get Canadian badminton gear advice + restock alerts
Join the Badminton House list for buying checklists, restock alerts, and practical gear advice for Canadian players.
By subscribing, you agree to receive Badminton House emails and can unsubscribe anytime.
Net play gets clearer when you stop asking, “What is my best net shot?” and start asking, “How high is the shuttle, how close am I, and what reply do I want next?” We play badminton ourselves, so if you are choosing a racket, string setup, or grip feel to support better touch in the forecourt, contact Badminton House and we will help you narrow it down for your game.
10% off first order · Free Canadian shipping on $200+ · 14-day returns · Canadian badminton specialty shop
Leave a comment
This site is protected by hCaptcha and the hCaptcha Privacy Policy and Terms of Service apply.