Last updated: June 2026 · Written by the team at Badminton House
Quick Answer: Badminton Net Kill Technique
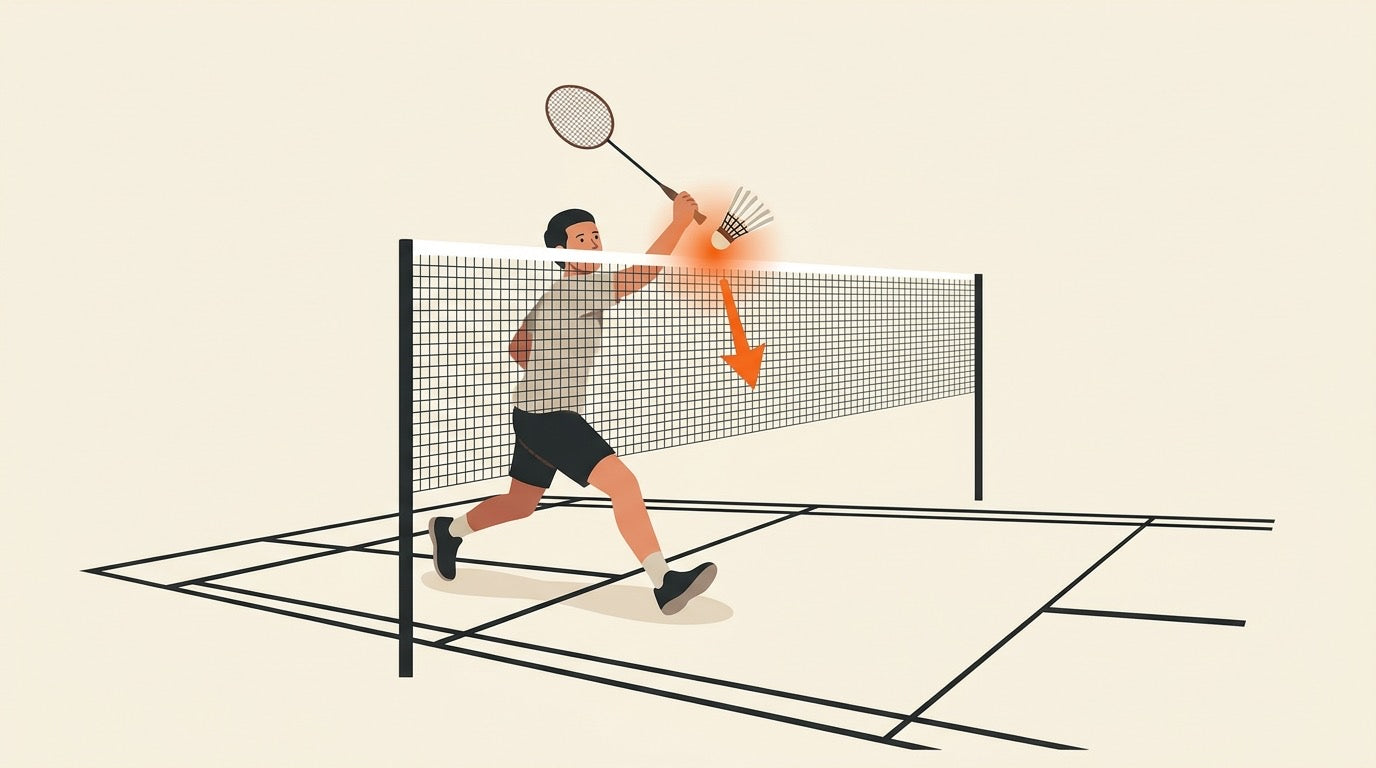
Use the net kill when the shuttle floats too high near the tape: rush in, keep the racket up, contact early at the highest point, and finish with a short downward finger squeeze—not a full smash swing.
Default
Rush loose net shots: when the opponent’s net return sits up, lead with the racket leg, keep the elbow high, take the shuttle early, and tap it steeply down with finger power.
Tight tape
If the shuttle is very close to the net, use a shorter, softer brushing kill so you can finish the rally without driving your racket into the tape.
Too late
If you cannot contact the shuttle early on your side, do not force the kill: touching the net or contacting the shuttle with your body or clothing loses the rally.
You get the loose net shot you wanted — the shuttle floats above the tape, your opponent is stuck low, and the point should be over. Then you take a big swing, contact drops below net height, or your racket catches the tape. That is the moment the badminton net kill technique matters: not more power, but faster preparation, earlier contact, and a compact downward finish.
A good net kill, sometimes called a rush, is built for split-second chances at the front court. The shuttle is taken high, close to the net, with a short downward action driven mainly by finger squeeze and quick forearm control — not a full smash swing. Your racket has to be up before the chance appears, your lunge has to stop you in balance, and your recovery has to be immediate in case the shuttle comes back.
This guide breaks the shot down for Canadian club players: when to rush, why it is different from a smash, how to set your grip for forehand and backhand kills, what footwork keeps you from crashing into the net, and how to choose between an easy kill and a tighter brush-style finish.
Training the front court? If your racket feels slow when you try to take shuttles early, compare current badminton racket options before your next club session. Badminton House lists prices in CAD and offers free shipping within Canada on orders over $200.
In This Guide
- What the Net Kill Is—and When to Use It
- Why a Net Kill Is Not a Smash
- Racket Up, Elbow High, Contact Early
- Grip and Finger Power for Forehand and Backhand Kills
- Rush Footwork: Lunge In, Stay Balanced, Recover Fast
- Easy Kill vs Tight Kill: Choosing the Right Finish
- A Simple Drill—and Gear That Supports Net-Kill Reps
- Which Net-Kill Finish Should You Choose?
What the Net Kill Is—and When to Use It
The badminton net kill technique is the attacking finish at the front of the court: a sharp, short, downward shot played from a high contact point directly in front of the net. Players often call it a “rush” because you are not waiting for the shuttle to drop—you are moving in early, keeping the racket up, and cutting the shuttle down before your opponent has time to reset.
Use it when your opponent’s net return floats or tumbles too high over the tape. That is the invitation. If the shuttle is sitting above net height, you can take it early and angle the racket face steeply downward into open court. The steep angle and quick execution are what make a good net kill so difficult to defend.
Simple cue: if the shuttle is high enough to hit down, kill it. If it is tight to the tape or dropping below net height, stay patient and build from your net shot technique instead.
That last point matters. A net kill is not just “any shot near the net.” It is a finish for a loose net reply. If you try to force the kill when the shuttle is too low, you are more likely to hit the net, lift the shuttle, or lose balance at the front court. Good net players in Canadian club-night games do not rush every net exchange—they recognize which replies are actually loose enough to punish.
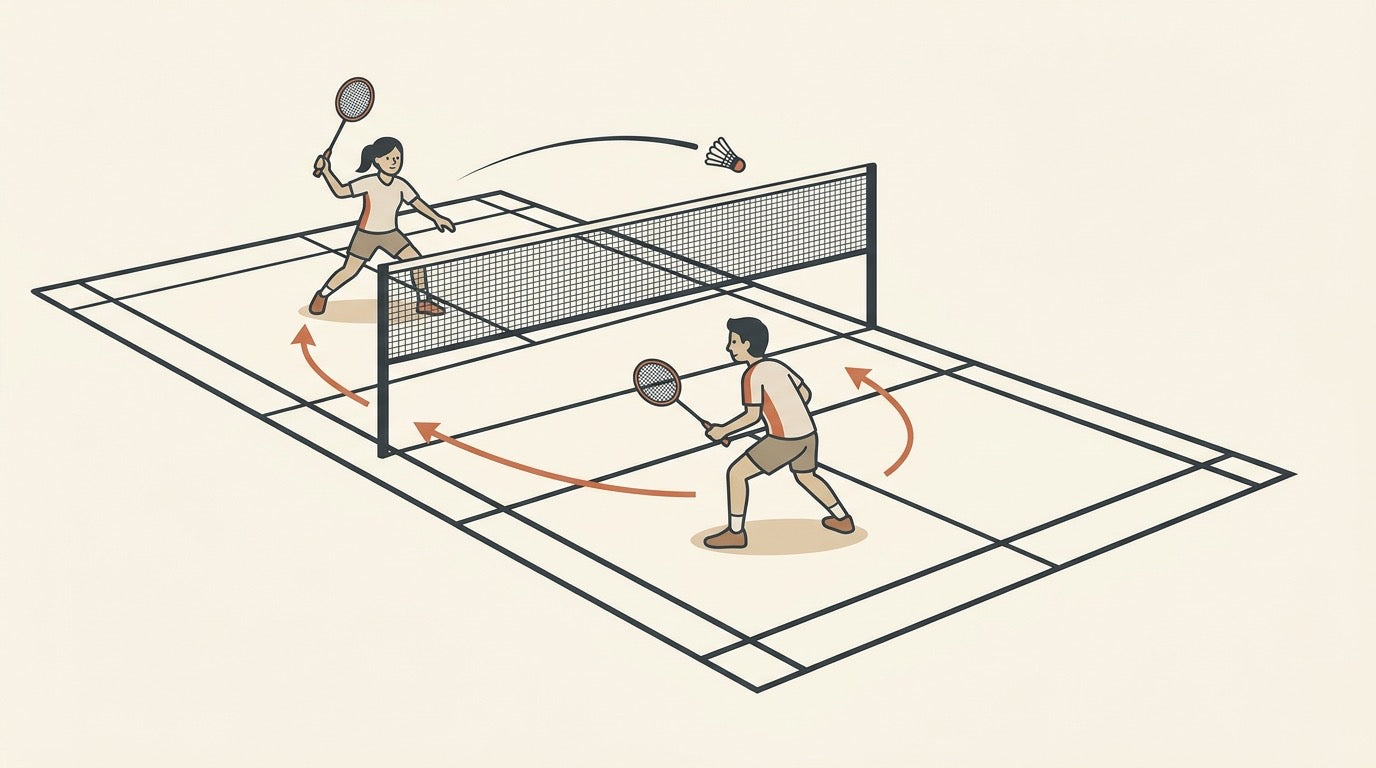
Think of the net kill as the final step in a net-play chain:
- You play or pressure a tight net shot. The opponent has to lift, tumble back, or push a risky reply.
- Their reply sits up. The shuttle floats or tumbles high across the net.
- You take it early. Racket up, contact high, short downward action.
- You recover immediately. Even a good kill can come back, especially in doubles.
So the goal is not to swing hard. The goal is to arrive early enough that the shuttle is still high, then finish it with a compact downward action before the defender can react.
Why a Net Kill Is Not a Smash

The biggest mistake in the badminton net kill technique is treating it like a mini-smash. A smash needs more preparation and preloading; a net kill does not. Near the tape, that extra preparation makes you late.
A net kill is a sharp, short, downward action played from a high contact point directly in front of the net. You are not trying to wind up, rotate fully, and blast through the shuttle. You are trying to arrive early, keep the racket up, and put the shuttle down before your opponent can recover.
Simple cue: take the shuttle early and hit it downward with a short follow-through. If your swing feels big, it is probably too slow for the net.
| Shot | Preparation | Swing feeling | Best use |
|---|---|---|---|
| Net kill | Very little preparation; racket already up | Short downward action with a compact follow-through | A weak or floating net return that can be contacted high |
| Smash | Longer preparation and preloading | Fuller overhead hitting action | An attacking shot from farther back in the court |
Do not use a full swing or a big wrist rotation on a net kill. At net distance, that movement takes too long and can also make the racket travel too far after contact. The cleaner version is compact: racket face above the shuttle, fingers engaged, shuttle struck down, racket stopped quickly.
This is why the shot often feels more like a quick tap or stab than a power shot. The steep angle does the work. When you contact the shuttle high and close to the net, you do not need smash-level force to make the reply difficult.
If you are comparing this with your full overhead attack, keep the two skills separate in practice. Build your smash mechanics away from the net, then train the net kill as its own compact finishing skill. For the overhead version, see our badminton smash technique guide.
Racket Up, Elbow High, Contact Early
A strong net kill starts before the shuttle crosses the tape. If you wait until the shuttle is already falling, the chance is usually gone. Your ready position should put you on the balls of your feet, knees bent, with the racket held up in front of your body so the head is already close to the contact point.
Keep the elbow high and slightly away from your body. This matters because a low elbow forces you to lift the whole arm before you can strike, which adds time and makes the kill feel rushed. With the elbow already up, the movement can stay short: see the loose net reply, move in, and punch the shuttle down early.
Racket-up checklist
- Weight forward: stay on the balls of your feet so you can rush the net without a flat-footed first step.
- Knees bent: keep your base springy rather than tall and stiff.
- Racket in front: hold the racket up where the shuttle is likely to appear, not down by your hip.
- Elbow high: set the arm early so the final action can be compact.
- Contact early: take the shuttle at the highest point possible and send it down before it drops into a harder, flatter contact.
Think of the net kill as a race to the highest contact point. The shuttle that floats above the tape is easiest to finish while it is still high; once it drops closer to net height, you may need a softer tight kill or a brushing action instead of a direct downward tap.
A useful cue is: racket first, body second. As you read the weak net return, the racket should already be rising while your feet rush forward. If your feet arrive first but your racket is still low, you will often end up scooping, pushing flat, or hitting late.
For the broader stance habits behind this, see our badminton ready position guide. The same athletic base helps here, but at the net the racket must be even more active: up early, elbow high, and prepared to strike the shuttle down immediately.
Grip and Finger Power for Forehand and Backhand Kills

For the badminton net kill technique, the hand should do most of the work. Whether you finish on the forehand or backhand side, the power mainly comes from a quick finger squeeze or thumb push, not a big arm swing or shoulder drive.
Keep the grip relaxed while you rush in, then tighten only at contact. A tight grip too early makes grip changes slower and limits both control and power. If your racket feels stuck in one position, revisit the fundamentals in our badminton grip guide before adding speed.
Forehand net kill: squeeze, snap, stop
On the forehand side, start with a forehand grip or a panhandle grip. The panhandle grip is useful close to the net for quick taps, interceptions, and net kills, but it is not the right grip for clears or smashes because it limits wrist flexibility and power.
- Before contact: hold the racket lightly so the face can adjust quickly to the shuttle.
- At contact: squeeze the fingers sharply and snap the racket head down through the shuttle.
- After contact: allow only a short follow-through so the racket stays ready for the next shot.
Think of it as a compact tap down, not a mini-smash. A full swing or wrist rotation takes too long around the tape. For bigger rear-court power strokes, the forearm has a much larger role; that difference is covered in our guide to badminton forearm pronation and power.
Backhand net kill: thumb behind the handle
On the backhand side, rotate into a backhand grip so your thumb sits along the flat back bevel of the handle. That thumb position gives you leverage to push the racket head down through the shuttle with a short, sharp action.
- Set the thumb: place it behind the handle, not wrapped loosely around the side.
- Stay relaxed: keep the fingers soft until the shuttle reaches the strings.
- Push at contact: use thumb power to whip the racket face downward.
Quick grip check
| Situation | Grip cue | Power source |
|---|---|---|
| Forehand kill | Forehand or panhandle grip near the net | Finger squeeze and short downward snap |
| Backhand kill | Thumb on the flat back bevel | Thumb push with a compact whip |
| Late grip change | Loosen the fingers earlier in the rally | Relax, then tighten only at contact |
Coach yourself with one cue: loose grip in, sharp squeeze at contact, short finish. If the racket travels far past the shuttle, you are probably using too much arm.
Rush Footwork: Lunge In, Stay Balanced, Recover Fast

The hand gets the glory on a net kill, but the feet decide whether you arrive early enough to play it. When the shuttle floats above tape height, your first job is to rush forward without letting your body crash into the shuttle. Move explosively with your racket leg leading, keep the racket up, and arrive with enough space that your elbow can stay out from your body.
A good net-kill lunge should feel decisive, not desperate. From a ready position, push off the back leg, stretch the racket foot forward, and land heel first before rolling onto the toes. Bend the front knee, keep your shoulders balanced over your hips, and let your non-racket arm extend slightly for counterbalance. That non-racket arm matters: a fast dash forward can pull your upper body past the shuttle, making you late to recover or more likely to touch the net.
Net-kill footwork checklist
- Start light: keep your knees bent, weight on the balls of your feet, and racket held up in front of the body.
- Lead with the racket leg: use a sharp step or lunge so your hitting side arrives close enough to strike early.
- Do not crowd the shuttle: leave room for a workable elbow bend; if you get too close, the racket face gets jammed and the kill becomes flat or messy.
- Balance the upper body: keep the shoulders stable and use the non-racket arm so the lunge does not throw you into the tape.
- Recover immediately: push back out of the lunge and split step so you can cover another net shot or turn for a lift.
For most loose net shots, an explosive step or lunge is more useful than a jump because it gives you better body control and makes recovery easier. A jump can be used when the shuttle is very tight and you want to commit fully, but the timing is harder: you need to strike at peak height, and a mistimed jump often leaves you landing late with no second movement.
The common mistake is lunging all the way to the net and then admiring the shot. Even a good net kill can come back if the opponent reacts, blocks, or lifts. After contact, keep the follow-through short, push from the front leg, and recover toward a balanced starting point. Use a split step as the opponent contacts the shuttle so you are ready to lunge again for a net reply or move back if they lift over you.
If your net kills feel rushed but not clean, check your distance first. Many players blame the grip or racket when the real issue is that their front foot lands too close to the shuttle. You want the shuttle in front of you, high enough to hit over the top, with the arm neither locked straight nor folded too tightly. That spacing gives your fingers and thumb room to finish the shot without needing a big swing.
For a broader movement foundation, build this rush step into your basic court patterns from Badminton Footwork Basics. The net kill is just one front-court application of the same habit: arrive balanced, strike early, and recover before the rally tells you where to go next.
Easy Kill vs Tight Kill: Choosing the Right Finish
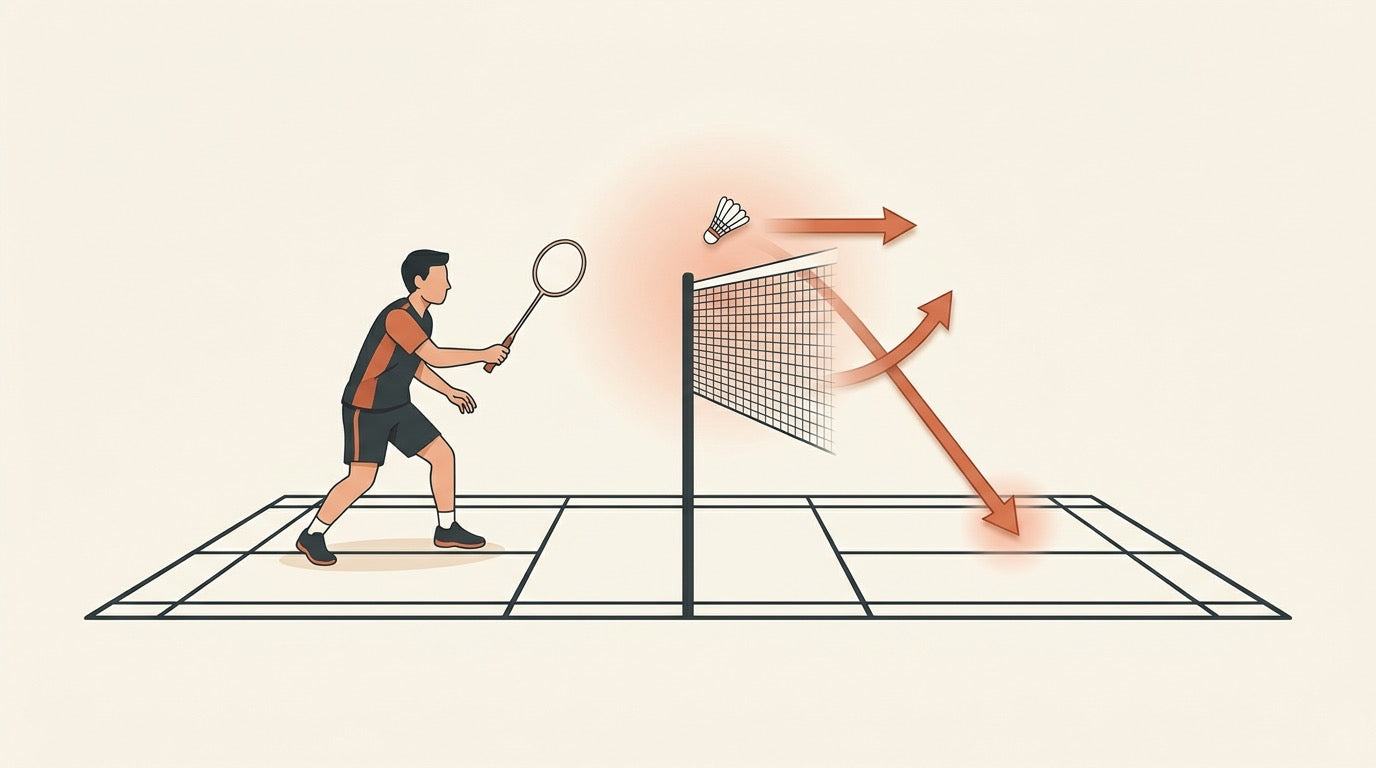
Once you arrive at the tape, the best badminton net kill technique depends on how much the shuttle is sitting up. If it floats clearly above net height, you can make an easy kill: still compact, but with a slightly longer controlled swing. If it is tight to the tape, the finish becomes shorter, softer, and more precise.
Think of it this way: the higher the shuttle, the more you can hit through it; the tighter the shuttle, the more you need to guide, brush, or clip it without crashing into the net.
| Finish | Use it when | How it should feel |
|---|---|---|
| Easy net kill | The opponent’s net return floats high enough that you have a clear contact point above the tape. | A short downward punch with finger squeeze. You may use a slightly longer swing, but it must stay compact enough that contact is not late. |
| Tight net kill | The shuttle is close to the tape, tumbling, or only barely killable. | A shorter, softer touch. The goal is a clean downward finish, not maximum power. |
| Brush kill | The shuttle is so tight that a direct tap risks hitting the net. | Start slightly outside the shuttle’s line and brush it with a small finger-led action so the racket avoids the tape. |
The easy kill: controlled, not wild
For the easy net kill, the temptation is to swing hard because the shuttle looks “free.” That is where many players lose the point: the swing gets too big, contact drops, and the shuttle either hits the tape or flies long. Use the extra time to get the racket face organized, then punch down with a compact finger squeeze.
- Contact high: take the shuttle as early as you can in front of the net.
- Keep the swing short: slightly longer than a tight kill is fine, but it is still not a smash motion.
- Choose open court: angle the face steeply down rather than trying to hit through the floor.
If you find yourself needing a huge arm swing, the shuttle was probably not as easy as it looked. In that case, play a safer downward block or tight net reply and reset the rally.
The tight kill: shorter touch, cleaner racket path
A tight net kill is more about racket path than power. The shuttle is near the tape, so your margin is small: shorten the movement, keep the grip relaxed until contact, and squeeze only enough to send the shuttle down. A softer finish is often better than forcing a hard kill into the net.
When the shuttle is extremely close to the tape, use the brush option. Instead of stabbing straight through the shuttle, begin just outside its line and brush across it with a small finger-led movement. This lets you attack a tight shuttle while reducing the chance that your racket drives into the net.
Timing note: if you choose the jump option described in Rush Footwork: Lunge In, Stay Balanced, Recover Fast, strike at the peak of the jump. If the timing is not clear, use the lunge-based finish instead so you can stay balanced and recover.
Rule checks before you rush the tape
Net kills are aggressive, but they still have to be clean. Keep these rule reminders in mind, especially in doubles where both players may be crowding the front court.
- Do not touch the net or posts. If your body or racket touches the net during a live rally, it is a fault.
- Contact the shuttle first on your own side. Your racket may follow through over the net during the stroke, but only after the initial contact has been made on your side.
- Only the racket may touch the shuttle. If the shuttle touches your body, clothing, shoe, or anything other than the racket, it is a contact fault.
When in doubt, make the shot smaller. A clean, controlled tight kill is better than a dramatic swing that clips the tape. For broader fault and scoring context, see our badminton rules and scoring guide. If the shuttle is not high enough to kill, go back to a quality net reply using the ideas in our badminton net shot technique guide.
Practice the finish, not the panic. Net-kill reps are easier with a racket you can keep up quickly and enough shuttles for repeated feeds. Browse badminton rackets, the Yonex Astrox series, and shuttlecocks at Badminton House. Pricing is in CAD, and Canadian orders over $200 qualify for free shipping.
A Simple Drill—and Gear That Supports Net-Kill Reps
Do not train the badminton net kill technique only as a coach-fed basket drill. Multi-feed is useful for learning the contact, but the real problem is decision speed: you have to read whether the net shot is loose enough, rush in without crowding the shuttle, keep the racket up, lunge to the correct distance, and still recover if the shuttle comes back.
A better practice block is a short rally pattern where the feeder can vary the height and tightness of the net reply. That forces the hitter to adjust approach speed, lunge length, and racket preparation before each kill instead of charging in the same way every time.
| Step | How to run it | What to watch |
|---|---|---|
| 1. Start neutral | Both players start in a rally. The feeder plays a net shot from the front court instead of hand-feeding every shuttle. | The hitter should split, keep the racket up, and avoid waiting with the racket low. |
| 2. Vary the feed | The feeder mixes loose net shots, tighter tumbling shots, and occasional lifts. | The hitter should kill only the loose shuttle, brush or control the tight shuttle, and recover for the lift. |
| 3. Finish compact | On a killable shuttle, the hitter lunges in, contacts high, and uses a short downward finger squeeze. | No full smash swing. The follow-through should be short enough to avoid the net and recover quickly. |
| 4. Recover every time | After the shot, push back out of the lunge and reset for the next ball. | If the hitter stays planted at the tape, the drill is too easy or the recovery standard is too low. |
Keep the scoring simple: the hitter wins the point only if the net kill lands cleanly or creates a weak reply that can be finished next shot. If the hitter touches the net, crowds the shuttle, swings too big, or fails to recover, the feeder wins the point. That pressure makes the drill feel closer to a real Canadian club-night rally than a predictable basket routine.
Gear for net-kill reps. Durable practice shuttles help when you are repeating short front-court patterns, and a responsive attacking racket can make finger-driven interceptions feel cleaner. Browse practice shuttlecocks, badminton rackets, or the Yonex Astrox series. Product pages show current availability and CAD pricing, and larger Canadian orders may qualify for the $200 free-shipping threshold.
For more off-court movement work that supports this shot, pair the drill with basic front-court footwork from Badminton Footwork Basics or add speed work from Badminton Agility Ladder Drills and Cone Footwork in Canada.
Which Net-Kill Finish Should You Choose?
Use this quick matrix when the shuttle appears near the tape. The best badminton net kill technique is the one that lets you contact early, stay compact, and recover without turning the shot into a smash.
| Situation | Choose this | Simple cue | Avoid |
|---|---|---|---|
| Weak net return floats high enough | Easy net kill | Take it early and hit down with a compact, slightly longer action if time allows. | A smash-sized swing or big wrist rotation. |
| Shuttle is tight to the tape | Tight or brush kill | Use a shorter, softer touch; a brushing action can help when the shuttle is very tight. | Crowding the shuttle so your racket path has no room. |
| Forehand-side chance near the net | Forehand finger-snap kill | Stay relaxed, then squeeze with the fingers at contact. | Holding the grip tight before the shot. |
| Backhand-side chance near the net | Backhand thumb-power kill | Use the thumb on the back bevel for leverage and a quick downward push. | Trying to power it mainly with the arm or shoulder. |
| You are late or off balance | Do not force the kill | Prioritize balance and recovery so you can cover the next net shot or move back for a lift. | Over-committing forward and getting stuck at the tape. |
Gear note: For repetition practice, Yonex Mavis 350 Nylon Shuttlecocks are the relevant Badminton House option for durable net-kill reps; they were listed at $16.99 CAD and sold out, so check the shuttlecocks collection before planning a drill basket. If you are also comparing rackets for fast racket-up attacking play, browse badminton rackets or the Yonex Astrox series.
Get Canadian badminton gear advice + restock alerts
Join the Badminton House list for buying checklists, restock alerts, and practical gear advice for Canadian players.
By subscribing, you agree to receive Badminton House emails and can unsubscribe anytime.
Net kills are built in small details: racket already up, grip relaxed until contact, fingers doing the work, and a balanced recovery after the rush. We play badminton ourselves, so if you are unsure whether your racket, grip, strings, or practice shuttles are helping or holding back your net-kill reps, contact us and we will point you in the right direction.
Build a faster front-court game with badminton gear chosen for real play.
Browse Badminton Rackets10% off first order · Free shipping on $200+ within Canada · 14-day returns · Canadian badminton specialty shop
Leave a comment
This site is protected by hCaptcha and the hCaptcha Privacy Policy and Terms of Service apply.