
Last updated: August 2026 · Badminton House
Quick answer
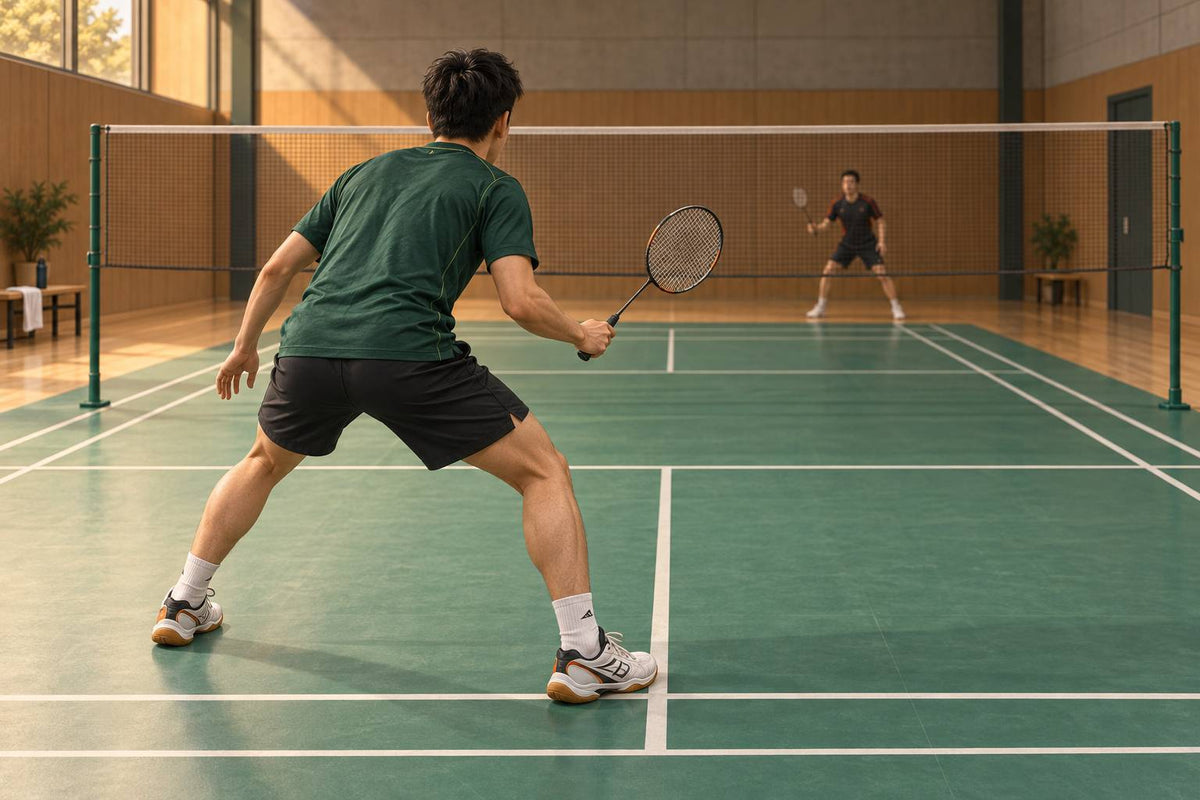
The badminton defense ready position is a wide, low, balanced stance with the racket held up in front and a split step timed to the opponent’s contact. It is not one position, though: how wide, how low and how high the racket sits depend on what you are about to defend.
Smash
After your lift: feet wider than your shoulders, knees bent until your eyes are near tape height, racket in front at about waist level, weight on the front half of both feet. Split just before their contact.
Serve
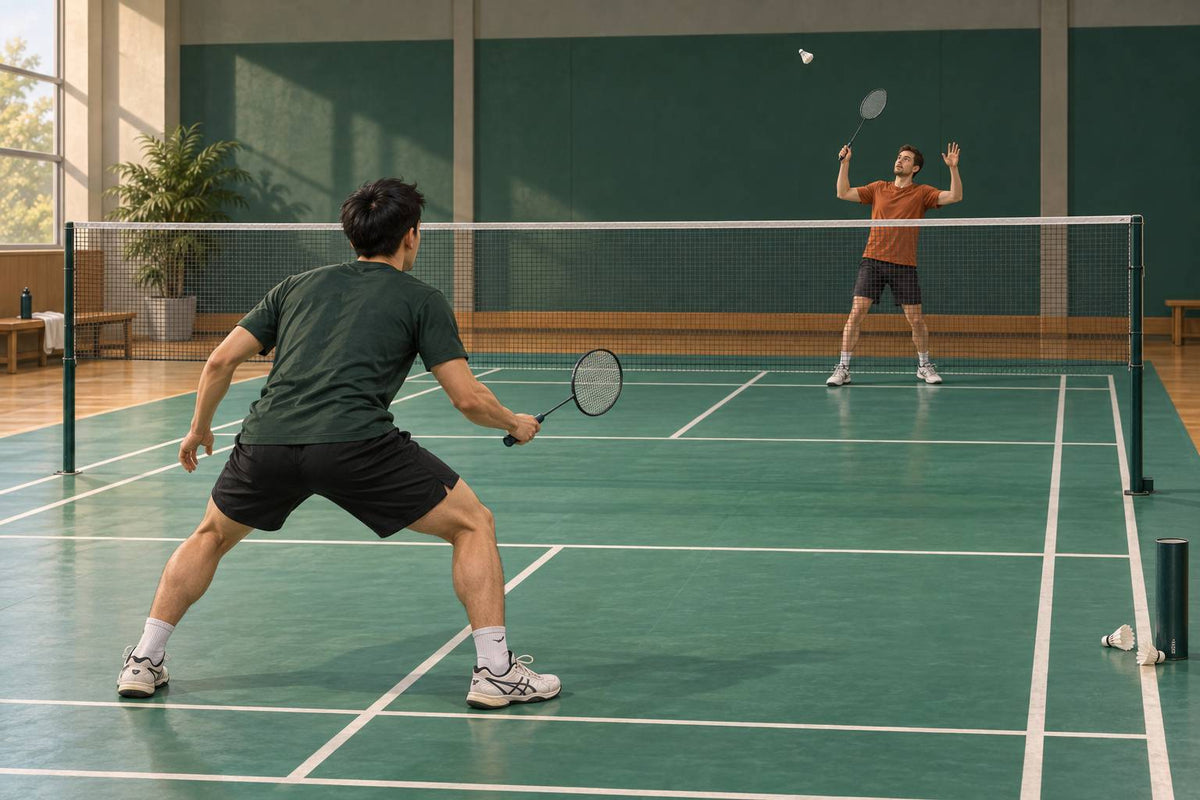
Receiving: non-racket foot forward, racket head above the tape, weight on the front foot. Both feet must stay still until the serve is struck (BWF Law 9.1.4): no hop, no bounce.
Drives
Flat doubles rally: narrower and taller than smash defence, racket head at chest height, neutral grip so forehand and backhand are each one finger turn away.
If smashes and fast drives keep beating you at club level, the problem is rarely reaction speed. It is usually that you were not set when the opponent hit: standing tall, racket beside your thigh, weight on your heels, still landing from a late split step. The ready position is the fix, and it is the cheapest one in badminton because it costs no fitness and no new stroke.
This guide gives you the stance with the few numbers that exist, then the part most guides skip: how the position changes between receiving a serve, defending a smash and covering half a court in doubles, plus a scored ten-shuttle test so you can check it on a club night without a coach. What you do once the shuttle arrives (block, lift or drive) is covered in our smash defense guide; this article is about being set before it does.
In This Guide
What the defensive ready position looks like

Start with the smash-defence version, because it is the widest and lowest and every other ready position is a smaller version of it. You have just lifted or cleared, the opponent is getting behind the shuttle, and you have roughly the time the shuttle spends in the air to get set. Set means all six of these at once:
| Body part | Target | The error that costs the point |
|---|---|---|
| Feet | Wider than shoulder-width, toes roughly square to the net | Feet under the hips, so the first move has to be a widening step before it can be a push |
| Knees | Bent until your eyes are close to the height of the net tape | Straight legs: the body has to drop before it can go sideways |
| Weight | On the front half of both feet, split evenly | On the heels, or already leaning one way before contact |
| Racket | Out in front at about waist level, head slightly up | Beside the hip or below the knee, where the arm drops after a lift |
| Hand | Neutral grip, fingers relaxed | Squeezing a full forehand grip, so the backhand block needs a grip change first |
| Head and chest | Chest open, back long, eyes on the hitter’s racket arm | Watching the shuttle instead of the player hitting it |
How low is low enough: the tape is 1.524 m
“Bend until your eyes are level with the top of the net” is the cue most coaches use, and it is worth taking literally because it is one of the few parts of this position with a number attached. Under BWF Law 1.10 the net is 1.524 m high at the centre of the court and 1.55 m over the doubles side lines. That is the line your eyes are aiming for.
The cue is hardest on tall players, which is exactly why they are the ones coaches keep telling to get lower. Every extra 10 cm of height is another 10 cm of knee bend to reach the same line, so a 1.85 m player has to drop about 20 cm further than a 1.65 m player to see the tape at eye level. If your back rounds or your heels come down when you try it, you have gone past what your legs can hold for a rally: bend the knees more and the hips less, and settle for eyes just above the tape rather than on it.
Wider than your first instinct
Most club players stand too narrow because a narrow stance feels comfortable, and comfortable is the wrong test. The test is whether you can push sideways without a preparatory step. Set your feet, then have a partner call left or right at random. If your first movement is a small shuffle to widen the base before the real push, the stance is too narrow. Widen it until the call produces a push and nothing else.
Four situations, four ready positions
The stance above is the smash-defence version. Most guides stop there and leave you applying a wide, low, waist-high-racket stance to a doubles drive exchange, where it is too low and too slow, or to serve receive, where part of it is against the rules. Five things change between situations: width, height, racket height, which foot is forward, and when you are allowed to move.

| Situation | Width | Height | Racket | Feet | When you move |
|---|---|---|---|---|---|
| Defending a smash after your lift (singles or doubles) | Wider than shoulders | Lowest: eyes near the tape | Waist level, in front, head slightly up | Square, or racket-side foot a few centimetres back | Split just before the hitter’s contact; push once the direction is clear |
| Receiving a doubles low serve | About shoulder-width | Tall: chest over the front foot | Head above the tape, ready to push or tap | Non-racket foot forward, weight on it | Feet stationary until the serve is struck (Law 9.1.4); the first movement is a lunge, not a hop |
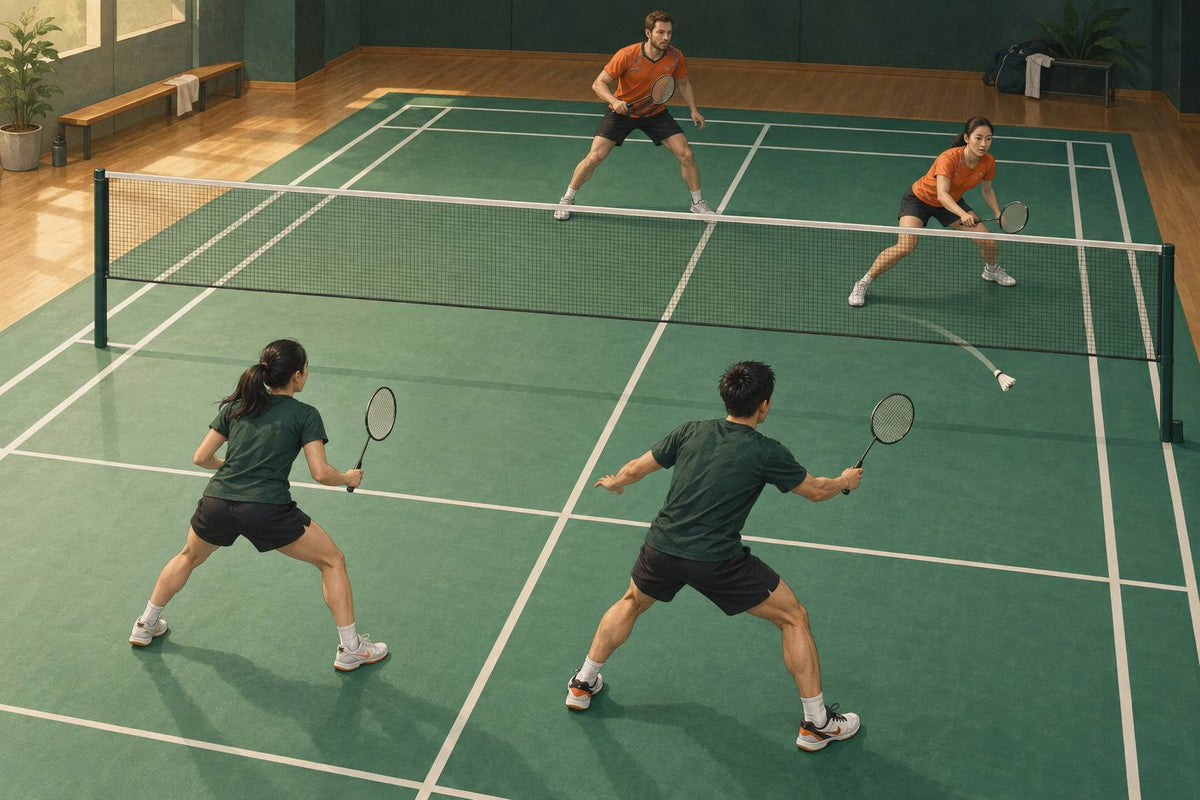
| Side-by-side doubles defence | Wider than shoulders | Low, a little taller than singles smash defence | Waist to chest, backhand side ready | Square, facing the hitter | Split on the hitter’s contact; cover your half, not the shuttle |
| Flat mid-court exchange (drives and pushes) | About shoulder-width | Mid: knees soft, chest up | Chest height, head up, neutral grip | Racket-side foot slightly back | Tiny split or none; the exchange is too fast, so racket preparation replaces the hop |
The receive stance is the one the rules care about
Serve receive gets its own row because it is the only ready position with a law attached. BWF Law 9.1.4 says some part of both feet of the server and the receiver must stay in contact with the court, in a stationary position, from the start of the service until the shuttle is struck, and the start of the service is the first forward movement of the server’s racket head. A split step, a bounce or a shuffle during the server’s swing is a fault by the receiver. On most Canadian club nights nobody calls it, so players build the habit and then lose points on it in the first sanctioned tournament they enter, where the same BWF Laws apply. Set the stance early, stay still through the swing, and make your first movement a push from the back foot. Our serve foot fault guide covers the server’s side of the same law.
The other detail that makes the receive stance different: the serve has to be struck with the whole shuttle below 1.15 m (Law 9.1.6), so a good low serve is already around tape height when it reaches you. That is why the racket head starts above the tape here and at waist level everywhere else. There is no time to lift it.
Racket in front, grip neutral
Where the racket sits is decided by where the shuttle will be when you touch it, which is why the table gives four heights. What does not change is that it is in front of you. After a lift the natural thing is to let the arm drop, so the racket ends up beside the hip, and the first thing you do when the smash comes is lift it. That costs the same time as standing up from straight legs, and club players usually do both at once.
Grip: hold the racket with a neutral, relaxed grip so the forehand block and the backhand block are each a small finger turn away. Most club players wait in a full forehand grip, then find the smash comes at the body or the backhand hip, which it does more often than not, and the grip change arrives after the shuttle. If the switch itself is slow, our grip switching guide fixes that separately.
Freeze test
Freeze after your next lift and look down. Racket in front, above the knee, fingers soft? If any of the three is wrong, that lift just cost you a tempo before the opponent even hit.
Read the hitter before contact

A set stance buys you time; reading the hitter tells you what to do with it. The shuttle tells you nothing until it has left the racket, and by then a smash is most of the way to you. Watch the player instead: trunk and shoulders, the racket arm, the racket face, the grip and the non-racket foot. None of them is a guarantee, and a good opponent will use them to lie to you, which is why the ready position still matters while you read. It keeps you balanced enough to be wrong and recover.
| Cue before contact | What it usually means | What you do with it |
|---|---|---|
| Shoulders and trunk turned toward the cross-court | Cross-court shot more likely | Shade your weight that way; keep the racket in front for the straight option |
| Full backswing, racket arm high, non-racket foot driving in | Smash | Drop lower, brace through both feet, prepare a short block or lift |
| Arm slowing before contact, racket face opening | Drop or slice | Weight forward, one quick step; do not stand up to do it |
| Hitter stretched, late, or still recovering | Fewer options: usually straight, often short | Move up a half-step and look to attack the reply |
Two cues, not one
One cue lies; two agreeing cues rarely do. Shoulders turned cross-court plus a full backswing is a cross-court smash. Shoulders turned cross-court plus a slowing arm and an opening racket face is a slice drop. Shade toward the read, keep the racket in front for the other option, and commit at contact, not before. If you keep getting sent the wrong way, the usual cause is moving on the first cue you see; our guide to reading deception gives a cue order that fixes it.
Time the split step to their contact
The ready position is static; the split step is what turns it into a start. The timing is the same in every situation except serve receive: begin the small hop as the hitter’s racket starts forward, so you land loaded a fraction after contact, when the shuttle’s direction is known.
On time
Hop as the racket starts forward, land just after contact, push in the direction you now know.
Too early
You land before they hit. The legs have already unloaded, and a deceptive opponent has a stationary target.
Too late
You are still in the air while the smash arrives, and the first step becomes a stumble.
Keep it small. In defence the hop is a few centimetres, sometimes only a heel lift; the point is to arrive on the front half of both feet with the knees bent, not to gain height. When your read is strong, land one foot fractionally before the other: the foot furthest from where you want to go touches first, so a read of “right” means the left foot lands first and the push comes from it. With a weak read, land square and accept a slightly slower first step in exchange for covering both sides. The mechanics of the hop itself, and where on court to make it, are in our split step guide.
Doubles: the same base, half the court each

In doubles the stance is the third row of the table: as wide and almost as low as singles smash defence, both players level with each other, each responsible for one half of the court width. The trigger to get there is your own shot, not theirs. The moment you or your partner lifts, both of you move to side-by-side and set, because if you wait to see the smash you will not be set when it arrives.
- Agree the middle before the game. The usual rule is that the player whose forehand it is takes a smash down the centre; decide it once so neither of you hesitates.
- Stay level. If one of you drifts forward, the diagonal behind you opens and a half-smash into it wins the rally.
- Racket backhand-ready. Most doubles smashes come at the body or the backhand hip; a racket held slightly to the backhand side covers both and leaves the forehand a small turn away.
When the rally turns and your pair should switch to front-and-back, and how the two of you rotate through it, is in our doubles positioning and rotation guide.
One note on Canadian gym floors. Most club nights run in school gyms on dusty hardwood, and the wide, low stance is the one that slides. If your feet skate on the push-off, the fix is the shoe rather than the stance; non-marking court shoes are in our badminton footwear collection.
The ten-shuttle ready-position audit
You cannot see your own stance during a rally, so test it in a way that produces a number. You need a partner, ten shuttles and half a court, and it takes about five minutes.

- Setup. From mid-court, lift a shuttle to your partner’s rear court and set your smash-defence stance straight away. Your partner smashes or drops at random, roughly seven smashes and three drops in ten.
- Scoring. Your partner, or a phone propped behind you, judges the instant of their contact and nothing after it. One point each for: knees bent with eyes near tape height; racket in front and above the knee; feet still, on the front half, not mid-shuffle. Three points per shuttle, 30 available.
- Pass mark. 24 or more on two consecutive club nights. Below 18 the position is not a habit yet, and cue reading will not help until it is. Between 18 and 23, note which of the three items you keep losing and work only that one for a week.
- Progression. Level 1: your partner tells you smash or drop before feeding. Level 2: random. Level 3: random, alternating straight and cross-court feeds. Level 4: the same, but you must also return the shuttle. Score the stance, not the return, at every level.
Whether the return then goes where you want is a different skill with its own drills. This audit only asks the one question that has to be answered first: were you set when they hit?
Which fix first?
Pick the one symptom you recognise most often and work only its row for a few sessions. Stacking all six at once is how the stance gets worse before it gets better.
| What happens in games | Work on | Court cue |
|---|---|---|
| You feel late even though you are quick | Stance height and racket position | Eyes at the tape, racket in front |
| You hop or shuffle while the serve is being hit | The receive stance | Still until it is struck |
| Smashes at the body beat you | Grip | Neutral grip, backhand ready |
| You get sent the wrong way | Cue reading | Two cues, then commit |
| Stance looks right on video, first step still slow | Split-step timing | Hop as the racket starts forward |
| Doubles: smashes land between you | Side-by-side spacing | Lift, then level with your partner |
Set first, then defend. Once the audit score holds, the next step is what to do with the shuttle when it arrives: our smash defense guide covers the block, the lift and the counter-drive, and the doubles positioning guide covers where the two of you stand when the rally turns.

Leave a comment
This site is protected by hCaptcha and the hCaptcha Privacy Policy and Terms of Service apply.