Last updated: June 2026 · Written by the team at Badminton House
Quick Answer: Badminton Defence to Attack Transition
The best badminton defence to attack transition is to defend from a balanced base, then take the first controlled chance to drive, push, or step in on a weak reply instead of staying passive.
Default
Drive or push: when the smash or fast shot is reachable in front of your body, use a flat drive or controlled push to make the opponent hit upward and flip the rally.
Block
Use a soft block when the shuttle is too steep or too fast to drive cleanly; absorb the pace, place it safely, and be ready to move forward on the next shot.
Lift
Lift high and deep when the counter-attack is not on; a patient reset is better than a loose block or rushed drive that gives the front player an easy kill.
If you can return smashes but still feel trapped, your defence is doing only half the job. The real goal is not just to survive one more shot — it is to spot the first shuttle that lets you take the initiative back.
A strong badminton defence to attack transition starts with patience, balance, and shot choice. In doubles especially, the side that is forced to lift usually gives the other side the chance to attack, so the turning point often comes from a controlled block, drive, push, or deep lift that changes the opponent’s rhythm.
This guide is for Canadian club, league, and tournament players who already defend rallies but want to stop staying passive. You will learn how to recognise the moment to change gears, move forward from a balanced base, and use the right counter-shot without forcing a low-percentage winner.
Dial in your control before you counter-attack. If blocks and drives feel inconsistent, a fresh string setup can help your touch and response — see our badminton stringing service for Canadian players.
In This Guide
- Defence Is the Platform, Not the End Goal
- Recognise the Moment to Change Gears
- Move Forward From a Balanced Defensive Base
- Use the Drive to Flip the Rally
- Use Pushes and Blocks When a Drive Is Not On
- When to Lift Instead of Counter-Attacking
- Gear That Supports a Control-to-Attack Game
- Which Transition Shot Should You Choose?
Defence Is the Platform, Not the End Goal
The key idea behind a strong badminton defence to attack transition is simple: your defence should not be a waiting room. It should be the platform that lets you take the first safe chance to change the rally.
Many players defend as if the goal is only to survive the smash, block one more shot, or lift one more time. That keeps the opponent comfortable. The faster way to win points is to stop merely returning the shuttle and start looking for the first moment when you can take the initiative back.
Build the base first. If your smash defence is breaking down, start with our deeper foundation guide: Badminton Smash Defense: How Canadians Can Return a Smash.
In doubles especially, attack and defence are often decided by who has lifted. If your side lifts, the other side usually gets the first chance to hit down. If you force your opponents to lift, you flip that equation and your side becomes the attacking side. That is why a good defensive shot is not judged only by whether it crosses the net; it is judged by whether it reduces pressure, disrupts the attacker, or creates a chance to make them lift.
Think of defence in three levels:
- Survival defence: you get the shuttle back, but the opponent can keep attacking.
- Neutral defence: you buy time, recover your base, and stop the attack from getting worse.
- Counter-attacking defence: your block, drive, push, or deep lift changes the rhythm enough that you can step forward and pressure the next shot.
That third level is the one Canadian club and league players should train deliberately. A flat drive can rush the attacker. A controlled block can pull them forward and break their rhythm. A deep lift can reset the rally when counter-attacking would be too risky. None of these shots are passive when they are used with purpose.
"The goal of defence is not to admire your opponent's attack — it is to find the first safe opening to take the rally away from them."
So before you worry about fancy counter-attacks, change your mindset: every defensive shot should ask a question. Can I make them hit up? Can I make them move? Can I make the next shuttle less steep, less fast, or less well-placed? Once you start reading defence this way, the transition to attack becomes a pattern you can train instead of a lucky escape.
Recognise the Moment to Change Gears
The badminton defence to attack transition starts with reading quality. Not every attacking shot deserves the same passive reply. If the smash, drive, or drop coming at you is suddenly weaker, shorter, slower, less steep, or less well placed, that is your invitation to step in and take initiative instead of simply surviving one more shot.
The key is to judge the shuttle before it crosses too far past your hitting zone. From a balanced defensive base, look for these counter-attack windows:
| What you see | What it means | Your first thought |
|---|---|---|
| The smash is less steep | The shuttle is easier to meet in front of your body rather than digging it up late. | Consider a firm drive or controlled block if your racket face is stable. |
| The attack loses pace | You have more time to control the racket angle and move your weight forward. | Step in with a push, drive, or tighter block instead of lifting automatically. |
| The reply is short | The opponent has not kept you pinned deep in defence. | Move forward immediately and take the shuttle early. |
| The shot is poorly placed | It lands closer to your racket or body line instead of pulling you off balance. | Use a compact counter-shot and recover forward. |
This is where many Canadian club players stay defensive for one shot too long. They recognise the shuttle is no longer dangerous, but their feet remain planted and their racket stays in a rescue position. Train yourself to pair the read with a physical trigger: small step forward, racket in front, contact early.
Simple cue: if the shuttle is no longer forcing you upward from below tape height, ask, “Can I take this early and make them lift?” If yes, change gears now.
That does not mean forcing a counter-attack from every defensive position. A poor counter-attacking shot can lose the rally quickly: a loose block can sit up for the front player, and a rushed drive can give the opponent another easy interception. The best defenders are patient enough to reject bad opportunities.
If you cannot control the racket face, meet the shuttle early, or keep the counter-shot tight enough, play the lift and reset. A good deep lift buys time, disrupts the attacker’s rhythm, and lets you wait for the next shuttle that is slower, less steep, shorter, or less well placed. The goal is not to attack first at any cost; it is to attack first when the window is real.
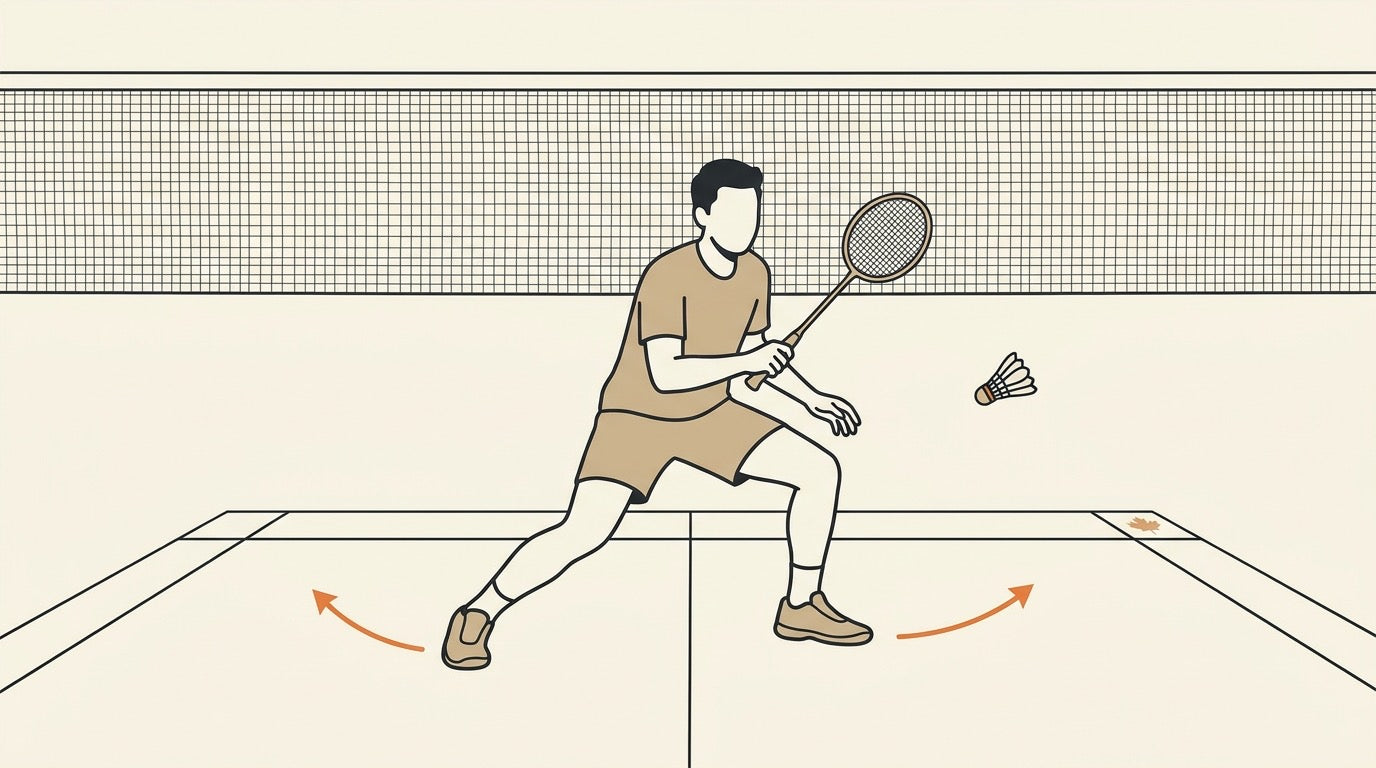
Move Forward From a Balanced Defensive Base

The badminton defence to attack transition starts before you hit the counter-shot. It starts in your base: square to the net, feet about shoulder-width apart, knees bent, and body weight balanced or slightly forward on the balls of your toes. From there, you can block, lift, drive, or step in without having to fight your own posture first.
A common mistake is defending with the hips too high or the weight sitting back on the heels. That stance might help you survive one smash, but it makes the next movement late. If the return comes loose, you are still recovering backward while the shuttle is already dropping in front of you.
The transition sequence
- Set the defensive base: stay square to the net with knees bent and feet shoulder-width apart.
- Stay light through the toes: keep the weight balanced or slightly forward so you can move in any direction.
- Split step as the opponent strikes: use a small hop and land with bent knees so your legs are ready to push.
- Read the reply: if the shuttle is short, flat, or loose, move forward instead of staying in a passive defensive line.
- Use short controlled steps: take compact steps forward so you arrive balanced enough to play a drive, push, block, or net follow-up.
The key is that your body weight should be moving forward as you strike the shuttle. That forward movement improves both power and control, and it helps you recover faster after the shot. In practical terms, your counter-drive feels sharper, your push stays tighter, and your next step into the forecourt is quicker.
Think of the split step as the switch between defence and attack. You are not jumping high; you are resetting your feet at the moment the opponent hits. Land soft, keep the knees bent, and let the first step be short enough that you remain balanced. Long lunges can reach the shuttle, but they often leave you stretched and unable to play the next ball with quality.
A simple court cue
After your defensive contact, ask: can I move forward? If your block, drive, or push has made the attacker lift or hesitate, step in immediately. Do not wait on the back half of the court for another smash if the rally has already opened. The first controlled step forward is often the difference between merely returning the shuttle and taking the initiative.
If your footwork base still feels unstable, build it first. Our badminton footwork basics guide breaks down the movement patterns that make this defence-to-attack changeover easier to train.
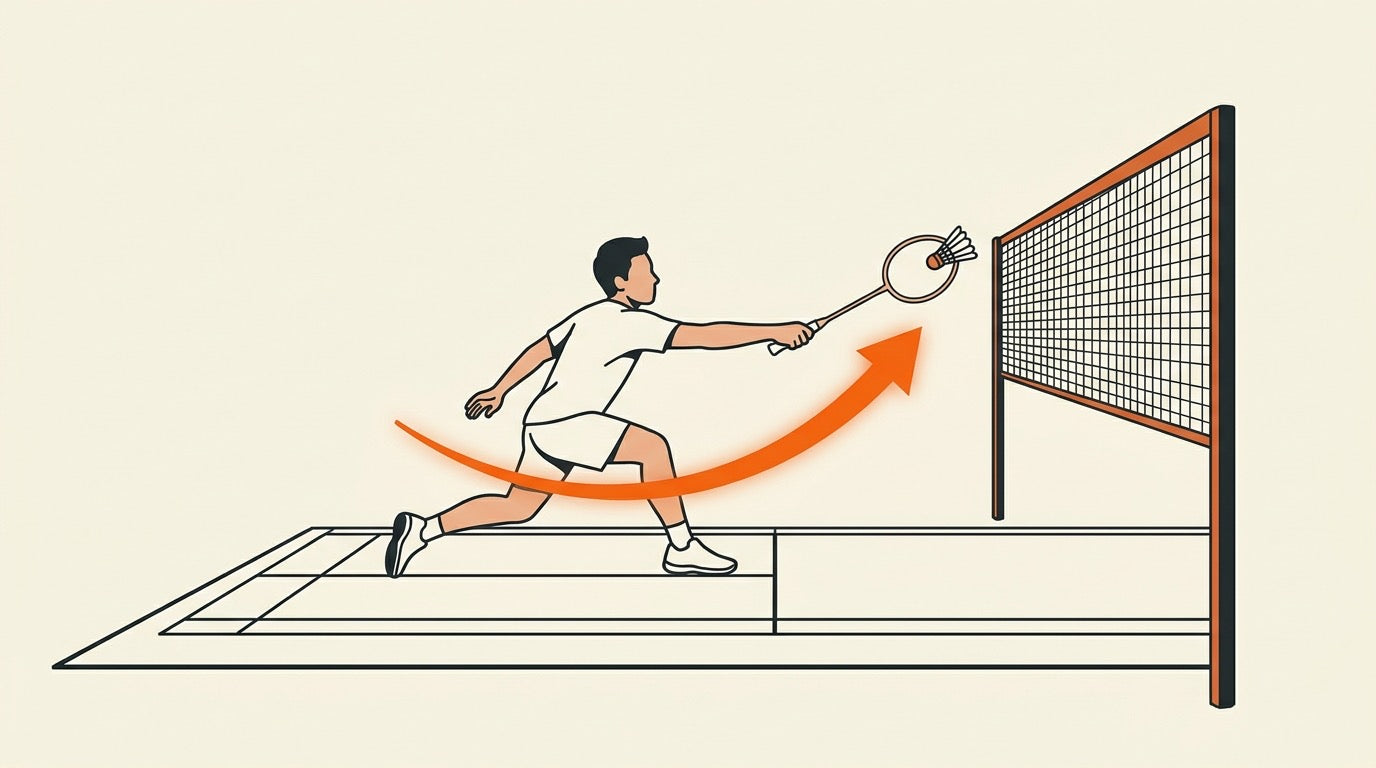
Use the Drive to Flip the Rally

The drive is the cleanest badminton defence to attack transition shot because it changes the rally without giving the attacker height. Instead of lifting and accepting another smash, you meet the shuttle around midcourt and send it flat, fast, and forward so your opponent has less time to react.
A good defensive drive is not a big swing. Think of it as a compact counter-punch: racket head facing forward, wrist firm at contact, quick wrist snap, and almost no follow-through. The shuttle should travel horizontally over the net toward the opponent’s midcourt or rear court, not float upward.
Drive with a purpose. The goal is not just to hit hard; it is to force an upward return so you or your partner can step in and take the attack.
When the Drive Is On
Look for the drive when the attack is fast but not too steep. It is especially useful against flatter smashes, body smashes you can meet in front, or a hard shot that arrives around hip-to-chest height. If the shuttle is already below your strings or jammed too close to your body, forcing a drive usually becomes risky.
- Best contact point: slightly in front of your body, with the racket face already set forward.
- Best target: through the open midcourt lane, at the body, or past the front player in doubles.
- Best result: the opponent is late, contacts below net height, and has to lift or play a soft reply.
If you are still building confidence against heavy smashes, pair this section with Badminton Smash Defense: How Canadians Can Return a Smash. The drive becomes much easier once your basic defensive contact is stable.
Drive Technique Cues
| Cue | What it means on court |
|---|---|
| Racket head forward | Prepare early so the strings face the shuttle before it arrives. Late preparation turns the drive into a panicked swipe. |
| Firm wrist at contact | Lock the racket face through impact so the shuttle leaves flat instead of popping up. |
| Quick wrist snap | Generate pace with a short, sharp action rather than a full arm swing. |
| Minimal follow-through | Stop the racket quickly so you can recover for the next fast shot. |
Do Not Chase Power First
Many club players lose the transition by trying to blast the drive. The first priority is height control: keep the shuttle flat enough that the opponent cannot step around it and hit a full overhead. Once your line is reliable, add pace.
After you drive, move with the shot. Stay balanced, recover the racket in front, and be ready for the upward reply. The point of the drive is to take time away from the attacker; if you stay planted after contact, you give that time back.
Simple Practice Pattern
Try this with a partner at your next club night: feeder plays controlled flat smashes or hard pushes into your defence; you answer with a compact straight drive; feeder blocks or lifts; you step forward and take the next shot early. Keep the pace moderate until your racket face stays stable.
- Start with straight drives before adding cross-court angles.
- Count only drives that stay flat and force a late or upward reply.
- Reset immediately when your counter floats, because a loose drive invites the next attack.
Use Pushes and Blocks When a Drive Is Not On
A drive is not always the right counter. If you are late, stretched, or not confident you can keep the shuttle flat, forcing a drive can turn into the loose reply your opponent is waiting to kill. This is where the push and the block become smart transition shots: they are less explosive than a drive, but they can still move the rally from survival toward control.
Think of the push as the quieter way to steal the attack. It has more pace than a tight net shot — enough to pass the front player — but it is slower than a drive, so it can drop below net height before the back player reaches it. That often leaves the opponent with a lift or a risky counter, which is exactly the moment you and your partner are trying to create.
Transition cue: if the shuttle is not high enough to drive cleanly, use a controlled push or soft block to make the opponent hit upward instead of giving them a loose target.
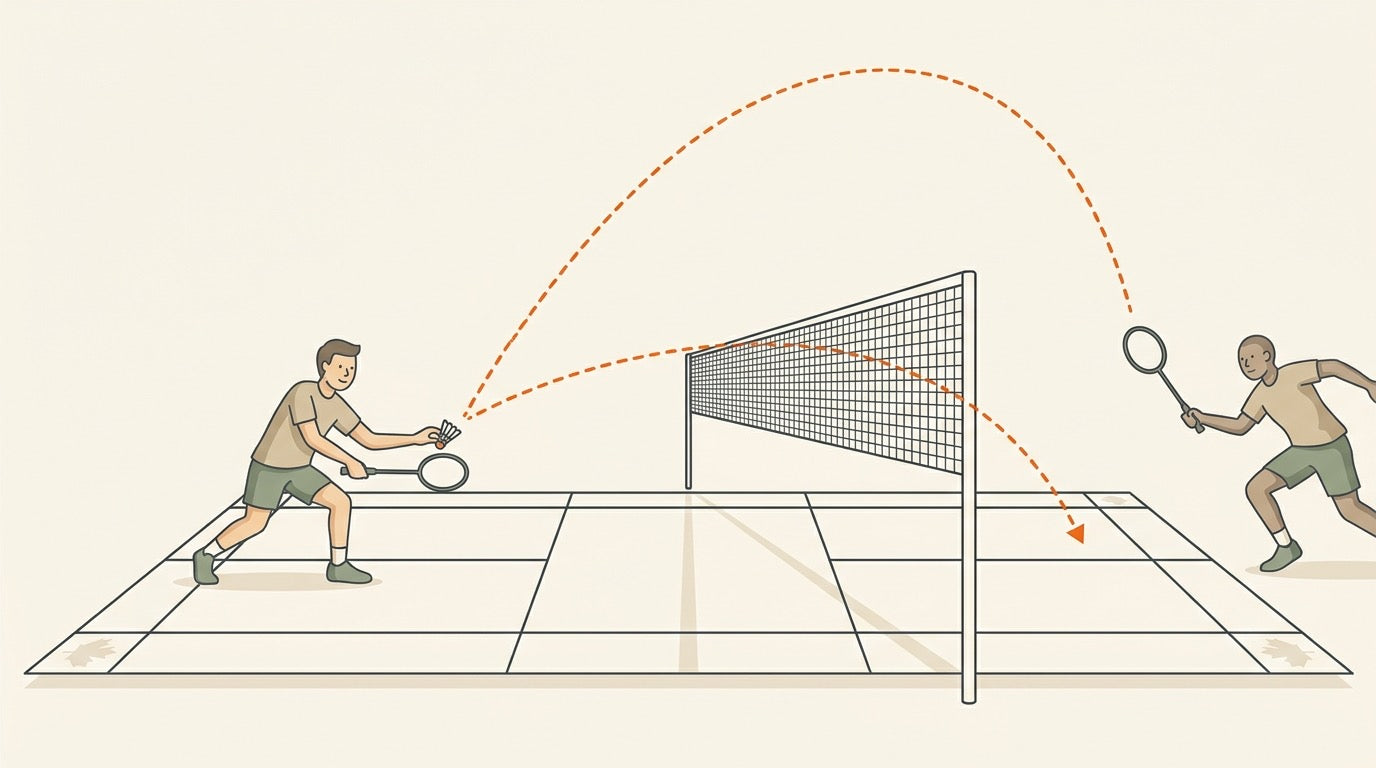
The push: pass the front player, force the lift
The best defensive push is not a wild slap. It is a controlled shot with just enough pace and direction to get past the front-court player. In doubles, this matters because attack and defence often switch when one side is forced to lift. If your push drops below net height before the back player can take it comfortably, you have taken away their easy downward option.
- Use it when the drive lane is covered. If a flat drive would run straight into the front player, the push can go past them with less risk.
- Keep the racket action compact. The goal is control and placement, not a huge swing from defence.
- Watch for the lift. Once the opponent hits upward, step forward and be ready to convert that lift into your own attack.
This is also a useful change-of-pace tactic. After several fast exchanges, a well-placed push can break the attacker’s rhythm without giving up the initiative.
The block: absorb first, attack next
A block is more reactive than a push. You are not trying to overpower the shuttle; you are using soft hands to absorb the pace and send the shuttle into a safer area. A good block can buy time, disrupt the opponent’s momentum, and set up the next attacking chance.
- Relax your grip. A tight grip makes the shuttle spring off the strings too high or too far.
- Keep the wrist flexible. Small racket-angle adjustments help you guide the shuttle instead of simply rebounding it.
- Meet the shuttle early. Early contact gives you more control and reduces the need for a big swing.
- Aim safely. Middle and front-court placements are reliable targets when you are absorbing a hard attack.
| Option | Best use | Transition goal |
|---|---|---|
| Push | When you can guide the shuttle past the front player but do not have a clean drive. | Make the back player take the shuttle below net height and lift. |
| Block | When the attack is too sharp to counter hard and you need to absorb pace. | Buy time, disrupt momentum, and prepare for the next attacking chance. |
The key is not to treat the block as a panic shot. If your hands stay soft and your base stays balanced, the block becomes part of the transition: you neutralize the attack first, then look for the next shuttle that can be pushed, driven, or followed into the forecourt.
For Canadian club players training this pattern, the simple rule is: do not force the counter-attack just because you want to be aggressive. If the drive is not on, a disciplined push or block can still create the lift that lets you take over the rally.
When to Lift Instead of Counter-Attacking
A lift is not a failure. In a badminton defence to attack transition, the lift is the shot you use when the counter is not controlled enough yet. Instead of forcing a risky drive, loose block, or half push, you send the shuttle high and deep into the opponent’s backcourt, buy time to recover your base, and make the attacker hit one more quality shot.
This matters most when the smash is steep, fast, or aimed into your body. If your racket face is late, your feet are stuck, or your contact point is too low, trying to counter-attack can give the front player an easy kill. A deep lift resets the rally so you can defend from balance instead of scrambling from a weak position.
Lift when the counter is not clean
- The shuttle is too low: if you cannot meet it early enough to drive, push, or block with control, lift deep and recover.
- You are off balance: a counter-attack from falling sideways usually becomes a sitter. Lift first, then rebuild your stance.
- The smash is well placed: when the attacker has found your hip, racket shoulder, or open channel, respect the pressure and send the shuttle high and deep.
- Your partner is not ready to rotate: in doubles, a controlled lift can be safer than a surprise counter that leaves both players out of position.
The goal is not simply to survive. A good lift gives you time, disrupts the opponent’s attacking rhythm, and can force a weaker next shot if they have to move back, adjust their timing, or hit from a less comfortable contact point. From there, your next defensive shot may become the actual transition: a drive, a push past the front player, or a block that pulls them forward.
Use height and depth first
For most players, the default defensive lift should be high and deep. Height gives you recovery time; depth reduces the attacker’s ability to stand close and hit steeply. If the lift is short, the opponent can keep smashing from a comfortable position. If it is deep, they must hit again from farther back, which gives your side a better chance to read the next shot.
After you lift, do not admire the shot. Recover immediately: knees bent, racket up, weight balanced, and eyes on the hitter’s shoulder and racket face. The lift has only done its job if you use the extra time to prepare for the next contact.
Mix in the flatter, faster lift carefully
A flatter, faster lift can be a useful rhythm disruptor. Instead of giving the attacker the same high defensive arc every time, you send a quicker lift toward the rear court to make them adjust their preparation. Used well, this variation can reduce the quality of their next attack because the shuttle arrives sooner than expected.
But the flatter lift is not a panic shot. It still needs enough length to reach the backcourt. If it lands short or sits at midcourt height, you have handed the attack an easier ball. Use it when your contact is stable, your racket face is clean, and you are confident the shuttle will travel deep.
| Situation | Best response | Why |
|---|---|---|
| Late contact under a steep smash | High, deep lift | Buys recovery time and avoids a loose counter. |
| Balanced contact against a flatter attack | Drive or push if controlled | This is when you can realistically flip the rally. |
| Opponent is timing your high lifts | Flatter, faster lift variation | Changes the rhythm and makes the attacker adjust. |
| You are reaching or falling away | Lift, then reset | A forced counter-attack from poor balance is usually too loose. |
The rule is simple: counter-attack only when you can control the shot. If the drive, push, or block is there, take it. If it is not there, lift deep without ego, recover your base, and wait for the next chance to change gears.
Gear That Supports a Control-to-Attack Game
Technique matters more than the racket, but the right setup can make your defence-to-attack transition feel cleaner. You want gear that helps you absorb pace, keep the shuttle tight on blocks and pushes, then accelerate quickly when the rally turns in your favour.
Looking for a control-to-attack setup? Browse badminton rackets and the Yonex Astrox Series for head-heavy attacking options. The current listed Astrox models are sold out, and availability can change, so check the live collection pages for the latest status.
A head-heavy attacking racket can suit players who want more help turning a lifted shuttle into a steep smash or heavy rear-court pressure. That does not automatically make it the best choice for every defender: if your blocks are late, your drives feel slow, or you struggle in fast doubles exchanges, balance and handling matter just as much as power. For a deeper explanation, read our head-heavy vs head-light racket balance guide.
Do not overlook the contact point. Fresh strings and a secure grip can make a big difference when you are trying to play soft blocks, quick pushes, and short-swing drives under pressure. A slippery grip makes the racket face harder to control; tired strings can make touch shots and flat counters feel less predictable. You can browse badminton accessories for grips and strings that support cleaner handling.
Badminton House lists prices in CAD and offers free Canadian shipping on orders over $200, which is helpful if you are combining a racket with grips, strings, or other club-night essentials.
Which Transition Shot Should You Choose?

The best badminton defence to attack transition is not always the most aggressive shot. Choose the shot that matches the shuttle you receive, your balance, and how much risk you can control. A rushed counter-attack that sits up can lose the rally immediately; a patient lift can be the right answer when the smash is too steep or too heavy to control.
| Choose this | When it fits | What it does to the rally | Key caution |
|---|---|---|---|
| Drive | Use it when the smash or attack is flatter and you can meet the shuttle early from a balanced base. | A flat, fast drive limits the opponent’s reaction time, disrupts their attack, and can force an upward return. | Keep the action compact: racket head forward, wrist firm at contact, and minimal follow-through. |
| Push | Use it when a drive is too risky but you can still guide the shuttle past the front player. | A push has enough pace to pass the front player, then drops low enough that the back player may have to lift. | Do not push blindly into the front player’s racket; the goal is to steal the attack, not feed a kill. |
| Block | Use it when the smash is hard and you need a controlled first touch rather than a full counter. | A controlled block can buy time, disrupt momentum, and set up a more aggressive next shot. | Soft hands matter. If the block sits loose at the net, the front player can kill it. |
| Deep lift | Use it when you cannot make a good counter-attacking shot under pressure. | A good lift sends the shuttle high and deep, gives you time to recover, and can disrupt the attacker’s timing. | A lift that is not deep enough may let the opponent continue smashing with ease. |
| Step-in attack | Use it after you read a weak, short, or upward reply and your body weight is already moving forward. | It changes the rally from survival to pressure: you move in, take the shuttle earlier, and make the opponent defend. | Do not rush from an off-balance base. Short, controlled steps preserve balance better than long lunges. |
Practical gear note. If your transition game is built around drive, push, then finish, a head-heavy attacking frame can support that style. The Yonex Astrox 100 ZZ sits in that attacking lane; browse current options in badminton rackets or the Yonex Astrox Series without building your whole choice around one model.
Get Canadian badminton gear advice + restock alerts
Join the Badminton House list for buying checklists, restock alerts, and practical gear advice for Canadian players.
By subscribing, you agree to receive Badminton House emails and can unsubscribe anytime.
The best badminton defence to attack transition is not one magic shot — it is the habit of staying balanced, reading the weaker reply, and moving forward the moment the rally gives you space. We play badminton ourselves, so if you are trying to match your racket, string tension, or grip setup to a faster counter-attacking game, contact us for advice and we will help you choose a practical setup for your level.
10% off first order · Free shipping on $200+ in Canada · 14-day returns · Canadian badminton specialty shop
Leave a comment
This site is protected by hCaptcha and the hCaptcha Privacy Policy and Terms of Service apply.