
Last updated: August 2026 · Written by the team at Badminton House
Quick Answer: Badminton Singles Strategy for Beginners
Ask one question before every shot. The answer picks the shot and the spot you recover to.
Me late
You are late or stretched: hit high and deep to the middle of the back line, then recover, if you can make that shot with control.
Them set
Your opponent is balanced: move them toward available space with a controlled shot.
Them late
Your opponent is late or stretched: change pace into the space they just left. A drop as they retreat, a lift as they lunge, a smash only when the shuttle is in front of you.
Most beginner singles rallies do not end with a winner. They end with a lift that landed mid-court, a clear that came up short, or a smash hit from behind the body because it looked like the moment. The player who lost the rally usually played the shot they wanted instead of the shot the position asked for.
This guide is a plan small enough to carry onto court tonight: a base position, one question to ask before each shot, a serve that starts the rally on your terms, three scored games that turn the plan into a habit, and the club realities a Canadian beginner runs into that coaching videos never mention. The opening three shots and playing the score have their own deep dives; this page is the map.
One rule sits under all of it. Under the Laws of Badminton the side that wins a rally scores the point, whichever side served, and a game goes to 21 (Law 7). An unforced error costs exactly what a winner earns. At club level the beginner who makes fewer errors beats the beginner with the better smash, which is why this plan starts with recovery, not power.
In This Guide
Where Do You Stand in Singles? Base Position

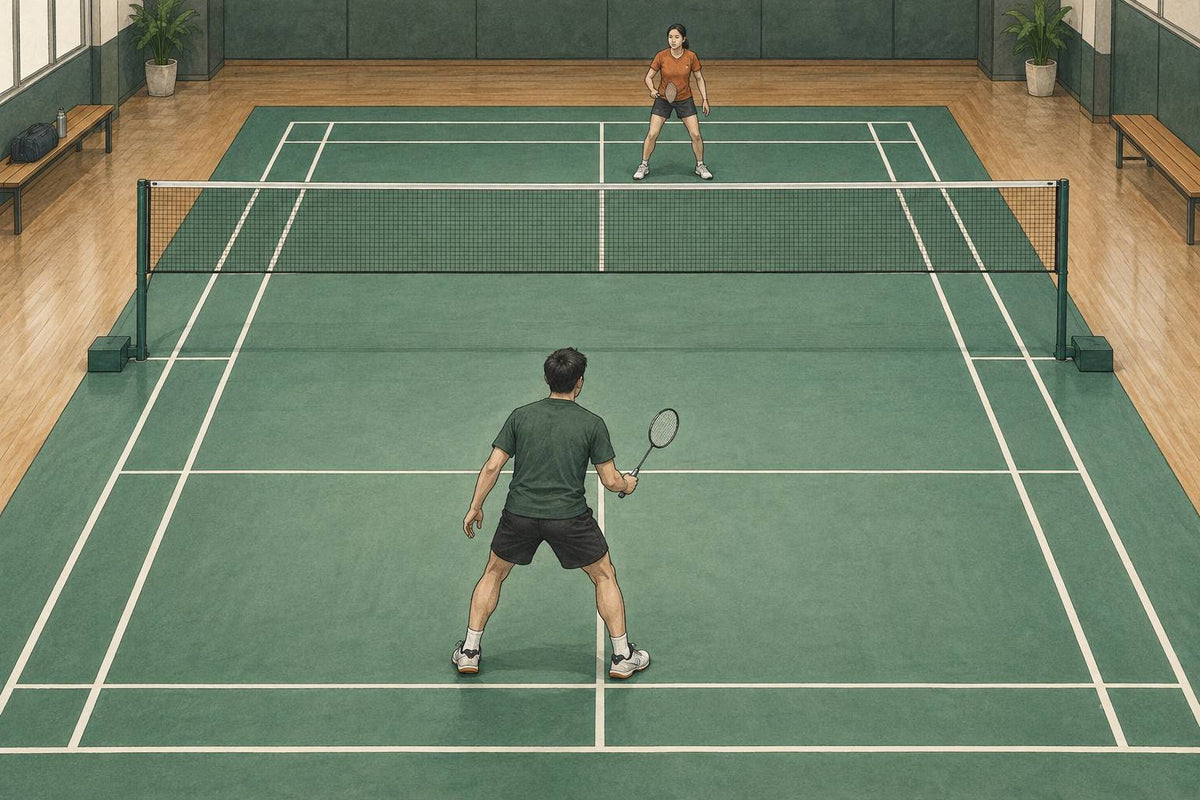
Base position is where you recover between shots. Use the centre of your half as a neutral reference, then adjust toward the replies your shot makes likely. After a tight net shot you may stay farther forward; when your opponent can attack deep, you need room to cover the rear court.
The court explains why coverage matters. The geometric centre of your half is 3.35 m from the middle of the back line and approximately 4.23 m from either rear corner, about 26% farther. Moving away from that reference changes the distances to each corner; it does not automatically put one out of reach. Recover toward a useful position and prepare to change direction as your opponent hits.
Recover at the speed the shot demands
- After a high clear or lift: the shuttle is in the air for a long time. Recover under control with the time available, arrive balanced, racket up.
- After a net shot: recover only far enough to cover the straight net reply and the lift over your head. Retreating all the way to base hands them the net.
- After anything short, flat, or loose: sprint. Expect an attack and get your racket up before you get your feet set.
The split step matters more than the run. A small hop timed to your opponent’s contact lets you push off in any direction; a player standing flat-footed at base is still late. If the hop and the chassé are new to you, the footwork basics guide teaches both with drills.
Question 1: Am I Late? Then Hit High and Deep
Late means the shuttle is behind you or you are stretched for it. If you can still lift or clear with control, a high, deep reply is a useful default: height buys recovery time and depth reduces easy attacking opportunities. If you cannot produce that shot, use the safest controlled reply available rather than forcing it.
When you are late, aim for the middle of the back line, not a corner. The middle is the shortest recovery for you and leaves your opponent the fewest angles. Corners are for when you are balanced; that is Question 2.
The test needs no coach. Watch your own feet, not the shuttle. If you are still recovering when your opponent makes contact, review both your shot’s height and depth and how promptly you moved back. If you are stopped, split-stepped, and watching their racket, it did its job.
Two ways beginners waste a clear
- Hitting it flat. A flat clear reaches the back line faster but can be intercepted mid-court, and it gives you no time. When in doubt, add height.
- Standing to admire it. The time a clear buys is only useful if you spend it recovering toward a useful base. A player who watches the shuttle land has bought nothing.
Question 2: Is My Opponent Balanced? Then Move Them

A balanced opponent with the racket up is harder to beat with pace alone. Use depth and width to make them travel, recover, and travel again until a reply becomes weaker. These two beginner defaults help you choose targets without trying to force a winner.
- Hit to the corner farthest from where they are standing, not the corner you like hitting. If they have just lifted from the front forehand corner, the far target is the rear backhand corner, the longest diagonal on the court.
- Use open space as your default target. Move the opponent with controlled shots to available corners; body attacks can have a place, but are not the focus of this beginner exercise.
Repeating a corner is allowed. If the rear backhand corner keeps producing short replies, keep going there until they prove they can clear from it. Test both rear corners in your first few rallies rather than assuming the backhand is weaker; let the replies show which side is less secure.
When those two rules feel automatic, the four-corner tactics guide adds the next layer: building pressure on one corner before switching, and choosing between the long diagonal and the hard direction change.
Question 3: Is My Opponent Late? Then Change Pace Into the Space
Pace is a reward for good position, not a substitute for it. Change pace only when your opponent is late, stretched, or still moving, and hit into the space they have just left. Each row below pairs the shot with the spot you recover to, because the recovery is half the shot.
| Opponent state | Your shot | Recover to |
|---|---|---|
| Still retreating after your deep clear | Slow straight drop to the front corner | A step in front of base, racket up for the net reply |
| Lunging at the net | Lift or push deep to the opposite rear corner | Base |
| Flat-footed mid-court, waiting for another clear | Flat drive past the racket side | Base, ready for a block |
| Late in the rear court, reply sits up in front of you | Straight smash to the open side | One step forward of base for the block |
| Balanced at base | Nothing changes. Back to Question 2. | Base |
The smash row carries a condition. Contact must be in front of your body and you must land balanced; forcing a smash from behind the body can compromise its angle and your recovery. Our guide on when to smash in singles lists the five checks to run before you commit.
How Should a Beginner Serve in Singles?
In singles you serve from the right service court when your score is even and from the left when it is odd, and the serve must land on or inside the diagonally opposite receiver’s service court (Laws 9.1 and 10.1). The singles service court runs all the way to the back boundary line, and that long, narrow box is why a deep high serve is more useful in singles than in doubles.

Start with a high serve toward the back of the diagonally opposite receiving box, near the centre line but safely inside it. The height gives you time to recover, while a steep descent can limit the receiver’s attacking options. Practise depth with a margin inside the baseline; a short high serve can offer an easy attack.
Add a low serve only when you can send it just above the tape and can cover the fast straight push that follows. Alternating the two without a reason is not variation, it is guessing. The singles serve and return game plan takes the opening three shots apart, serve choice, likely replies, and the third shot, in the detail this page leaves out. If you play in a school gym, read the ceiling note below before your first high serve.
Three Scored Games That Build the Habit
These three scored practice games each constrain one shot choice. Play them in order over several sessions, moving on when you can follow the intended pattern consistently; winning alone does not establish that the habit is secure.
| Game | The one rule | Score | What it fixes |
|---|---|---|---|
| Game 1: Nothing hard | No smashes and no drives. Clears, lifts, drops, and net shots only. A smash or drive loses the rally. | To 11, normal singles serving | Attacking from a bad position. With power gone, Questions 1 and 2 are the only way to win a point. |
| Game 2: Two deep, one short | You may play a drop or net shot only after your two previous shots both landed past the doubles long service line, the back tramline. A short shot that was not earned loses the rally. | To 11, all shots allowed otherwise | Dropping too early. Length has to be established before the front court opens, which is Question 3 with a rule attached. |
| Game 3: Real game, error tally | Normal singles. Each player keeps a count of points lost by hitting out or into the net when not under pressure, and says the count aloud at every change of server. | To 21, win by 2, capped at 30 | Compare the tally to the final margin. If your unforced errors outnumber the margin, reducing avoidable errors could make a meaningful difference. |
Eleven is not a random number. Law 16 gives the players an interval when the leading score reaches 11, so a game to 11 is half a real game and feels like one, with a serve rotation and a score you can lose. If the court is shared, which at a busy drop-in it usually is, the first two games also work on a half court with the straight-only rule in our half-court singles article.
Getting Singles Rallies at a Canadian Drop-In
Municipal and club drop-ins in Canada rotate doubles so that everyone on the sign-up sheet gets on court. Nobody hands a beginner a singles court in the middle of a busy night, so you have to engineer your singles practice.
- Use the empty minutes. If a court is available at the start or end of the session, ask the convenor to use it for singles, and have a partner lined up before you ask.
- Split a court. Two singles pairs on one court, each playing the half between the centre line and the side line, run at the same time. The straight-only game punishes a weak rear backhand corner anyway.
- Book an hour. A court rental with one partner gives you dedicated time for repeated singles rallies. Play the three scored games and nothing else.
- Practise inside doubles. When the rotation pairs you with a stronger partner, practise recovery, a timed split step, and hitting to space while keeping your doubles formation and partner’s position in mind.
Low ceilings and the high serve
Under Law 13.3.3 a shuttle that touches the ceiling or side walls during play is a fault. School gyms and older community-centre halls often have beams, hanging basketball hoops, or a ceiling low enough that a full-height singles serve or clear touches it. Clubs handle this three ways: some call the fault as written, some replay a serve that hits the ceiling and nothing else, and some replay every ceiling contact. Ask before your first game. If the ceiling is low, flatten the serve and the clears rather than lose points to the roof, and expect faster rallies than the plan above assumes.
Non-marking soles are the ticket in. Municipal gyms require them, and singles asks more of a shoe than doubles does: every rally is a sprint, a brake, and a push-off in a new direction. If you are still playing in running shoes, our badminton footwear collection is the one purchase that changes how you recover.
Which Singles Plan Should You Start With?
Fix the problem that is costing you the most points, not all of them at once. Match the symptom to a starting point, then follow the deep dive when the basics hold.
| If this is happening | Start here | Deep dive |
|---|---|---|
| You feel rushed after every shot | Question 1: high and deep to the middle, then base. Play Game 1. | Footwork basics |
| Your opponent stands comfortably at base all rally | Question 2: the far corner, space not player. Play Game 2. | Four-corner tactics |
| You smash and it keeps coming back | Question 3: pace only into space, contact in front. Play Game 3 and count. | When to smash in singles |
| The rally is over within three shots | High serve deep into the diagonal receiving box near its centre line, recover, read the return. | Serve and return game plan |
| You lose leads, or panic when behind | Same three questions, one point at a time. The score changes your risk, not your plan. | Strategy when leading or trailing |
| You cannot get a full court | Split the court and play straight-only singles. | Half-court singles games |
Singles gets simpler when every shot answers a question. If you are unsure whether your shoes, racket, or practice shuttles are getting in the way of the plan, contact us; we play, and we will point you at a practical next step rather than a shopping list.
Singles is won on recovery. Start with the shoes that let you recover.
Shop Badminton FootwearCanadian badminton specialty shop · CAD pricing · Ships across Canada

Leave a comment
This site is protected by hCaptcha and the hCaptcha Privacy Policy and Terms of Service apply.