
Last updated: July 2026 · Written by the team at Badminton House
Quick Answer: Senior Doubles Tactics
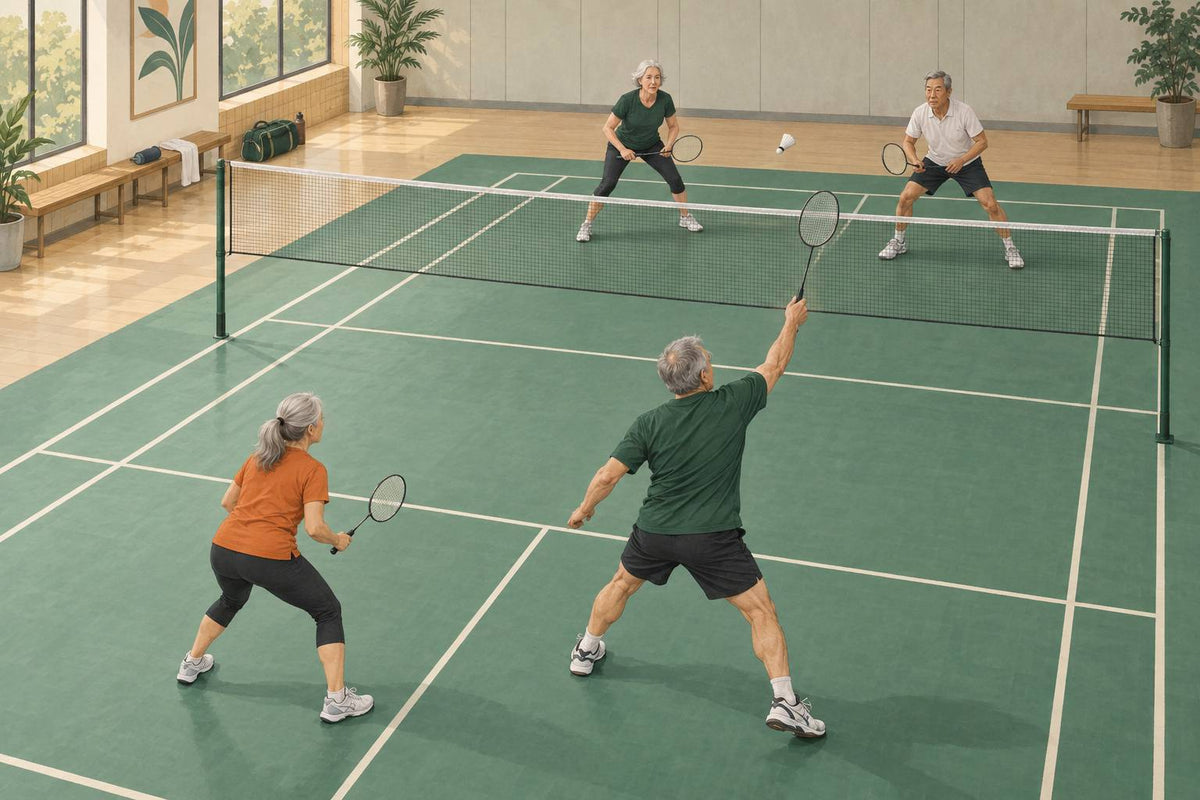
Win points more efficiently by letting your own shot decide the team shape: hit down and stay front/back; lift and recover side-by-side.
Default
Best pattern: after a low serve, smash, drop, or net kill, keep one player rear and one player front; attack straight or through the middle first instead of trying to win with a harder swing.
Lift
If you are off-balance, lift high and deep, then both partners move back into side-by-side defence; if you are balanced and the opponent is leaning forward, use a flatter attacking lob down the sideline.
Reset
When the rally gets fast, stay controlled: block, drive, or push to change pace, then recover together unless your pair has clearly won the attack back.
In senior doubles, the biggest tactical upgrade is not swinging harder — it is making the rally easier to read for both partners. If your shot goes down, hold the attack in front-and-back. If you lift, recover side-by-side and defend the full width. That one rule prevents a common club-play pattern: both players chase the same shuttle, leave gaps, then try to rescue the rally with late footwork.
These senior badminton doubles tactics are built around efficient points: low serves that start you in the right shape, straight attacks before risky cross-court swings, middle pressure to create hesitation, safe lifts when you must give up the attack, and short calls that let two players move as one. The goal is controlled pressure — not passive play, and not constant all-out smashing.
Think of this as a practical doubles system for club nights, league matches, and tournament games where long rallies add up. You will learn how to win more points by choosing repeatable patterns: place first, change pace second, and only swing harder when the court shape is already in your favour.
In This Guide
- Read Your Own Shot First: Down Means Attack, Lift Means Defend
- Use Two Court Shapes Instead of Four Individual Jobs
- Start Patient Placement from the Low Serve
- Attack Straight and Through the Middle Before Swinging Harder
- Change Pace Without Becoming Passive
- Lift Safely When You Must Give Up the Attack
- Recover Early and Use Short Calls
- Which Senior Doubles Choice Should You Make?
Read Your Own Shot First: Down Means Attack, Lift Means Defend

The most useful senior badminton doubles tactics start with one simple trigger: read your own pair’s shot first. If your side hits the shuttle downwards, you are attacking. If your side is forced to lift or clear, you are defending.
The trigger: hit down, stay front-back and keep the attack; lift or clear, recover side-by-side and defend the full width. For the complete movement system, see our badminton doubles positioning and rotation guide.
The two shapes you need
In doubles, you do not need four complicated individual jobs after every shot. You need two shared shapes.
| Your pair’s shot | Your shape | What each partner does |
|---|---|---|
| Smash, drop, net kill, downward push | Front-back attack | Rear player keeps pressure with smashes, drops, or controlled downward shots. Front player covers net and midcourt replies, looking for kills or shots that force another lift. |
| Lift or clear | Side-by-side defence | Both players move back into a defensive base so the pair can cover the full width of the doubles court and react to smashes, drives, and steep drops. |
When you are attacking, one player belongs in the rear court and one player belongs forward. The rear player should expect to cover most rear-court replies and continue the pressure. The front player should expect fast blocks, loose net replies, and midcourt shuttles that can be killed or pushed back down.
When you are defending, the court becomes too wide for one player to cover alone. A side-by-side base gives each partner a half-court responsibility and enough reaction time against a well-placed smash. A good defensive base is usually slightly behind the middle of your half, not standing too close to the net and hoping to guess correctly.
Post-smash: do not rotate just because you hit hard
After your pair smashes, the default is still front-back. The hitter normally stays at the back because the opponents’ most likely replies are blocks, drives, or lifts that continue the same attacking phase. The front partner stays alert around the net and midcourt, ready to intercept anything loose.
This is especially important in senior doubles, where efficient positioning prevents unnecessary court coverage. If the rear player smashes and then charges forward without a clear reason, the pair can leave the back court exposed. If the front player drifts backward too early, the opponents can block softly into the front court and escape pressure.
Simple check after your smash
- Did the shuttle travel downward from your side? Stay in attack.
- Is your partner already covering the front? Do not run into the same space.
- Did the opponents lift again? Rear player keeps the rear-court pressure; front player protects the net and midcourt.
Post-clear: accept that you gave up the attack
After your pair clears or lifts, the opposite is true. You have given the opponents the chance to hit down, so both partners should move into side-by-side defence. Do not leave one player stranded at the net just because they were the front player a moment earlier.
The mistake is treating a clear as a neutral shot. In doubles, a clear often invites the other pair to start smashing. Once your side sends the shuttle high, your next job is not to admire the length of the shot; it is to recover into a base that covers the width of the court.
For a practical defensive base, think: low posture, racket up, each player responsible for a half court, and both players ready to absorb pace. If you want the defensive footwork and recovery details, use our badminton defence ready position guide alongside the full rotation guide.
A rally example without overthinking rotation
Imagine your partner plays a controlled drop from the rear court. Because the shuttle travels downward, your pair is still attacking: your partner stays ready behind you, and you hold the front court for the net reply. If the opponents lift, nothing changes — your pair continues front-back.
Now imagine your front-court shot is too tight to the tape and you are forced to lift. The moment your side lifts, your pair changes jobs. You recover out of the front, your partner shifts with you, and both of you settle into side-by-side defence before the opponents hit down.
Why this works for senior doubles pairs
In adult and senior sessions where rallies are won by placement and consistency, this trigger keeps movement economical. You do not need to cover the whole court at full speed if your pair holds the correct shape early.
Use this as a starting rule for your doubles decisions: down means attack, lift means defend. Once both partners trust that trigger, the next tactical layers — placement, pace change, safer lifting, and short calls — become much easier to apply.
Use Two Court Shapes Instead of Four Individual Jobs
A useful shortcut in senior badminton doubles tactics is to stop thinking in four separate jobs: left front, right front, left back, right back. Once the shot direction has told you whether your pair is attacking or defending, simplify the rally into two repeatable court shapes.
- Front-back attack: one player works from the rear court, continuing the downward pressure with smashes, drops, and attacking placement. The partner stays forward enough to cover net replies and mid-court blocks, looking for kills or shots that force another lift.
- Side-by-side defence: both players cover the full 6.1 m doubles width, usually about one step back from the middle so there is enough time to react to smashes and fast drives.
That is the whole map. You are not trying to personally cover every corner. You are trying to arrive in the correct shared shape early, then trust your partner to own their half or zone.
Simple Court Map: Two Shapes on a Doubles Court
A doubles badminton court is 6.1 m wide and 13.4 m long. The diagrams below show the same court width, but focus only on your pair’s shape.
Front-back attack
Use this when your pair has kept the shuttle going down. The rear player supplies pressure; the front player protects the net and mid-court.
Side-by-side defence
Use this after your pair has had to give up the attack. Each player owns a side so a well-placed smash cannot simply pass through the open width.
The practical mistake is switching shapes late. If the rear player smashes and the front player drifts backward, the net is open. If your pair lifts and one player stays parked at the tape, the defenders no longer cover the full width. Senior pairs can win a lot of efficient points just by making the shape change clean and early.
| Situation | Shape to choose | Efficient cue |
|---|---|---|
| Your pair is applying downward pressure | Front-back | Rear player keeps the attack; front player hunts loose net and mid-court replies. |
| Your pair has to lift or clear | Side-by-side | Both players move back together and cover the full doubles width. |
| The rally becomes flat and fast | Usually side-by-side or slightly staggered | Absorb the pace first, then look for a block, drive, or push that wins the attack back. |
For the full rotation logic behind these shapes, use our badminton doubles positioning and rotation guide. For the shot choices that help you keep the front-back shape longer, see our doubles shot placement guide.
Start Patient Placement from the Low Serve
In senior badminton doubles tactics, controlled play starts before the rally feels fast. The low serve matters because it helps the serving pair avoid handing over the attack immediately. After a good low serve, the server does not drift backwards and wait; the server moves in to take the front court and part of the mid-court, while the partner is ready to cover the rear court.
That shape gives your pair a simple first intention: keep the shuttle going downward or flat enough that the opponents cannot attack freely. You are not trying to win with one heroic shot. You are trying to make the receiver play up, reach late, or hit a loose reply that your front player can threaten.
Serve with a job attached. A low serve is not finished when the shuttle leaves your strings. Serve, step forward, show your racket, and be ready to cover the net or mid-court reply. For the full serve mechanics, see our badminton doubles low and flick serve guide.
The first two movements after serving
Think of the serve as the start of your attacking shape, not as a separate skill. The server’s first step is forward and slightly ready for the middle: close enough to threaten net replies, but not so committed that every flat push goes past you. The partner behind should be ready for anything lifted or driven past the server.
- Server: cover the net, loose blocks, and reachable mid-court pushes. Keep the racket up so the receiver feels the threat of a kill.
- Partner: cover the rear court and be ready to continue the attack with a smash, drop, or controlled placement if the receiver lifts.
- Both players: read your own team’s shot. If your side keeps the shuttle downward, stay front-and-back. If your side is forced to lift, move back into side-by-side defence.
For many older club pairs, this is where points become easier. You reduce the amount of late chasing because each player knows the first job. The server does not chase every deep shuttle, and the rear partner does not crowd the front unless the rally clearly changes.
Use the push as a placement shot, not a panic shot
After the low serve, one of the most useful replies is a controlled push. The aim is not to blast the shuttle through the court. The aim is to find the gap in the opponents’ shape and hit with just enough pace to pass the forward player.
| Situation | Patient placement choice | Why it works |
|---|---|---|
| Receiver steps in hard and the front player is leaning toward the net | Push flat past the front player into the open mid-court lane | The pace is only high enough to clear the forward racket, so you keep control without gifting a clean counterattack. |
| Both opponents hesitate over the centre channel | Push or drive through the middle | The middle often creates confusion because both players may expect the other person to take it. |
| Opponent blocks short after your pair has kept pressure on | Take the shuttle early and push to the space behind the front player | You stay in attack by making the defenders move, instead of trying to end the rally with extra swing speed. |
| The rear defender is set and waiting for pace | Use a softer push or controlled drop into the front half | Changing the pace can disrupt a defensive rhythm, especially after several faster shots. |
A good push should feel almost boring: compact preparation, relaxed grip, and a clear target. If you swing too big, you give away the direction and lose the efficiency you were trying to create. For more detail on the stroke itself, pair this section with our badminton push shot technique guide and doubles shot placement guide.
Net shots keep the attack only if you threaten the kill
A tight net shot can be one of the most efficient shots in senior doubles, but only when the front player follows it properly. The reason the net shot keeps your attack is not just that it lands short. It works because your racket presence threatens a net kill, which pressures the opponents into lifting.
After you play the net shot, move in enough to cover the reply. If you play the net shot and admire it from too far away, the opponents can play another net shot back and escape the pressure. If you move in with your racket up, they feel the front-court threat and are more likely to lift, giving your rear partner another attacking chance.
- Good net-shot pattern: low serve, short reply, controlled net shot, step in, threaten the kill, force the lift.
- Risky net-shot pattern: low serve, short reply, slow net shot, no follow-up, opponents play back to the net and your team loses the initiative.
- Efficient front-court habit: show your racket early and make the opponent see that any loose net reply will be punished.
This is controlled play, not passive play. You are using placement to keep the rally in a shape your pair can manage: front player threatening the tape, rear player ready to hit down, and both players avoiding unnecessary court coverage. When games run back-to-back, that kind of efficient point construction matters just as much as raw power.
A simple serve-plus-one routine to practise
Try this as a repeatable doubles routine in practice. The goal is not to win every rally immediately; it is to make your first three shots organised.
- Serve low. The server steps forward into the front and partial mid-court role.
- Partner holds the rear. If the receiver lifts, the rear player attacks without both players drifting backwards.
- If the reply is flat, push with just enough pace. Aim past the forward player or through the middle gap rather than swinging harder.
- If the reply is short, play the net and move in. Your follow-up threat is what helps force the lift.
- If your pair must lift, call it and change shape. Once you give up the attack, recover into side-by-side defence instead of pretending you are still front-and-back.
If your pair keeps losing points immediately after the serve, the issue is often not the serve alone. It is the missing serve-plus-one plan. Start with a low serve, take the right shape, and use patient placement to make the opponents lift before you spend energy trying to finish the rally.
Attack Straight and Through the Middle Before Swinging Harder

When your opponents lift, they normally move into side-by-side defence to cover the full width of the doubles court. That is your cue to set your pair in front-back attack: the rear player keeps the shuttle travelling downward, while the front player looks for blocks, loose drives, and net replies.
For senior doubles, the goal is not to prove you can hit harder than everyone else. The goal is to make the defence solve simple, uncomfortable problems again and again.
Efficient attack rule. Before you swing harder, attack straight, attack the body, or attack through the middle. For more placement patterns, see our badminton doubles shot placement guide.
1. Smash straight down the sideline
If you receive a lift to your rear forehand or rear backhand corner, the safest first attacking choice is often straight. A straight smash or steep half-smash keeps the shuttle on your side of the court and gives your front partner a clear idea of where the next block may come from.
- Rear player: hit down the line and recover ready to continue the attack.
- Front player: shade toward the straight net reply without standing so central that you block your partner’s next shot.
- Why it works: the defender has less angle to counter compared with a loose cross-court attack.
This is especially useful when you are playing long rallies and want points that are controlled, not chaotic. A straight attack reduces recovery distance and keeps your pair organized.
2. Attack the body when the defender is set
If the defender is already balanced and waiting for the smash, hitting at the body can be more effective than aiming for a perfect sideline. A body smash, body half-smash, or firm drive can jam the racket arm and make the return sit up for your front player.
- Good target: the racket-side hip or torso rather than a flat hit directly into the opponent’s ready racket.
- Good pace: fast enough to pressure the defender, but controlled enough that you can recover for the next shot.
- Good follow-up: the front player looks for a weak block, loose lift, or panicked drive.
Body attacks are not flashy, but they are efficient. They ask the defender to make a quick decision under pressure instead of giving them a comfortable swing at a wide target.
3. Drive or smash through the middle when it opens
The middle is one of the smartest attacking zones in doubles. Many pairs hesitate for a split second because both defenders think the other player might take it. That hesitation is enough to create a weak lift, a loose block, or a communication error.
Use the middle when the defenders are stretched side-by-side, when one player has drifted too wide, or when both defenders are standing deep and waiting for a hard smash to the tramlines.
- Rear-court option: smash or half-smash between the two defenders, especially if the gap is visible.
- Mid-court option: drive flat through the centre when the shuttle is above net height and you can keep it legal and controlled.
- Front-court option: push into the middle gap with just enough pace to pass the front defender.
Do not think of the middle as a compromise target. In doubles, it can be the safest aggressive target because it limits sharp counter-angles and forces the defenders to communicate clearly.
A simple three-shot pattern
Try this pattern when the opponents lift and settle into defence:
- First attack: straight smash or half-smash down the sideline.
- Second attack: body smash if the same defender is now braced for the straight line.
- Third attack: drive, smash, or push through the middle if both defenders start leaning wide.
The rear player should still be ready to continue attacking after each shot, and the front player should be ready to intercept anything that floats. If your attack forces a lift again, stay in front-back shape and keep the pressure. If your pair is forced to lift, accept that the rally has changed and recover into side-by-side defence.
Change Pace Without Becoming Passive
For senior badminton doubles tactics, “controlled” does not mean “soft” or “safe for the sake of safe.” A controlled rally is one where your pair keeps the shuttle low, changes rhythm on purpose, and avoids giving the opponents a clean chance to attack.
The mistake is thinking every attacking shot must be harder than the last one. Several smashes can pin the opponents into side-by-side defence; once they are fixed there, a fast drop landing around the service line can break their rhythm without handing them time at the net. The key word is fast: you are changing pace, not floating a slow drop that lets them walk forward and take over.
Practice cue for club nights
Try a simple three-shot rhythm in a practice rally: smash straight, smash through the middle, fast drop to the service-line area. Your goal is not to hit winners immediately; it is to make the defenders adjust their base, racket height, and timing.
Shot 1
Smash straight to reduce the counter-attack angle and keep your partner confident at the front.
Shot 2
Drive or smash through the middle if both defenders hesitate or leave a seam between them.
Shot 3
Play the fast drop around the service line only after the defenders have been pushed into a low, reactive stance.
Use pace changes as pressure, not relief
A pace change should still ask an awkward question. If your fast drop forces the defender to reach forward and lift, it has done its job. If your block off a smash lands tight enough to make the attacker move, it has reset the rally. If your drive goes flat through a gap, it has changed the speed without giving up initiative.
| Rally situation | Controlled shot | What it should create |
|---|---|---|
| You have hit several rear-court smashes and both opponents are set in defence | Fast drop around the service line | A late forward step, a weak lift, or a loose net reply for your front player |
| You are defending a smash side-by-side | Block off the smash into the forecourt | A chance to absorb pace, pull the attacker forward, and look for a lift or loose push |
| The rally turns flat and both pairs are driving | Drive through the body or middle, then recover low | Less reaction time for the opponents and fewer big backswing attacks |
| The front opponent is hunting too close to the tape | Push with just enough pace to pass the front player | A gap behind the front player without needing a full-power swing |
This is especially useful in senior doubles because efficient pressure beats constant maximum effort. You can still be aggressive while choosing a smaller swing, a flatter contact, or a better target.
On defence, reset with blocks, drives, and pushes
When your pair is side-by-side, the first job is to cover the full width and absorb the attack. From there, do not only lift and wait. Mix in three simple reset shots:
- Block off the smash: use the opponent’s pace and guide the shuttle down so they must move forward instead of smashing again from comfort.
- Flat drive: if the smash or push is not steep, meet it early and drive through the middle or into the body to change the rally speed.
- Controlled push: when the front player is too close or the rear attacker is slow to recover, push into the space with enough pace to pass the racket, not with a wild swing.
After any of these shots, recover together unless your pair has clearly turned the rally back into attack. The moment your block forces a lift, you can rebuild front-back shape. If the opponents keep the shuttle down, stay side-by-side and stay patient. For the full defensive base, see our badminton defence ready position guide; for the attack/defence rotation logic, see badminton doubles positioning and rotation.
Keep the rally uncomfortable. A good reset shot does not have to win the point. It only needs to stop the opponents from hitting the same comfortable smash, drive, or net follow-up again.
Be careful with clears in doubles
A clear can feel safe because it buys time, but in doubles it usually gives the other pair the attack. Once you clear, they can move into front-back shape and start hitting down. Use a clear only when there is a compelling reason: you are off-balance, your partner is exposed, or a safer deep lift is the only way to survive the exchange.
If you must lift, choose the lift on purpose. When you are off-balance, lift high and deep. When you are balanced and the opponent is leaning forward, a flatter attacking lob down the line can be the better escape. For more detail on safe lifting targets, use our badminton lob shot guide.
The simple rule: change pace to keep pressure, not to escape responsibility. Smash to fix the defence, fast drop to disrupt it, block or drive to reset under pressure, and avoid the easy clear unless the rally truly demands it.
Lift Safely When You Must Give Up the Attack
Efficient senior badminton doubles tactics are not about pretending you can attack every shuttle. Sometimes the smartest shot is the one that admits, early, that your pair has lost the initiative.
If you are late, stretched, or off-balance, do not force a tight net shot or a flat push that sits up. Lift high and deep, give your partner a clear defensive signal, and move together into side-by-side defence. A safe lift may concede the attack, but it keeps the rally alive and prevents the easy kill.
Use this simple rule:
- Off-balance: lift high and deep so you have time to recover.
- Balanced, and the opponent is leaning forward: use a flatter attacking lob down the line.
The target matters. Aim your safer lifts and attacking lobs toward the sidelines, not low through the middle. A straight or wide sideline target gives the opponent less room to step in and intercept cleanly. A low lob through the centre often travels directly into the rear player’s hitting zone, which turns your “reset” into their next easy smash.
Safe lifting decision guide
| Situation | Best choice | Why it works |
|---|---|---|
| Late or reaching | High, deep lift | Buys recovery time and gives both players a clear cue to defend side-by-side. |
| Balanced with opponent leaning in | Flatter attacking lob down the line | Punishes a forward-leaning opponent without trying a low-percentage net winner. |
| Under pressure in the middle | Lift toward a sideline | Avoids feeding a low central shuttle into the opponent’s easiest interception zone. |
The mistake is not lifting. The mistake is lifting halfway, low, and central while your partner is still standing as if you are attacking. Once your lift leaves the strings, both players should read the same message: the attack is gone, so recover together.
For the shot mechanics and target choices, use the badminton lob shot guide. For the base position after you lift, review the badminton defence ready position guide, especially the idea of returning to the same low defensive base unless your pair has clearly turned the rally back into attack.
This is especially useful in club-night doubles, where rallies often include mixed speeds, changing partners, and quick transitions. A clear, safe lift followed by an early side-by-side recovery is usually better than one more rushed shot that leaves both players guessing.
Recover Early and Use Short Calls
Efficient senior doubles is not just about choosing the right shot. It is also about stopping the rally from pulling both partners into random movement. After the first defensive contact, recover together to the same low base unless your pair has clearly taken the attack back.
That shared base matters because one good block, drive, or counter-push does not automatically mean both players should rush forward. If only one partner moves and the other stays trapped, the next shot often exposes the open half of the court. Think of recovery as a pair habit: hit, rebalance, check partner, then move again.
Simple recovery rule
After the first defensive shot, both players return to a low side-by-side base. Only break that shape when the next shot has clearly given your pair the front-and-back attack again.
The common movement leaks
Most wasted movement in senior doubles comes from uncertainty, not effort. These are the errors to remove first:
- Both players chasing the same shuttle: one player moves, the partner also moves, and the far side is left open.
- Standing too central and forward at the net: the front player feels involved, but blocks the partner’s lane and becomes late to cover wide replies.
- Overcommitting without partner cover: a hard lunge or big interception attempt is useful only if your partner can protect the space behind it.
- Recovering at different speeds: one player resets low while the other watches the shot, leaving a seam between the two bodies.
A good test: after your pair defends the first smash, pause the video or ask a partner where both of you are standing. If you are staggered by accident, too close together, or both leaning toward the same sideline, the next rally problem is already being created.
Use calls that are short enough to say under pressure
Long explanations do not work during a fast doubles exchange. Use calls that are clear, short, and agreed before the game starts:
| Call | Use it when | What it prevents |
|---|---|---|
| “I got it” | You are already balanced and best positioned to take the shuttle. | Two rackets arriving at the same contact point. |
| “Yours” | Your partner has the better angle or is moving forward into the shot. | Late hesitation in the mid-court seam. |
| “Back” | Your pair needs to reset together after a defensive contact. | One player staying too far forward while the other is left covering both rear corners. |
The call should happen early, not after both players have already moved. For many club-night pairs, the easiest improvement is choosing one default caller for shuttles in the seam: for example, the player facing the shuttle calls first, and the partner obeys unless the call is impossible.
A two-minute partner reset drill
Try this between games or during a quiet practice court:
- Start side-by-side in a low defensive base.
- One partner blocks or drives a feed, then both players recover together before the next feed.
- The feeder sends one shuttle into the middle seam every few shots.
- The receiving pair must use only “I got it,” “yours,” or “back.” No extra talking until the rally ends.
Keep the drill slow enough that the calls are calm. The goal is not to win the feed; it is to make the recovery automatic. Once the habit is stable, increase pace and add a loose net reply so the pair has to decide whether to stay low together or move into attack.
For the full court-shape logic behind these habits, pair this section with the badminton doubles positioning and rotation guide and the badminton defense ready position guide.
Which Senior Doubles Choice Should You Make?
Use this as the match-day shortcut: choose the shape, shot, or call that protects your pair’s court coverage first, then look for the efficient point-winning option. It works well for club nights, league play, and senior tournament doubles because it keeps decisions simple under pressure.
| Choose this | When it is the best call | Efficient cue |
|---|---|---|
| Front-back attack | Your pair has hit downwards: smash, drop, net kill, or a net shot that threatens a lift. | Rear player keeps pressure; front player hunts net and mid-court replies. |
| Side-by-side defence | Your pair has lifted, cleared, or is absorbing smashes and flat exchanges. | Cover the full court width, stay low, and recover together after the first defensive touch. |
| Low-serve pressure | You are serving and want to avoid giving the receivers an immediate attacking chance. | Server takes front and part of mid-court; partner is ready behind. |
| Straight or middle attack | The opponents have lifted and are set side-by-side. | Start with straight pressure or the centre channel before trying a bigger angle. |
| Change of pace | Opponents are settled into repeated smash defence or predictable flat rhythm. | Use fast drops, blocks, drives, and pushes to disturb timing without becoming passive. |
| Safe lift | You are late, stretched, or cannot keep the attack with a controlled net, push, or drive. | If off-balance, lift high and deep; if balanced, consider a flatter attacking lob down the line. |
| Short call | The shuttle is between partners, or one player must switch from front to back coverage. | Use simple calls such as “I got it,” “yours,” or “back” instead of both players chasing. |
For deeper follow-up, use the doubles positioning and rotation guide for shape changes, the doubles shot placement guide for target choices, and the lob shot guide for safer lifting decisions.
Get 10% off your first order
Join the Badminton House list and we’ll email you a 10% welcome code — plus subscriber-only restock alerts, giveaways, and honest gear advice from players.
By subscribing, you agree to receive Badminton House emails and can unsubscribe anytime.
Efficient senior doubles is about making the next shot easier for both partners: read your own shot, use the right shape, place before you force, and recover early. For a separate equipment decision, use our senior-friendly racket guide or contact us for advice.
Need a racket that fits controlled doubles?
Browse our badminton racket collection and check live availability. If you’re unsure about weight, balance, or flex, ask us before you buy.
Check Live Racket Availability10% off first order · Free shipping on $200+ · 14-day returns · Canadian badminton specialty shop

Leave a comment
This site is protected by hCaptcha and the hCaptcha Privacy Policy and Terms of Service apply.