Last updated: June 2026 · Written by the team at Badminton House
Quick Answer: Badminton Doubles Shot Placement
Choose placements that force a lift: straight and centre shots are the safest default, then use body jams and four-corner movement to open bigger gaps.
Default
Straight or centre: keep smashes, drops, and net shots mostly straight or between the two defenders so the shuttle travels a shorter distance and creates less counter-attacking angle.
Jam
Body or racket-side hip: aim at the defender when you want to cramp the swing, create forehand/backhand hesitation, and make the next reply weaker.
Stretch
Four corners: use straight and angled drops or pushes to move the pair apart, then attack the gap between them when their formation opens.
If your doubles rallies feel chaotic, the problem is often not that you lack power — it is that your shots are letting the other pair stay comfortable. In doubles, a decent smash to the wrong place can be easier to defend than a simple push, net shot, or body attack that forces the opponents to take the shuttle below net height.
Badminton doubles shot placement is about choosing targets that make the other side lift. Once they lift, your pair can move into attack, keep hitting downward, and build pressure with safer, higher-percentage choices: straight angles, centre targets, shots between the two players, backhand-side pressure, and body shots that jam the defender.
Build the attack around smart placement, not just harder swings. If you are upgrading your setup for doubles pressure and rear-court finishing, start with our badminton rackets collection. Orders over $200 ship free in Canada.
In This Guide
- Badminton doubles shot placement starts with forcing lifts
- Use straight and centre shots as your default angles
- Target the gap between the two players
- Aim at the backhand side and body to jam the defender
- Front-court placement: straight net shots and pushes past the front player
- Spread the pair to the four corners to open the gaps
- When the lift comes, finish with a steep downward attack
- Which Doubles Placement Should You Choose?
Badminton doubles shot placement starts with forcing lifts
The first rule of badminton doubles shot placement is simple: stop thinking only about winners. In strong doubles, the better target is often the one that makes your opponents contact the shuttle below net height, so their safest reply is to lift. Once they lift, your side gets the next attacking chance.
That is why attack and defence in doubles are not just about who hit the last hard shot. They are usually determined by which pair was forced to lift. If your pair can keep the shuttle travelling downward or flat, you can stay on offence. If you are forced to lift, you normally surrender the attack and prepare to defend the smash.
Think “lift first, winner second.” A good doubles placement does not need to end the rally immediately. It should make the next reply weaker, higher, or more predictable so your pair can keep attacking.
For Canadian club players, this mindset changes a lot of everyday rallies. Instead of trying to blast through two defenders from a neutral position, ask: Can I make them hit up? A tight net shot, a push past the front player, a controlled drop, or a steep smash can all do the same tactical job if they force the other pair to lift.
Once the lift comes, the standard doubles pattern is to keep applying pressure with more aggressive downward shots until there is a clear chance to finish. The rear player usually supplies the downward pressure, while the front player looks to intercept weak blocks, loose drives, and half-court replies. If you want the positioning piece that supports this, read our badminton doubles positioning and rotation guide.
The mistake is treating every shot like it must be spectacular. A half-power smash that lands steep and forces a lift is often more useful than a flat full-power smash that gives the defenders an easy counter-drive. A controlled attacking shot keeps the rally on your terms; a rushed winner attempt can hand the attack back.
Use this test during your next doubles session: after each shot, ask whether your placement made the opponents hit upward, sideways, or downward. Upward is what you want. Sideways can still be useful if it keeps them late and uncomfortable. Downward usually means you gave them the attack.
This is also where equipment should support tactics rather than replace them. An attacking racket can help when you already have the lift and want a steeper finish, but placement creates that chance first. If you are comparing frames for a more attacking doubles game, check the live badminton rackets collection; Badminton House offers free Canadian shipping on orders over $200.
Everything else in this guide builds from this idea: choose placements that make opponents lift, then keep the shuttle going down until the rally is yours to finish.
Use straight and centre shots as your default angles
In badminton doubles shot placement, your safest attacking pattern from the rear court is simple: hit straight or through the centre unless you have a clear reason not to. That applies to both smashes and drops. Straight and centre shots keep the shuttle travelling on a shorter path, give defenders less time, and help your front-court partner stay in the right place to intercept the next reply.
A straight smash from a rear corner is usually the high-percentage choice because it travels the shortest distance to the defender. The shorter the flight, the less time the defender has to react, and the less the shuttle slows before it reaches them. In doubles, where defenders are already set side-by-side and looking for counter-attacks, that time difference matters.
Cross-court smashes have the opposite problem. They travel farther, so the shuttle slows more and the cross-court defender gets more time to prepare. A well-positioned cross-court defender can also stand a little closer to the net than their partner, which gives them better chances to block, drive, or counter into space. That is why cross-court power can look exciting but often gives away the pressure you worked to build.
Simple doubles rule: if you are attacking from the rear court, make straight and centre your defaults. Use cross-court only as a deliberate variation, not as your main pattern.
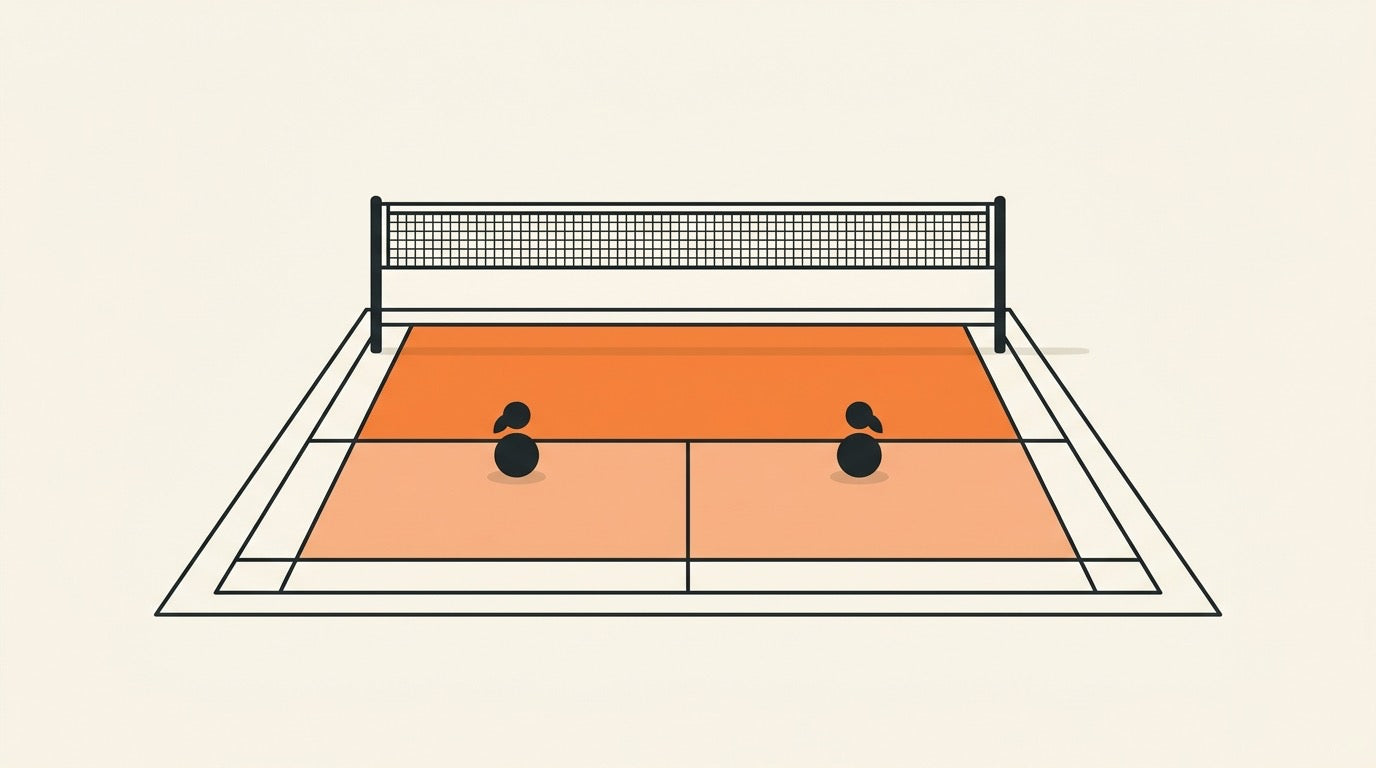
Why straight shots fit doubles positioning
The rear player’s shot choice is tied directly to the pair’s formation. In the attacking formation, one player works from the back and hits downward while the partner covers the front. When the rear player attacks straight, the reply often comes back straight as well, which lets the front player stay roughly parallel to the attack and look for interceptions.
If you attack cross-court without a clear plan, you can pull your own formation out of shape. Your front player may be covering the wrong channel, and your pair may be late to rotate if the defenders block or drive into the open side. For the formation side of this, see our badminton doubles positioning and rotation guide.
| Rear-court choice | Why it works or fails | Best use |
|---|---|---|
| Straight smash | Shortest flight from the corner, less reaction time for the defender, and easier coverage for your front partner. | Default attacking shot from a rear corner. |
| Centre smash or drop | Can create uncertainty between defenders and limits their counter-attacking angles. | Strong variation, especially when the defenders are spread or hesitating. |
| Cross-court smash or drop | Longer flight gives the defender more time and can expose your own formation if your partner is not ready. | Occasional surprise, not the main doubles pattern. |
Do not mistake cross-court for “advanced”
Many improving players like cross-court drops and smashes because they feel more technical. In doubles, that can be a trap. A shot is not better because it crosses the court; it is better when it makes the defenders contact the shuttle late, low, or awkwardly, and when it keeps your own side ready for the next ball.
A cross-court drop from the rear corner may look clever, but if it travels slowly into the defender’s hitting zone, they may step forward and counter before your side can adjust. A cross-court smash can have the same issue: instead of forcing a weak lift, it may give the defender time to block into the open straight side.
Use the cross-court option when you have created it: the straight defender is leaning, the centre is covered, your partner has read the rotation, or the defenders have started overcommitting to your straight attack. Until then, straight and centre are not boring choices. They are the shots that let your pair keep hitting down, keep the attack, and make the next shot easier.
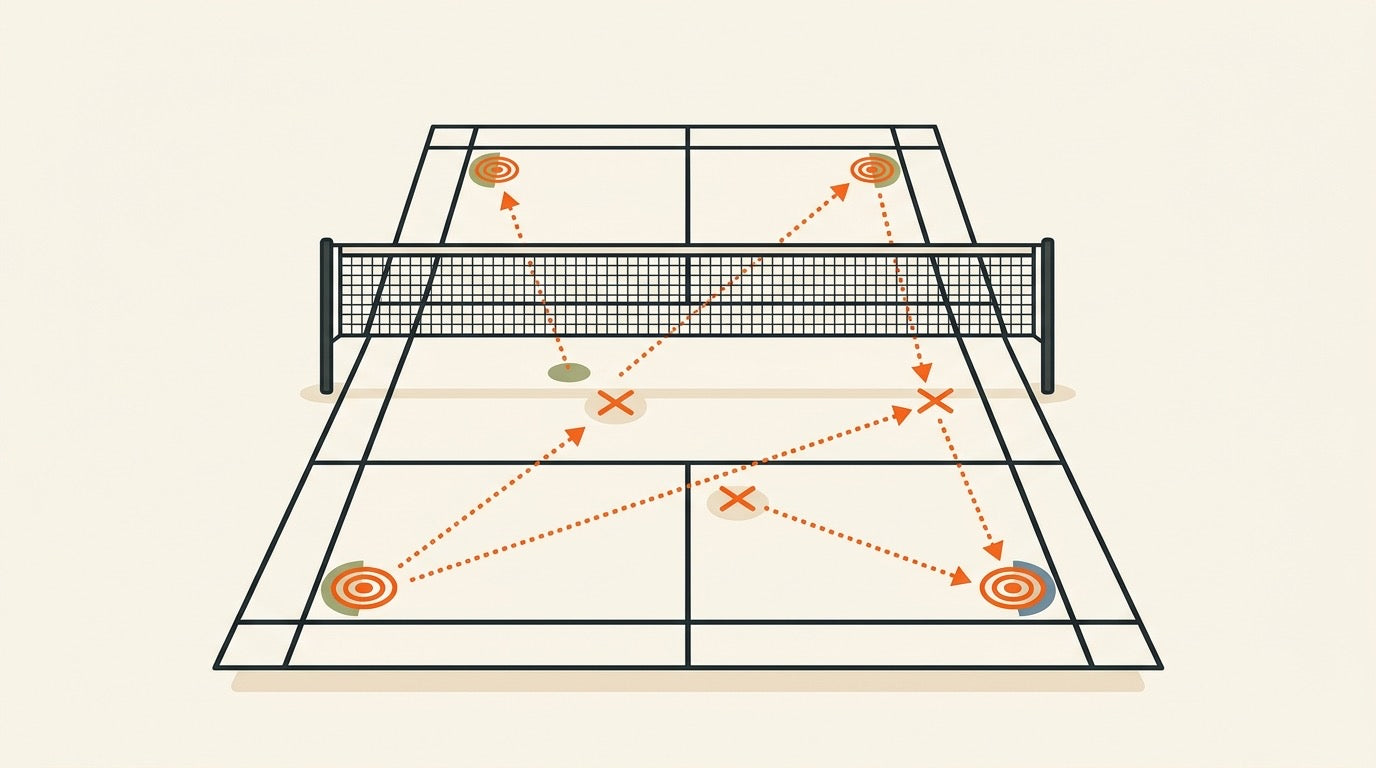
Target the gap between the two players
The first specific badminton doubles shot placement pattern to build into your attack is simple: hit between the defenders. Not at the sideline. Not automatically cross-court. Aim into the seam where both opponents have to decide, in a split second, who is responsible for the shuttle.
This works especially well on smashes and drops. A smash between the two players can create that awkward “yours or mine?” hesitation; a drop between them asks the same question at a softer pace and lower contact point. Even a tiny delay is enough for your front-court partner to move in, threaten the next shot, and keep your side on attack.
Best middle-gap pattern: when you are attacking from the middle of the rear court, send the smash or drop back through the middle seam. It is a short, direct route, it creates responsibility confusion, and it gives the defenders fewer useful counter-attack angles.
Where exactly is the gap?
Do not think of the “middle” as one fixed line painted on the court. In doubles, the real target is the space between the two defenders’ racket zones.
- From the centre rear court: aim straight down the centre channel between both defenders.
- From a rear-court corner: aim between the players, usually a little closer to the straight-side defender rather than the exact centre line.
- On a drop shot: place it between the opponents so both must move forward and inward at the same time.
That slight adjustment from the corner matters because the cross-court defender is typically positioned closer to the middle than the straight defender. If you aim at the exact centre line from the corner, you may feed the player who is already better placed to intercept.
Use the middle gap to help your partner
The middle target is not only about winning the point with one shot. It is also about making the next reply predictable. If the defenders are late, cramped, or unsure, their block or lift often becomes loose enough for your front player to threaten the interception.
This is why the middle-gap attack fits so well with proper doubles rotation. In a front-back attacking shape, the rear player pressures the seam while the front player reads the weak reply. If you want the positioning side of this to feel automatic, pair this section with our badminton doubles positioning and rotation guide.
| Your contact point | Middle-gap target | What you want |
|---|---|---|
| Rear-court middle | Straight through the seam | Confusion, late defence, and fewer counter-attack angles |
| Rear-court corner | Between players, slightly toward the straight side | A weaker straight-side defensive reply your partner can hunt |
| Half-court attacking lift | Steep smash into the body-side seam | A blocked reply below net height or a short lift |
| Disguised drop opportunity | Soft drop between both defenders | Both players hesitate or move inward, opening the next gap |
Training cue for club night
For one game, make the middle gap your default attacking target whenever you get a lift. You are not trying to smash harder every time; you are training your eyes to find the seam before you swing. If the defenders start squeezing the middle, that is your signal that other placements — body shots, backhand-side pressure, and four-corner stretching — will become easier later in the rally.
A powerful rear-court frame can help if your technique is already sound, but placement comes first. Badminton House carries a growing badminton rackets collection; stock changes, and Canadian orders over $200 qualify for free shipping.
Aim at the backhand side and body to jam the defender
Once you have a lift and can hit down, do not only think “hit harder.” In badminton doubles shot placement, a very high-percentage target is the defender’s weaker backhand-side area, then the body line that cramps their swing.
The key body target is around the defender’s racket-side hip. That area is awkward because the defender is stuck between choices: backhand defence is starting to become less effective there, but a forehand defence is still uncomfortable. The result is hesitation, a shorter swing, and weaker replies that your front player can intercept.
Simple doubles target order
- Backhand side: use it as a natural pressure point, especially when the defender is late or leaning forehand.
- Racket-side hip: aim there to make the defender unsure whether to use forehand or backhand defence.
- Chest or head line on flatter attacks: a flat-smash variation can be aimed directly at the opponent, including toward the head or chest, to reduce their reaction time.
- Same defender again: attacking drives are most effective when played directly at the opponent, especially the defender who just returned your partner’s smash and has almost no recovery time.
This does not mean swinging recklessly at your opponent. It means choosing a line that gives them no comfortable extension. A smash slightly outside the body may let them block cleanly. A smash into the hip or chest line forces the racket to get tucked in close, which often creates a loose block, a weak lift, or a rushed drive.
For club players, the best pattern is simple: smash steep to the hip or backhand-side channel, have the front player expect a short block, and keep drilling the same defender if their replies are getting weaker. Switching targets without a reason often lets the pair reset.
| Target | Why it works | Best used when |
|---|---|---|
| Backhand side | It attacks a weaker defensive side and limits clean counter-attacks. | The defender is late, stretched, or expecting a straight body smash. |
| Racket-side hip | It sits between comfortable backhand and forehand defence, creating hesitation and a cramped swing. | You have a good downward angle and want a weak block or lift. |
| Chest or head line | A flatter smash aimed directly at the opponent can be difficult to handle, especially for players who struggle when the shuttle comes into the body. | You are using a controlled flat-smash variation, not a full-power smash that risks travelling long. |
| Same defender again | The defender who just returned a smash has less time to recover before the next drive or attack. | Their blocks, lifts, or drives are starting to sit up. |
If you are the defender, this is exactly why your ready position matters. A relaxed grip, compact racket position, and balanced base make body attacks less effective; for more on that side of the rally, see our badminton defence ready position guide and smash defence guide.
If your own game is built around rear-court pressure, you can browse the live badminton rackets collection. Recent attacking frames listed there included the Yonex Astrox 100 ZZ at $299.99 CAD and Yonex Astrox 100VA Game at $349.99 CAD, both marked sold out, so use the collection page for current availability; Canadian orders over $200 ship free.
Front-court placement: straight net shots and pushes past the front player
In doubles, the front player is not just waiting for a loose shuttle to kill. Their job is to keep the attack alive by choosing placements that stop the opponents from counter-attacking. Most of the time, that means playing straight or centre net shots, then using a push with just enough pace to pass the opposing front player.
A good push is not a flat drive. It has enough speed to get past the front-court opponent, but because it is slower than a drive, it can fall well below net height before the back player reaches it. That is exactly the outcome you want: the back player often has to lift, or attempt a risky counter-attack from a poor contact point.
Front-court rule of thumb: if you cannot kill the shuttle, make the next opponent hit up. For more detail, see our guides to badminton net play shot selection and badminton push shot technique.
Why straight net shots are the safe default
Straight net shots keep your side better positioned for the next ball. If you play a cross-court net shot, you open your court to a straight counter-attack, which is dangerous in doubles because the straight counter travels quickly into space.
Straight net shots also give you a quality advantage: they can be played with spin. Cross-court net shots cannot use spin in the same way, so they often sit up more and give the opponent a clearer chance to pounce.
- Play straight when you are tight to the tape and want to keep your front-back attack organized.
- Play to the centre when the opponents are split and you want to create hesitation without exposing a wide angle.
- Avoid casual cross-court net shots unless you have a clear tactical reason, because they can invite a fast straight reply.
How to use the push past the front player
The push is best when the opposing front player is hunting too close to the tape. Instead of lifting over them or driving through them, guide the shuttle into the gap just past their racket. The goal is not maximum power; it is controlled pace that gets beyond the front player and drops low before the rear player can attack it.
| Front-court choice | Best target | What it should create |
|---|---|---|
| Straight spinning net shot | Tight to the net on your straight side | A weak lift or a loose net reply your partner can attack behind you |
| Centre net shot | Between the two opponents | Hesitation over who takes the shuttle, without giving away a wide counter angle |
| Straight push | Down the side tramline, just past the front player | A low contact for the rear player, often forcing a lift |
| Cross-court push | Use sparingly | It passes through the front opponent’s hitting area, so it is easier to intercept than many players expect |
One common mistake is pushing too hard. If your push turns into a flat drive, the back player may contact it around net height and counter-attack. If your push is too soft, the front player intercepts it. The useful version is in between: enough pace to pass the front player, not so much pace that it stays high for the back player.
What to practise at Canadian club night
In a doubles drill or drop-in game, watch the opposing front player’s racket. If they are leaning in for a net kill, push behind them. If they are hanging back, play tight and straight to make them lift. That small adjustment is often the difference between keeping the attack and handing it away.
- Set the target: one shuttle-width past the front player’s reach, not deep into the rear court.
- Use compact preparation: show the same racket position for a net shot and a push so the front player cannot jump early.
- Recover forward: after the push, stay ready for a loose block or panicked net reply.
- Keep the pattern simple: straight net, straight push, centre net. Make the opponents lift before you look for fancy angles.
Spread the pair to the four corners to open the gaps
Four-corner placement in doubles is not the same idea as a slow singles rally. In singles, moving an opponent corner to corner can be a patience game. In doubles, the goal is sharper: stretch the pair just enough that the middle, backhand-side, and body gaps become easier to attack on the next shot.
Think of it as controlled stretching, not aimless variety. If both defenders are compact and comfortable, your smash to the body or gap between them is harder to finish. But once you pull one defender toward a side tramline or make the front player cover a wider lane, the next downward shot has a cleaner target.
"In doubles, four-corner placement is valuable only when it helps you create the next lift, weak block, or jammed defence."
Aim drops toward the side tramlines, not at the defender
When you use a straight or cross-court drop from the rear court, place it toward the side tramlines. The reason is simple: the defender has to move slightly farther to reach the shuttle. Unlike smashes and drives, drops do not gain much by being hit directly at the opponent; they work better when they make the pair shift and cover more court.
This is where doubles players often get trapped. A cross-court drop can look clever, but if it is loose or predictable, it gives the other side time to counter. Use it as a change-up to stretch the formation, not as your default attacking angle. Your safer rhythm is still straight or centre first, then wider when the defenders start sitting on those lanes.
| Placement choice | What it does to the pair | Best follow-up |
|---|---|---|
| Straight drop toward the side tramline | Makes the straight defender move wider and lower while your front player can stay connected to the reply. | Look for a net interception, weak lift, or body smash on the same defender. |
| Cross-court drop toward the side tramline | Pulls the opposite defender away from the middle, but gives the shuttle a longer path and more time in the air. | Use sparingly, then be ready for the straight counter or a rushed lift. |
| Push past the front player down a side lane | Finds the gap in the formation and makes the back player take the shuttle lower. | Move forward with your partner and prepare to attack the lift. |
| Next attack through the middle, backhand side, or body | Punishes the space created after the pair has been stretched. | Hit down again and keep the opponents below net height. |
Do not turn it into a singles-style clear-and-wait rally
The mistake is trying to “use all four corners” by playing patient clears and neutral shots until something appears. In doubles, lifting too often usually hands the attack away. Your four-corner work should still serve the main doubles goal: make the opponents contact the shuttle below net height so they have to lift, block loosely, or defend from an awkward body position.
A useful pattern is: straight pressure, wide drop or push, then attack the new gap. For example, after two straight downward shots, a drop toward the straight side tramline can make the defender reach wider. If their partner shifts across to help, the middle gap opens. If the same defender recovers late, the backhand-side or racket-hip body target becomes available.
Practice cue. In your next Canadian club night, do not count “four corners” as four winners. Count how often your wide drop or push creates the next lift. For the front-court details behind this pattern, see our badminton push shot guide and net play shot selection guide.
How to know the four-corner spread is working
- The defenders stop standing comfortably side by side. One player is pulled wider, lower, or later than the other.
- The middle becomes less protected. Your next smash or drop between the two players creates hesitation.
- The body shot becomes more awkward. A stretched defender has less time and space to choose forehand or backhand defence.
- Your side keeps hitting downward. If your “spread” leads to you lifting first, the pattern has drifted away from doubles attacking logic.
If you want the positioning layer behind this, pair this section with our badminton doubles positioning and rotation guide. The shot only works when your partner is ready to cover the reply it is most likely to create.
When the lift comes, finish with a steep downward attack
All the earlier placement choices have one purpose: make the opponents take the shuttle below net height, lift it, and give your side the attack. Once that lift comes, do not reset the rally with a casual clear. The rear player should keep hitting downward while the front player looks to intercept the weak block, drive, or half-lift.
In doubles, the pair that lifts is usually defending; the pair that can keep hitting down is attacking. That is why your first attacking thought should be steepness before raw power. A steep smash is harder to counter because the shuttle is farther below net height when the defender contacts it, which makes their reply more likely to lift or sit up for the front player.
Use a simple finish pattern
- First smash: go steep and high-percentage — straight, centre, between the players, or into the racket-side hip.
- Next ball: if the defence lifts again, repeat the downward pressure instead of trying a low-percentage cross-court winner.
- If the defenders back up: mix in a controlled drop shot to the same straight or centre channels, then be ready for the lift that follows.
- If the return is loose: the front player finishes with an interception or net kill before the defenders can recover side-by-side.
For the rear player, this is where technique matters. If your smash is flat, late, or drifting long, the defenders get counter-attacking chances. Work on contact height, shoulder rotation, pronation, and recovery in our badminton smash technique guide. If you want a softer way to keep the shuttle moving downward without over-hitting, add the straight attacking drop from our badminton drop shot guide.
Gear note for attacking players. Head-heavy attacking rackets can suit players who want help finishing steep from the rear court, but availability changes. The attacking Astrox frames checked for this guide were sold out at the time, so check the live badminton rackets collection for current Canadian availability. Badminton House offers free Canadian shipping on orders over $200.
The best doubles attacks are not just harder — they are cleaner. Force the lift, hit down steeply, keep the next shot in front of your partner, and make the defenders prove they can survive more than one downward ball in a row.
Which Doubles Placement Should You Choose?
For practical badminton doubles shot placement, choose the target that keeps the shuttle travelling down or forces the opponent to take it below net height. If you are unsure, start with straight or centre placements, then add body shots, pushes, and side-tramline drops as variations.
| Choose this placement | Use it when... | Why it works |
|---|---|---|
| Straight smash or drop | You are attacking from a rear-court corner and want the highest-percentage angle. | The shuttle travels a shorter distance than a cross-court shot, giving the defender less time and helping your front player stay ready for the straight reply. |
| Middle smash or middle drop | The defenders are side-by-side or you can aim between them. | It can create uncertainty over who takes the shuttle, and from the middle of the court it gives opponents weaker counter-attacking angles. |
| Body shot at the racket-side hip | A defender is set and returning your attacks cleanly. | The racket-side hip is awkward because it sits between comfortable backhand and forehand defence, cramping the swing and creating hesitation. |
| Attacking drive at the same defender | Your partner has just forced a weak or rushed return from one opponent. | Driving directly at the same player gives them little recovery time, and repeated pressure can make their returns weaker. |
| Straight net shot | You are at the front and want to keep your pair well positioned for the next shot. | Straight net shots preserve your positioning, and they can be played with spin; cross-court net shots open your court to straight counter-attacks. |
| Push past the front player | You see a gap beside the front player and can use just enough pace to get the shuttle past them. | A push is slower than a drive, so it can fall below net height before the back player reaches it and force a lift or risky counter-attack. |
| Side-tramline drop | You want to stretch the defending pair toward the corners instead of hitting at them. | For drops, aiming toward the side tramlines makes defenders move farther; unlike smashes, there is no advantage in aiming drops directly at opponents. |
| Avoid cross-court smash as your default | Use only as a deliberate variation, not because it feels more advanced. | Cross-court smashes travel farther, slow more, and give the cross-court defender more time and stronger counter-attacking chances. |
This decision table also depends on formation: in attack, one player works from the rear court while the partner hunts at the front. If that rotation feels unclear, read our badminton doubles positioning and rotation guide before adding more shot options.
Gear note for attacking doubles. If your plan relies on steep rear-court smashes, check the live badminton rackets collection for current attacking-frame availability. Badminton House offers free Canadian shipping on orders over $200.
Get Canadian badminton gear advice + restock alerts
Join the Badminton House list for buying checklists, restock alerts, and practical gear advice for Canadian players.
By subscribing, you agree to receive Badminton House emails and can unsubscribe anytime.
Good doubles shot placement is a habit you build rally by rally: make the other pair lift, stay patient with straight and centre targets, then punish the loose reply with a steep attack. We play badminton ourselves, so if you want help matching your racket, strings, or grip setup to a faster doubles game, contact Badminton House and we’ll point you in the right direction.
Build a doubles setup that helps you keep the attack
Browse current badminton racket availability for frames that suit fast front-court interceptions, rear-court pressure, and steep finishing shots.
See Badminton RacketsFree Canadian shipping on orders over $200 · Canadian badminton specialty shop
Leave a comment
This site is protected by hCaptcha and the hCaptcha Privacy Policy and Terms of Service apply.