Last updated: June 2026 · Written by the team at Badminton House
Quick Answer: Badminton Wall Drills
Start with slow wall taps from about 2–3 metres away, then build into faster drives once you can keep the rebound controlled.
Default
Controlled taps: best starting point for most players because it grooves timing, contact point, and forehand/backhand rhythm before speed makes the drill messy.
Drives
Use continuous wall drives when you want faster hands: contact slightly in front, keep the swing short, and tighten the grip only at impact.
Grips
Alternate forehand and backhand rebounds to train relaxed grip changes; keep the racket loose during the switch, then squeeze at the hit.
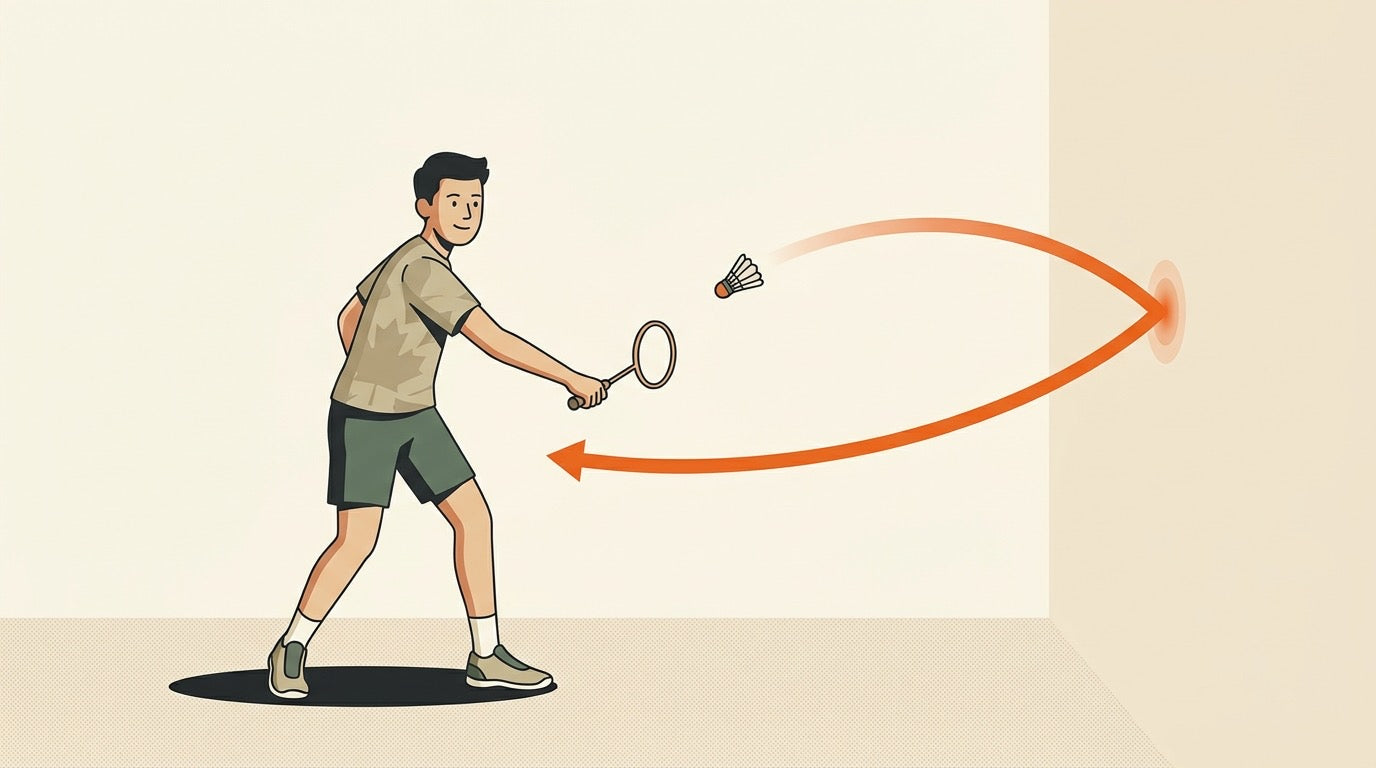
No partner, no booked court, and only a small patch of space? Badminton wall drills are one of the most practical ways to keep your touch sharp when you cannot get onto a court. With a racket, a few shuttles, a flat wall, and enough room to move safely, you can build cleaner contact, faster hands, and better forehand-to-backhand grip changes on your own.
The wall is useful because it gives the shuttle back quickly. That quick rebound forces you to stay balanced, relax your grip between shots, and tighten only at impact instead of taking a big swing every time. Used properly, wall practice can improve reaction time and stroke consistency; it should still support your regular court play, not replace it.
This guide keeps the progression simple: set up a sensible target, start with controlled taps, then build toward continuous drives, pace changes, and short solo sessions that fit around Canadian school gyms, club nights, winter weather, and busy weeks.
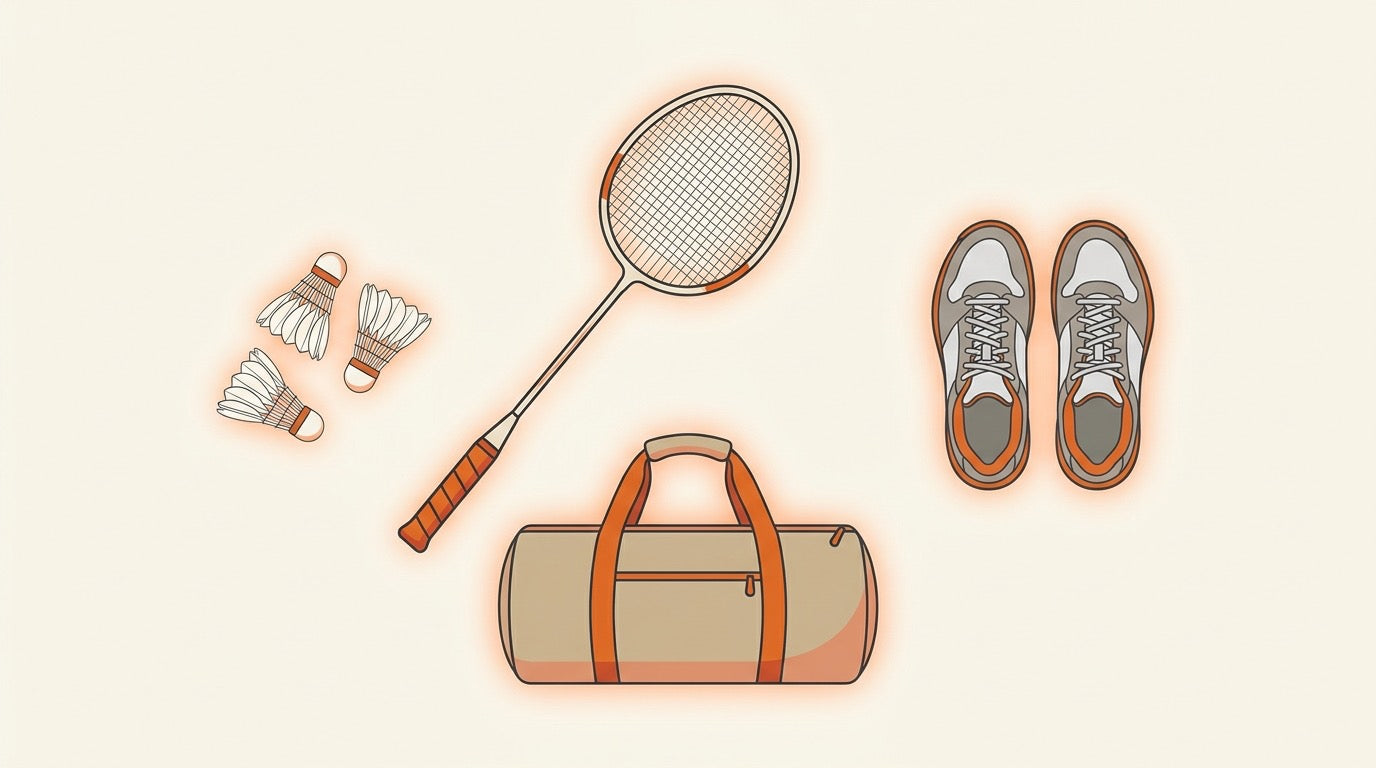
Check your racket before you start. Wall drills reward a racket you can hold loosely and move quickly. Browse the badminton rackets collection for current options, and remember that Canadian orders over $200 qualify for free shipping.
In This Guide
- Why Badminton Wall Drills Work for Solo Practice
- Set Up the Wall: Net Line, Distance, and Ready Stance
- Start With Controlled Taps Before Speeding Up
- Build Reaction Speed With Continuous Wall Drives
- Use Wall Rebounds to Train Grip Changes
- Targets, Pace Changes, and Short Solo Sessions
- Gear Notes for Wall Practice in Canada
- Which Wall Drill Should You Choose?
Why Badminton Wall Drills Work for Solo Practice
Badminton wall drills are the simplest way to get meaningful racket reps when you do not have a partner or a booked court. You rally the shuttle against a flat wall, return each rebound, and keep the rally going for as long as you can with control. The setup is minimal: a racket, a few shuttles, a wall that can handle repeated impacts, enough clear space to move safely, and the focus to repeat the same action with purpose.
The value is repetition. A wall sends the shuttle back quickly, so you have to organize your racket face, contact point, grip, and recovery over and over. That makes wall training useful for improving reaction time, stroke consistency, timing, grip adjustment, and hand speed. It is especially helpful for the short, fast exchanges that many players struggle to practise alone: forehand-to-backhand changes, compact drive swings, and relaxed-then-squeeze grip timing.
Training at home between court sessions? Use wall drills for racket repetition, then add movement and conditioning from our badminton drills at home guide when you want broader no-court practice ideas.
Think of the wall as a technique tool, not a full replacement for court play. It can simulate the back-and-forth rhythm of a rally and sharpen your reflexes, but it cannot recreate an opponent’s shot selection, court angles, deception, or full movement patterns. The best use is to build cleaner habits alone, then bring those habits back into drop-in games, lessons, club nights, and match play.
- For beginners: wall drills help you find a repeatable contact point and learn to keep the racket ready after each shot.
- For club players: they add high-repetition practice for fast hands, grip switching, and compact drives without needing a feeding partner.
- For busy Canadian players: they are a practical way to stay sharp between booked court sessions, especially when gym time is limited.
Set Up the Wall: Net Line, Distance, and Ready Stance

A good badminton wall drill setup is simple, but the details matter. You want a flat wall that can handle repeated shuttle impacts, a clear horizontal target line at roughly net height, and enough space to stand about 2–3 metres away without crowding your swing.
Start by choosing a wall that is smooth enough for predictable rebounds and durable enough for repeated hitting. Avoid fragile surfaces, windows, mirrors, doors, or anything that could be damaged by constant contact. If you are using a shared gym, school space, condo room, or community facility, make sure wall practice is allowed before you start.
Basic Wall Drill Setup
- Wall: flat, sturdy, and free of breakable objects around the hitting zone.
- Target line: mark a horizontal line at roughly net height so every shot has a clear visual reference.
- Distance: stand about 2–3 metres from the wall to give the shuttle enough room to rebound while still forcing quick reactions.
- Stance: begin in a balanced ready position, not standing tall and flat-footed.
The net-height line is important because it stops the drill from becoming random wall hitting. If your returns keep flying far above the line, you are probably lifting or scooping the shuttle too much. If everything drops below the line, reduce pace and clean up the contact point before trying to rally faster.
| Setup detail | What to do | Why it helps |
|---|---|---|
| Wall choice | Use a flat, durable wall that can take repeated shuttle impacts. | More consistent rebounds make it easier to train timing instead of chasing unpredictable bounces. |
| Net line | Mark one horizontal line at roughly net height. | It gives every tap or drive a target, so you can tell when your racket face is too open or too closed. |
| Starting distance | Begin around 2–3 metres from the wall. | This distance keeps the drill quick without forcing you into rushed, uncontrolled swings right away. |
| Ready stance | Feet active, knees soft, racket up, body balanced. | The wall returns the shuttle quickly, so your first movement should come from a stable athletic base. |
For the ready stance, think like you are waiting for a flat drive in doubles: weight slightly forward, racket head in front of you, grip relaxed, and feet ready to make a small adjustment. You should not be reaching from your heels or leaning into the wall. If you feel jammed, step back slightly within the 2–3 metre range. If the shuttle dies before it returns, move a little closer and reduce the swing.
Make the stance feel like court movement. Wall drills work best when your feet stay alive between hits. If you are still building that base, review Badminton Footwork Basics so the solo drill connects naturally to real rallies.
Once the wall, target line, distance, and stance are set, resist the urge to hit hard immediately. The next step is to make slow, controlled contacts above the line until the rebound feels repeatable.
Start With Controlled Taps Before Speeding Up
Do not start wall drills by trying to hit fast. The better progression is slow first: gentle taps into the wall, clean contact slightly in front of your body, then a relaxed recovery before the next rebound. Your first target is control, not pace.
Aim for about 10 consecutive controlled drives before you increase speed. If you cannot reach 10, keep the shuttle slower, hit a little higher on the wall, and make the swing smaller. The wall gives the shuttle back quickly, so rushing too early usually turns the drill into a scramble instead of useful badminton practice.
Simple rule: earn speed by keeping the rally alive. When you can control 10 clean rebounds, then make the feed flatter, lower, or faster.
A simple controlled-taps progression
| Stage | What to do | Move on when... |
|---|---|---|
| 1. Gentle taps | Tap the shuttle softly into the wall and return each rebound without forcing power. | You can keep the shuttle in front of you instead of chasing it. |
| 2. Forehand rhythm | Use short forehand drive swings. Keep the backswing and follow-through compact. | You can hit roughly 10 clean forehand returns in a row. |
| 3. Backhand rhythm | Switch to backhand drives. Keep the grip relaxed, use the thumb behind the handle for leverage, and tighten only at impact. | You can control the rebound without locking your hand too tightly. |
| 4. Forehand/backhand rally | Alternate forehand and backhand drives as the wall returns the shuttle. Return each rebound for as long as possible. | You can maintain a steady rhythm before the drill becomes rushed. |
| 5. Lower the height | Once the rally is stable, aim lower on the wall. A lower rebound gives you less time and makes the drill harder. | You can stay relaxed while reacting faster. |
Keep the racket loose during the grip change, then squeeze at the moment of contact. That relax-then-squeeze feeling is the same principle covered in our badminton grip pressure guide, and wall taps are a practical way to repeat it without needing a partner.
If your tap rally is improving but your shot shape still feels inconsistent, review the compact contact cues in our badminton drive shot guide. Wall work should feel like a controlled drive exchange: short swing, contact in front, quick reset, then the next rebound.
Build Reaction Speed With Continuous Wall Drives
Once your controlled taps feel steady, turn the same wall setup into a faster drive drill. Stand in your ready stance, hit the shuttle into the wall with enough pace that it rebounds quickly, then immediately drive each rebound back to the same target. The goal is not one huge swing — it is a compact, repeatable exchange where your racket is ready again before the shuttle comes back.
This is where badminton wall drills become especially useful for reflex training. The wall returns the shuttle faster and more predictably than a slow cooperative rally, so you get dense repetitions for reaction time, timing, stroke consistency, wrist control, hand speed, and reflexes. If you want to connect this drill to match play, think of it as a solo version of flat drive exchanges in doubles; our badminton drive shot guide breaks down that stroke in more detail.
Continuous Wall Drive Pattern
- Start controlled: aim for about 10 consecutive rebounds before you add more speed.
- Use a short swing: keep the backswing and follow-through compact so the racket recovers quickly.
- Contact in front: meet the shuttle slightly in front of your body instead of letting it jam you.
- Relax, then squeeze: keep the hand loose while preparing, then tighten at impact with finger power.
- Stay on one target: return each rebound to the same wall mark until your rhythm is stable.
A good rally should feel quick but not frantic. If the shuttle keeps diving into the floor, add a little height or reduce pace. If you are late on every rebound, move a small step farther from the wall or slow the swing until your contact point returns in front of the body. For more off-court hand-speed ideas, see our badminton reflex training guide.
Canadian home-practice tip. Use an older shuttle for repeated wall rebounds, and make sure the wall and floor space are safe before you speed up. If your racket is due for an upgrade, start with our badminton rackets collection and choose based on control, comfort, and recovery speed rather than power alone.
Keep the drill short and sharp: a few focused bursts are usually more useful than a long session where your grip gets tight and your contact breaks down. Wall work is a repetition tool, so pair it with normal court play when you can.
Use Wall Rebounds to Train Grip Changes

One of the best uses of badminton wall drills is not just “hitting faster.” It is learning to switch grips without thinking. Because the wall sends the shuttle back quickly, every rebound asks the same question: can your hand find the right forehand or backhand position before contact?
Keep the racket relaxed in your fingers as the shuttle comes back. If you squeeze the handle the whole time, the racket becomes harder to rotate and your grip change gets stuck. The goal is to stay loose during the switch, then tighten only at the moment of impact. That quick relax-then-squeeze action is the “finger power” that makes fast drives feel sharp without using a big swing.
Grip slipping during wall rallies? That is useful feedback. Wall reflex work exposes loose, worn, or badly wrapped grips quickly, so check your handle and see our step-by-step overgrip wrapping guide if the racket is twisting in your hand.
Simple forehand-to-backhand wall sequence
- Start loose. Hold the racket lightly enough that your fingers can roll the handle between shots.
- Hit one forehand drive. Use a short backswing, contact the shuttle slightly in front of your body, and keep the follow-through compact.
- Switch to backhand as it rebounds. Let the fingers rotate the handle so the thumb supports the flat edge of the grip for leverage.
- Squeeze at impact only. Tighten for the hit, then relax again immediately so the next switch is ready.
- Repeat slowly first. Aim for a clean rhythm before adding pace. If the racket face wobbles, slow down and make the grip change smaller.
The wall is strict: if your grip is late, the shuttle usually sprays off-line or dies into the wall. That is why this drill is so good for drives, blocks, and quick defensive touches. You get immediate feedback on whether the racket face is prepared before the shuttle arrives.
Watch your grip thickness
A grip that is too thick can make wall drills feel clumsy because it hides the handle edges and encourages over-squeezing. A thinner, well-wrapped grip makes it easier to feel where the racket face is and switch hand position on the spot. You do not need to strangle the handle for power; you need a relaxed hand that can tighten cleanly at impact.
For backhand rebounds, think “thumb support,” not “big arm swing.” Place the thumb behind the handle for power, keep the contact point slightly in front of the body, and use a short punchy motion. For forehand rebounds, return to a neutral forehand grip quickly instead of leaving the thumb parked on the backhand side.
If you can rally against the wall while alternating forehand and backhand grips without the racket twisting, you are building a skill that carries directly into fast exchanges on court: relaxed preparation, quick finger adjustment, and a clean squeeze at the shuttle.
Targets, Pace Changes, and Short Solo Sessions
Once you can control the earlier benchmark of roughly 10 consecutive returns, make the wall drill measurable instead of just “hitting until you miss.” Pick one rally target on the wall, keep returning the shuttle to that same area, and track how long you can stay in rhythm while changing pace and force.
Simple goal: aim at the same wall target, mix soft and firm contacts, and try to extend the rally without losing control. If your rally falls apart, slow down and rebuild from controlled taps.
| What to Track | How to Do It | Why It Helps |
|---|---|---|
| Target consistency | Return each rebound toward the same place on the wall instead of letting the shuttle spray randomly. | This turns the drill into stroke-control practice, not just reaction practice. |
| Pace changes | Mix the pace and force of your strokes while keeping the same rally target. | You learn to stay relaxed through the change, then tighten at impact instead of muscling every shot. |
| Rally length | Count how many clean returns you can make before a miss, then try to extend the rally. | Longer rallies reward calm timing, a short swing, and quick recovery between rebounds. |
| Session length | Keep solo wall sessions short and intense: 20–40 minutes is enough for focused work. | Wall rebounds come back quickly, so quality drops fast if you keep going after your focus fades. |
A useful rhythm is to alternate “control” and “pressure” phases: start by landing repeated returns on the same target, then add a few firmer drives, then settle back into control. If the shuttle starts bouncing too high, too low, or too far off line, that is your signal to reset rather than swing harder.
For players training at home during a Canadian winter, this kind of short session pairs well with off-court work from Badminton Drills at Home and movement basics from Badminton Footwork Basics. If your wall drives feel rushed, the technique cues in Badminton Drive Shot Guide can help you keep the swing compact.
10% off first order · Free shipping on $200+ in Canada · 14-day returns
Gear Notes for Wall Practice in Canada
You do not need a full court setup for badminton wall drills. Keep the gear simple, protect your good shuttles, and make sure the space around you is safe before you start hitting continuous rebounds.
Wall drill gear checklist
- Racket: any badminton racket you can control comfortably. If you are replacing or upgrading, check current options in the badminton rackets collection.
- A few shuttles: use old or used shuttles for wall work. Repeated wall impact wears shuttles quickly, so save your best feathers for court sessions.
- Flat, durable wall: choose a wall that can handle repeated shuttle contact and avoid fragile paint, windows, mirrors, or shared walls where noise may be a problem.
- Clear space: give yourself enough room to stand balanced, swing safely, and recover after each rebound without stepping into furniture, wet flooring, or other people.
Nylon shuttles are a practical choice for this kind of repetition because they are more forgiving as a training shuttle than premium feathers. The Yonex Mavis 350 Nylon Shuttlecocks were listed at $16.99 CAD and sold out when this guide was prepared, so check the live product page before planning an order around them.
Canadian gear note. Stock changes quickly on rackets and shuttles; verify live availability before ordering, and remember that Badminton House offers free Canadian shipping on orders over $200.
If you are also using wall drills to sharpen grip changes, keep your handle comfortable but not bulky. A loose grip helps you switch between forehand and backhand positions, then squeeze at impact for finger power. For more detail, see the badminton grip pressure guide and the overgrip wrapping guide.
Which Wall Drill Should You Choose?
Choose the wall drill based on what you are trying to improve that day. If you are newer to solo practice, start with controlled taps before moving into fast continuous drives or grip-change work.
| Choose this drill | If your goal is... | How to run it |
|---|---|---|
| Controlled taps | Building clean contact, rhythm, and confidence before adding speed. | Hit gently into the wall, keep a rhythmic forehand/backhand rally, and aim for about 10 consecutive reps before increasing pace. |
| Continuous wall drives | Improving reaction speed, timing, hand speed, and drive-shot consistency. | Return each rebound for as long as possible without missing. Keep contact slightly in front of the body, use a short backswing and follow-through, and tighten the grip only at impact. |
| Grip-change rebounds | Making forehand-to-backhand grip changes faster and more automatic. | Hit hard enough that the shuttle flies back, then switch grips between rebounds. Keep the racket loose during the switch and tighten when the switch is complete or at impact. For grip setup, see how to hold a badminton racket and how to wrap badminton overgrip. |
| Target and pace changes | Turning a basic rally into a sharper control drill. | Aim at the same wall target on each return, then mix the pace and force of your strokes. Lowering the rebound height increases the difficulty. |
| Short solo session | Getting useful at-home reps without a partner or booked court. | Keep the session short and intense: 20–40 minutes. Wall drills improve reaction speed and stroke repetition, but they work best alongside real court practice. For more no-court ideas, read Badminton Drills at Home. |
| Setup check | Practicing safely and consistently. | Use a flat, durable wall, stand about 2–3 metres away, and work from a balanced ready stance. If your footwork base feels unstable, review Badminton Footwork Basics. |
Gear note for wall drills. Use old or used shuttles when you can, because wall work repeats impacts quickly. If the Yonex Mavis 350 Nylon Shuttlecocks are back in stock, they are a practical nylon option at $16.99 CAD; at the time checked, they were sold out. If you need a racket, start with the badminton rackets collection and check current availability before ordering.
Get Canadian badminton gear advice + restock alerts
Join the Badminton House list for buying checklists, restock alerts, and practical gear advice for Canadian players.
By subscribing, you agree to receive Badminton House emails and can unsubscribe anytime.
Wall drills are simple, but the details matter: loose fingers, clean contact in front of the body, and a ready stance you can repeat under pressure. We play badminton too, so if you are unsure whether your racket, grip setup, shoes, or shuttle choice is helping your solo practice, contact us for advice and we will help you choose a practical setup for your level.
Free Canadian shipping on orders over $200 · Canadian badminton specialty support

Leave a comment
This site is protected by hCaptcha and the hCaptcha Privacy Policy and Terms of Service apply.