
Last updated: July 2026 · Written by the team at Badminton House
Quick Answer: Left-Handed and Right-Handed Badminton Doubles
Set your defensive formation so both forehands protect the middle, then agree before each game who takes shared middle balls, body shots, and cross-court interceptions.
Default
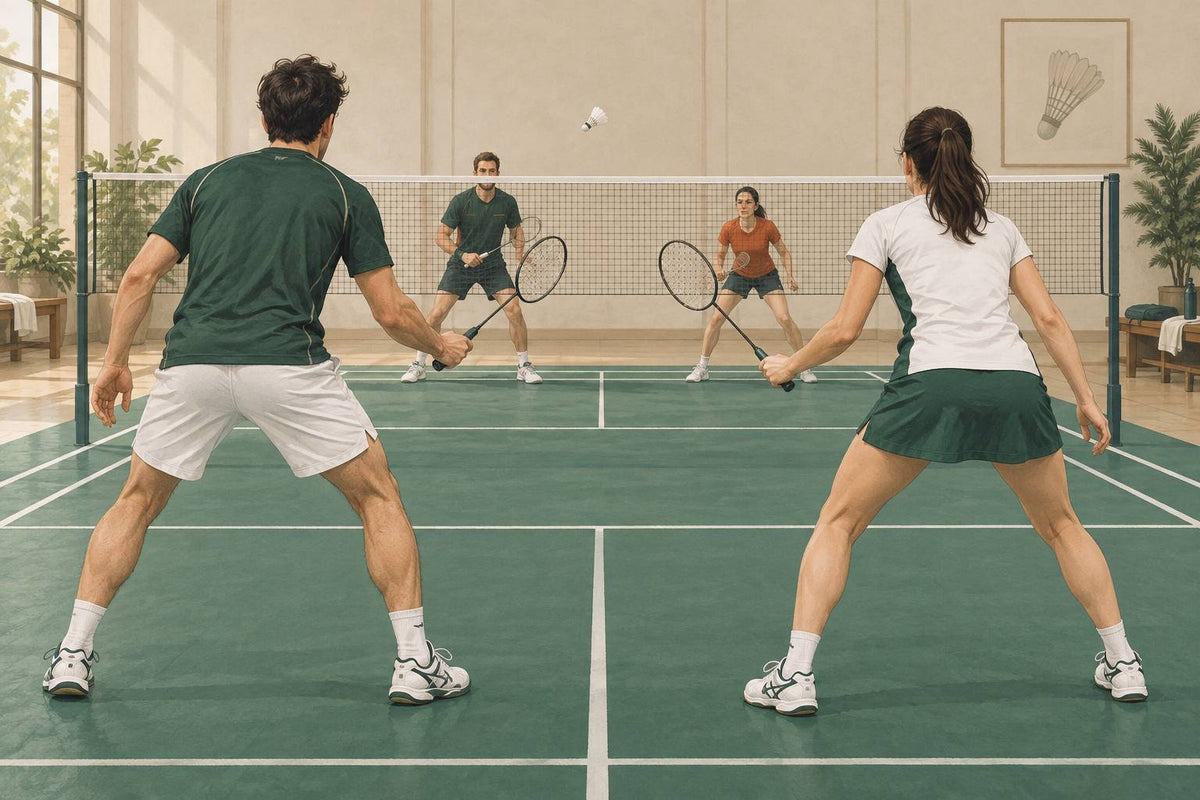
Forehands middle: in side-by-side defence, place the left-hander on the right half and the right-hander on the left half so both players can cover the centre with forehands.
Attack
Use normal front-back attacking rotation: the rear player hits down, the net player covers replies, and the pair keeps a clear call for middle forehand interceptions.
Serve
Handedness changes the first-three-shot plan, not the laws: serve side still follows the score, and the serve still goes diagonally into the correct service box on the same court layout used in Canadian clubs.
If one partner is left-handed and the other right-handed, do not just stand “normal” and hope the middle sorts itself out. In left handed and right handed badminton doubles, your biggest tactical gift is that both forehands can face the centre in defence—but only if you choose who owns which middle shuttle before the rally. Otherwise the exact advantage becomes the classic club-night racket clash. Start by deciding: the pre-agreed middle player takes it unless stretched or the partner calls early, body shots belong to the player being attacked, and any switch must be loud and immediate.
Handedness changes your coverage plan, not the laws. The server still serves from the right court on an even score and the left court on an odd score, and the serve still travels diagonally into the correct doubles service box. What changes is your first-three-shot plan: who protects the straight return, who hunts the cross drive, and when the front player should bias toward the rear attacker’s angle.
This guide is built for real club and league play, where you may be switching partners at drop-in, playing on school courts, or trying to turn a new left/right pairing into a stable doubles team. The court layout is the same regulation layout used worldwide, so the spacing ideas here apply no matter where you train.
Need a setup that fits your doubles role? Learn the positioning first, then if your racket is holding back your rear-court power, drive defence, or net interceptions, you can check live availability in our badminton rackets collection.
In This Guide
- What Changes in Left Handed and Right Handed Badminton Doubles
- Serving and Return Positions: Handedness Does Not Change the Laws
- Side-by-Side Defence: Put Both Forehands on the Middle
- Attacking Shape: Rear Power, Net Control, and Middle Forehands
- Middle-Ball Calls: Prevent the Shared-Forehand Collision
- Rally Sequences and Drills for a Left/Right Pair
- Which Setup Should a Left/Right Doubles Pair Choose?
What Changes in Left Handed and Right Handed Badminton Doubles
The biggest mistake in left handed and right handed badminton doubles is treating the pairing like it needs a brand-new system. It does not. You still play standard doubles rotation: front-back when you are attacking, side-by-side when you are defending, and constant switching as the rally changes.
The handedness advantage is a coverage choice inside that normal system. As a default in defence, place the right-hander on the left half and the left-hander on the right half so both forehands protect the centre. That gives your pair a stronger first contact on many drives, body smashes, and loose middle replies — but only if you agree who takes which middle ball before the point starts.
If you want the full baseline system first, read the badminton doubles positioning and rotation guide. This section builds on the same idea: handedness changes your preferred coverage, not the fundamentals of doubles.
| Situation | Normal doubles rule | Left/right adjustment |
|---|---|---|
| Attacking | Use front-back shape: one player pressures from the rear, the other controls the net and mid-court. | Choose the rear player based on who can hit down with pressure from that corner, then let the front player shade toward the most likely interception lane. |
| Defending | Use side-by-side shape so the pair covers the full doubles width against smashes, drives, and drops. | Start with forehands toward the middle, then lean as a pair toward the opponent who is attacking. |
| Transition | If your side hits down, move into attack. If your side is forced to lift, split into defence. | Do not stay in your preferred handedness lanes if the rally demands a switch; recover first, then rebuild the best shape. |
| Middle balls | One player must take responsibility early so both players do not swing at the same shuttle. | Because both players may feel the middle is their forehand, use a simple call such as “mine,” “yours,” or “back.” |
Think in triggers, not fixed lanes
A left/right pair should not freeze into one court map. Doubles rallies change too quickly. If your partner blocks tight to the net and follows forward, you cover behind. If you lift under pressure, both players must split across the court. If your rear player smashes or drops with pressure, the front player should be ready to hunt the next reply.
That means the best left/right teams are not the ones that memorize a formation and refuse to leave it. They are the ones that rebuild the right formation after every shot. The handedness plan simply gives you a preferred defensive base and clearer middle coverage when the rally becomes flat or fast.
Practical cue for club matches
Before the first rally, agree on one sentence: “In level defence, we start with forehands to the middle; if either of us is pulled out, the nearest player plays the shuttle and calls early.” That keeps the advantage without creating a middle-court collision.
What stays exactly the same
- Front-back attack still matters. When your side has the chance to hit down, one player should pressure from the rear while the partner controls the net and mid-court.
- Side-by-side defence still matters. When your side lifts, both players must cover width; no handedness setup saves a pair that leaves one sideline open.
- The closest player usually moves first. If you are already at the net after playing a tight shot, stay involved at the front while your partner covers the rear.
- The rally decides the rotation. Who is left-handed or right-handed matters less than whether your side is attacking, defending, or recovering from a stretched position.
For Canadian players, the court picture is the same whether you train at a dedicated badminton centre, a school gym, or a community centre: regulation badminton court dimensions use the same layout worldwide. If you want the service boxes and doubles lines visualized, see the badminton court dimensions and lines guide.
Gear setup note. This tactic depends on quick lateral recovery and clean forehand contacts, so make sure your shoes grip indoor courts and your racket suits your role. You can check live availability in badminton footwear and badminton rackets without changing the coaching priorities above.
Serving and Return Positions: Handedness Does Not Change the Laws
A left-handed and right-handed badminton doubles pair can be clever with coverage, but the service order itself does not change. The score decides the service court: when the serving side has an even number of points, the server serves from the right service court; when the score is odd, the server serves from the left service court. The receiver stands in the diagonal, alternate service court.
The useful freedom is around the two non-receiving/non-serving partners. Players may take any legal position on their own side as long as they do not block the sight of the server or receiver. That is where a left/right pair can build a first-three-shot plan: not by changing the laws, but by choosing who is best placed to cover the straight reply, middle reply, and cross-court reply after the serve.
| Service situation | What the law requires | What the left/right pair can adjust |
|---|---|---|
| Even score | Serve from the right service court into the diagonal service box. | Set the partner slightly to protect the most likely straight or middle return without blocking sight lines. |
| Odd score | Serve from the left service court into the diagonal service box. | Flip the coverage plan rather than forcing the same left/right pattern every point. |
| Partner positioning | Partners may stand anywhere legal on their side if they do not impede the server or receiver’s sight. | Use the freedom to pre-arrange the third shot: who closes the net, who covers the middle, and who protects the tramline. |
Use the low serve as the default
In doubles, the low serve should be the default starting point because it begins falling below net height immediately after crossing the net. That limits the receiver’s chance to attack downward and gives your pair a better chance to control the third shot.
For a left/right pair, the low serve also buys time to use your shared-forehand advantage. If the serve is tight, the receiver is often choosing between a net reply, a flat push, or a lift. Before the point starts, decide which of you is hunting the flat middle ball and which of you is ready to cover the straight channel.
For the technical serve mechanics and when to mix in a flick, use the full badminton doubles low and flick serve guide.
Build a simple first-three-shot plan
Think of the serve as shot one, the return as shot two, and your pair’s next touch as shot three. Because many doubles rallies are decided very early, your plan should be short enough to say before the serve and clear enough to execute at speed.
Left/right first-three-shot example
- Shot 1: Serve low to reduce the receiver’s attacking angle.
- Shot 2: Expect a net reply, straight push, body push, or lift.
- Shot 3: The server closes the net if the reply is soft; the partner covers the agreed straight or middle lane if the reply is driven.
If the server is not quick enough to cover the straight tramline after a wide serve, the pair can pre-arrange a practical adjustment: the partner protects the straight line while the server takes a half step back to cover the middle and cross-court reply. That is a coverage choice, not a service-law change.
Use body serves to feed your forehand interception zone
A body serve can be useful when it makes the receiver play an awkward, compact return. For a left/right pair, the best body-serve idea is not simply “serve at the body”; it is “serve so the likely reply comes toward our forehand interception lane.”
For example, if the receiver’s rushed reply tends to pop into the middle, place your partner where their forehand can meet that ball early. If the reply tends to go straight, agree whether the server or partner is taking the first interception before the shuttle is served. The goal is to make the return predictable enough that your pair moves first instead of reacting late.
For the receiver’s side of this exchange, especially how to punish loose low serves and flicks, read the badminton doubles return of serve guide.
Keep the pre-serve call brief
Do not turn every serve into a long meeting. Use one short coverage cue before the serve, then play. The detailed middle-ball system belongs in the Middle-Ball Calls section; here, you only need enough information to survive the first return.
| Quick cue | Meaning |
|---|---|
| “You straight.” | Partner protects the straight tramline after the serve; server is ready for middle and cross-court. |
| “I close.” | Server expects to follow the serve forward and take the first soft net reply. |
| “Middle yours.” | A temporary first-return cue only; use the fuller middle-ball rules later in the rally. |
The key is that handedness changes your preferred coverage, not the service law. Serve from the correct side, keep the receiver’s sight clear, then use your left/right geometry to make the third shot feel rehearsed.
Gear note for serve-and-return footwork. Quick first steps matter in doubles. If your shoes slide or mark indoor courts, check live availability in our badminton footwear collection before your next club session.
Side-by-Side Defence: Put Both Forehands on the Middle

Once your pair is forced to lift, get into side-by-side defence quickly. For a left-handed and right-handed badminton doubles pair, the cleanest default is simple: right-hander defends the left half, left-hander defends the right half. That turns the centre channel into a shared forehand zone instead of a shared backhand problem.
Do not crowd the centre line. Each player starts about one step back from the middle of their own half, racket up, ready for smashes, flat drives, and soft drops. If you want the full base-position checklist, use our badminton defence ready position guide alongside this left/right pairing plan.
Defensive map for a left/right pair
Left half: right-hander
Covers the left sideline, straight smash lane, and left-side drop. Forehand is pointed toward the middle.
Right half: left-hander
Covers the right sideline, straight smash lane, and right-side drop. Forehand is pointed toward the middle.
Centre rule: both forehands face the middle, but only one player takes the shuttle after the call.
Lean toward the attacker without losing your half
The formation is not static. If the opponent is attacking from your defensive right side, both defenders shade slightly right within their halves. If the attack comes from your defensive left side, both shade left. This small lean protects the most dangerous straight and body smash lanes while keeping the full doubles width covered.
- Straight defender: expect the fastest smash first, then be ready to block or drive away from the front attacker.
- Cross-court defender: stay connected to the middle, but do not drift so far that the cross drive or drop opens up.
- Both players: keep the racket in front and recover after every block, because the next shot may be a drive, re-smash, or soft drop.
Footwork check. Side-by-side defence depends on fast lateral push-offs and stable braking. If your shoes slide on indoor courts, check live availability of non-marking badminton shoes before your next club night.
The mistake to avoid: two forehands, one shuttle
The left/right advantage becomes a problem when both players see the same centre shuttle and both swing. Treat the middle as a planned responsibility, not a free-for-all. Before the rally pattern gets fast, agree on a short call such as “mine” or “yours,” and decide whether the stronger forehand or the player with better body position takes the middle by default.
A useful rule is: forehand shape first, verbal call second, recovery third. Set the two-forehand wall, call early on middle balls, then recover back to your half so the next smash or drive does not split you.
Attacking Shape: Rear Power, Net Control, and Middle Forehands
When a left-handed and right-handed pair is attacking, the basic doubles shape does not change: one player works from the rear court and the other controls the front court. The rear player applies pressure with smashes and drops, using a clear when the situation calls for it — while the front player looks for net replies, loose blocks, and flat drives that can be intercepted before the opponents escape defence.
The handedness advantage is not that you invent a new formation. It is that, when the rally gives you time to choose, you can arrange the front-back shape so the middle lane is protected by forehands instead of two backhands or two unsure swings.
Start with normal rotation, then add the left/right bias
Rotation still decides who goes forward and who covers the back. If you play the downward shot and finish closest to the net, you usually stay or move forward. If your partner is behind you, they cover the rear. If your side is forced to lift, you stop thinking front-back and recover into side-by-side defence.
Once that rotation is clear, a left/right pair can add a preferred attacking map:
- Right-hander rear on the left half: their forehand naturally covers smashes and steep drops through the middle. A left-handed front player can shade slightly right of the T so their forehand also faces the middle and cross-court drive lane.
- Left-hander rear on the right half: their forehand covers the middle from the opposite side. A right-handed front player can shade slightly left of the T to take interceptions with the forehand.
- Rear player pulled to the “wrong” side: forget the preferred map for that shot. Keep the rally structure first: the player who can stay front controls the net, and the partner covers the rear.
A useful rule for club play is: formation first, handedness second. If the shuttle and your movement say one player must go forward, trust the rotation. Use the left/right forehand-middle setup when you have enough time to choose the shape, not when you are already late.
Where the front player stands
The front player should normally work around the T area: close enough to threaten net replies, but not so close that a flat cross-court drive flies past the racket shoulder. For a deeper breakdown of this job, see our doubles front-court net play guide.
In a left/right pair, the front player’s small side bias matters. If the rear player is smashing from the left rear and the front partner is left-handed, the front player can sit a touch right of centre so their forehand is ready for the cross drive. If the rear player is smashing from the right rear and the front partner is right-handed, the front player can sit a touch left of centre for the same reason.
Do not overdo the bias. If the front player camps too far to one side, the opponents get an easy block or push into the open front corner. Think “half a step and racket-side ready,” not “stand in the tramline.”
| Attacking situation | Left/right adjustment | What to call |
|---|---|---|
| Rear player has a clear forehand attack from their preferred half | Front partner shades so their forehand also protects the middle or cross-drive lane | “Stay” or “front” so the net player knows to hold the T area |
| Rear player is late and must clear or lift | Drop the attacking bias and recover into side-by-side defence | “Back” or “side” early, before both players hesitate |
| Front player sees a loose net reply | Front player commits to the kill or tight net shot; rear player stays ready for the lift | “Mine” if there is any middle overlap |
| Opponent drives cross-court past the front player | Front player should only intercept if balanced; otherwise rear player covers the back channel | “Yours” if the drive has already passed the front racket |
Attack toward your front partner, but protect the middle first
A strong doubles attack is connected. The rear player should avoid smashing into a lane the front player cannot cover. If your front partner is loaded on the forehand side near the T, aim your smash, drop, or half-smash so the likely block or drive travels into that interception zone.
For left/right pairs, this often means using the middle more deliberately. A smash through the body or centre can produce a weak block, and both partners already know whose forehand owns the next ball. That is safer than both players chasing a flashy wide angle and leaving the centre open.
The danger is the shared-forehand collision. Because both players may feel the middle is “theirs,” you need a simple rule before the rally starts: rear player takes deep middle shuttles; front player takes anything they can intercept in front of the service line or around the T. If the shuttle is dropping between those zones, the first clear call wins.
A simple attacking pattern to try
- Lift earned: as soon as the opponents lift, the rear player moves back and the front player claims the T area.
- Forehand-middle setup: if possible, place the right-hander on the left-side role or the left-hander on the right-side role so the middle is covered by forehands.
- First attack: rear player hits down through the middle, at the body, or into the lane the front player is already guarding.
- Front interception: front player holds around the T and looks for the net block or cross-court drive.
- Reset call: if the opponents force a lift from your side, call early and recover into side-by-side defence.
If your pair is choosing a racket setup for these roles, the rear player may prefer a frame that supports repeated overhead attack while the front player may prioritize fast handling for interceptions. You can check live badminton racket availability and compare options against how your pair actually rotates, rather than buying only for handedness.
Middle-Ball Calls: Prevent the Shared-Forehand Collision
The biggest strength of a left-handed and right-handed badminton doubles pair can also become its messiest problem: both players often see the centre shuttle as a forehand. That gives you confidence through the middle, but if you both swing, you lose the rally, risk clashing rackets, and make your next movement late.
Treat this section as the pair’s main communication system. The service plan, return plan, defensive shape, and attacking rotation should all refer back to these rules instead of inventing new calls mid-rally.
Default rule. Before the match, agree who owns the true middle. Usually it is the stronger forehand, but it can also be the player you choose for that rally plan.
Use Three Short Calls Only
Long explanations do not work in doubles. The call has to come early, before both players load their swing. Keep the vocabulary small so your partner recognizes it under pressure:
- “Mine” means you are taking the shuttle and your partner should cover the next space.
- “Yours” means you are leaving it and immediately recovering to cover the reply.
- “Back” means the front player is letting a flatter or lifted shuttle pass to the rear player.
The call should happen as the shuttle leaves the opponent’s strings, not when it is already between both rackets. In a noisy Canadian club night or tournament gym, short words are easier to hear than full sentences.
Set a Pre-Match Middle Rule
A left/right pair should not decide every middle ball from scratch. Pick a default owner, then add exceptions. This prevents the classic shared-forehand collision while keeping the pair aggressive through the centre.
| Situation | Call Rule | Why It Works |
|---|---|---|
| True middle in side-by-side defence | Pre-agreed player calls “mine” unless clearly stretched | Both forehands are available, so the pair needs one owner rather than two guesses. |
| Fast shuttle aimed between hips | Closest player calls “mine”; partner protects the next drive | Body shots give less time, so distance to the shuttle matters more than preference. |
| Flat drive through the centre | Middle owner takes it unless the partner has a clear forehand intercept | This keeps the middle firm without stopping a clean attacking interception. |
| Front player sees a cross-court drive passing shoulder height | Call “mine” only if you can intercept in front of the body; otherwise call “back” | Late reaching from the front opens the court and can block the rear player’s swing. |
| Loose lift or clear drifting down the middle | Rear attacking player calls “mine” early | The rear player usually has the longer swing path and better view for a downward shot. |
Body Shots: Do Not Both Flinch Forward
Body shots are where left/right pairs often panic. Because the shuttle is not clearly on one side, both players may step in and poke at it. Instead, use a simple rule: the player whose body line the shuttle is attacking owns the first touch, while the partner prepares for the next ball.
If the shuttle is between both players but closer to one hitting shoulder, that player says “mine.” If the shuttle is tight to the middle and neither player has space, the pre-agreed middle owner takes the compact block or drive. The other player must not hover with a second racket; recover into the open half.
Cross-Court Interceptions: Call Before You Cut Across
In attack, the front player wants to threaten cross-court drives and loose pushes. That is a major advantage for a left/right pair because the forehand can sit over the middle. The danger is cutting across a partner who is already preparing from the rear.
Use this rule: intercept only when the shuttle is in front of you and you can take it cleanly. If the shuttle is level with your shoulder, behind you, or travelling too flat to control, call “back” and let the rear player hit through it. For the mechanics of staying compact in these exchanges, see our badminton flat drive technique guide.
The Switch Rule When the Rally Changes
The middle owner is not permanent for the whole rally. It changes when your formation changes. In side-by-side defence, the agreed middle player may take the centre drive. But once one player moves forward to attack, the front player owns interceptions in front, and the rear player owns shuttles that pass or lift behind.
A practical switch rule is:
- Defending side-by-side: agreed middle forehand owns the centre unless stretched.
- Transitioning forward: the player moving in calls “mine” only for shuttles taken clearly in front.
- Attacking front-and-back: front player calls “mine” for clean interceptions; front player calls “back” for anything passing through.
- Scramble phase: closest balanced player calls first; the other covers the empty court instead of chasing the same shuttle.
The goal is not to talk constantly. The goal is to remove the one moment of doubt that causes both forehands to swing at the same middle shuttle.
Rally Sequences and Drills for a Left/Right Pair

A left handed and right handed badminton doubles pair should practise its patterns as rally sequences, not as isolated shots. The goal is simple: keep the shared-forehand middle useful, avoid both players chasing the same shuttle, and turn defence into attack as soon as the opponent gives you a flat or loose reply.
Quick practice rule
In defence, hit to the space the front attacker is least ready to cover: the straight defender usually drives cross-court, and the cross-court defender usually drives straight.
Sequence 1: Straight defender drives cross-court
Use this when the opponent smashes straight at the defender on the same side as the smasher. Because the opposing front player often shades toward the smasher’s side, a firm cross-court drive can move the shuttle away from that front racket and force the rear attacker to change direction.
- Start: Your pair is side-by-side, with both forehands protecting the middle.
- Opponent: Rear player smashes straight.
- Your straight defender: Blocks or drives cross-court with a compact swing, aiming past the front attacker rather than through the centre.
- Your partner: Holds the middle forehand zone and prepares to move forward if the drive forces a weak lift or loose block.
- Next call: If the drive rises and your pair can attack, call “up” or “mine” early so one player moves in and the other rotates behind.
Do not make this a floaty cross-court push. It needs to be flat enough that the front opponent cannot step across and kill it.
Sequence 2: Cross-court defender drives straight
Use this when the smash travels diagonally to the defender away from the smasher. From that cross-court defensive position, a straight drive often travels into the open lane before the front attacker can recover across.
- Start: Both defenders lean slightly toward the attacking side while still owning their half.
- Opponent: Rear player smashes cross-court.
- Your cross-court defender: Drives straight down the line or blocks straight with enough pace to pass the front player.
- Your partner: Stays connected to the middle and does not drift too wide, because the next reply may come flat through the shared-forehand lane.
- Next call: If the straight drive forces a lift, the closest player moves forward and the partner takes rear-court coverage.
For a left/right pair, this is where the forehand-middle advantage matters. If both players know whose forehand owns the next middle ball, you can pressure the drive lane without hesitation.
Sequence 3: Avoid soft pushes through the centre
The centre looks safe, but in doubles it is often the worst defensive target. A soft push through the middle gives the opposing front player an easy interception, especially if they are already standing near the T and hunting anything loose.
- Bad pattern: Smash comes in, defender panics, soft push floats through the centre, front opponent kills it.
- Better pattern: Defender chooses a clear lane: flat cross from the straight defender, flat straight from the cross-court defender, or a controlled lift away from the smasher.
- Communication cue: If the shuttle is genuinely between both players, call “mine” or “yours” before the swing, not after both rackets have moved.
This is especially important for left/right pairs because both players may feel that the centre is their forehand. Treat the middle as a shared weapon, not shared territory.
Sequence 4: When you must lift, lift away from the smasher
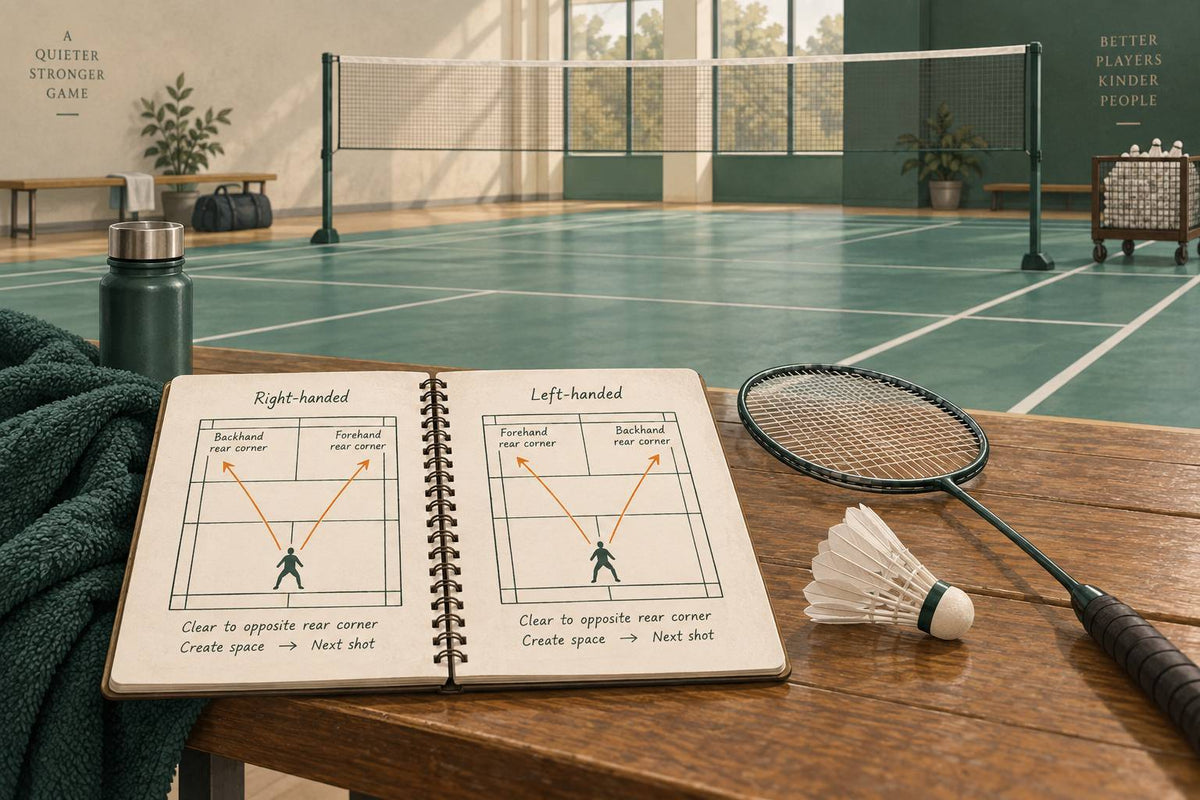
Sometimes the smash is too steep or too fast to counter-drive. If you have to lift, make the rear attacker move. Lifting back to the same corner lets the smasher stay balanced and continue attacking; lifting to the opposite rear corner buys your pair more time to reset.
- If the smasher is in their right rear corner: Lift toward their left rear corner when you can do so safely.
- If the smasher is in their left rear corner: Lift toward their right rear corner when you can do so safely.
- After the lift: Split immediately into side-by-side defence, re-establish the forehand-middle agreement, and lean toward the next attacking side.
A high, deep lift is better than a half-lift. A half-lift keeps you under pressure and removes the benefit of your left/right defensive shape.
Drill 1: Serve-to-front-back entry
This drill trains the first three shots without changing the service laws. The server still serves from the correct service court according to the score; the pair is simply rehearsing what happens after the serve.
- Set-up: Server starts from the correct service side. Partner stands in the agreed legal support position behind or beside the server.
- Feed: Server plays a low serve. Receiver returns either a net shot, flat push, or lift.
- Task: If the return is lifted, the server or partner calls early, one player takes the rear, and the other takes the net.
- Left/right focus: Decide before each rep who owns the middle forehand if the return comes through the body or centre lane.
- Progression: Add a live fourth shot so the front player must intercept or recover instead of watching the rear player smash.
Run this from both service courts so the left-hander and right-hander learn how the entry pattern changes when the server’s racket side changes.
Drill 2: Lift-to-side-by-side split
This drill fixes the most common positioning leak: one player lifts, then both players stay too central or too front-back. The lift is the trigger to defend side-by-side.
- Set-up: Pair starts in attack formation, one front and one rear.
- Feed: Rear player is forced to play a lift or clear under pressure.
- Task: As soon as the lift leaves the strings, both players split into left-right defence.
- Left/right focus: Arrange the split so both forehands protect the middle whenever the rally position allows it.
- Quality check: Each player should be able to cover smashes, drives, and drops in their own half without leaving the centre completely exposed.
For more detail on the defensive base, ready position, and how to react from side-by-side, use the badminton defence ready position guide.
Drill 3: Defence-to-attack transition
This drill connects the defensive angles to the rotation. The pair starts under pressure, then must recognize the first chance to move forward and take the attack.
- Set-up: One pair attacks from front-back. The left/right pair defends side-by-side.
- Feed: Attacking pair smashes or drives for three shots.
- Task: Defenders must use an open angle: the straight defender can drive cross-court and the cross-court defender straight when those lanes pass the front attacker, or lift away from the smasher under pressure.
- Transition: When the defenders force a lift or loose block, the closest player moves to the net and the partner rotates behind.
- Scoring: Defending pair gets one point for surviving three attacking shots and one bonus point for winning the rotation into attack.
This is the pattern that turns left handed and right handed badminton doubles from “we cover the middle well” into “we win the next phase of the rally.” For a deeper breakdown, read the badminton defence-to-attack transition guide.
Drill 4: Middle-call pressure game
This is a simple club-night drill for Canadian players who may only get one court and a short warm-up window. It trains the habit that matters most for a left/right pair: call before the collision happens.
- Set-up: Two feeders attack or drive repeatedly toward the centre channel.
- Rule: The left/right pair must use its agreed “mine,” “yours,” or “back” call before contact on every middle shuttle.
- Penalty: If both players swing, both leave it, or the call comes after contact, the pair loses the rally.
- Progression: Feed body shots, half-court drives, and cross-court interceptions so the pair must decide whether the middle belongs to the defender, the front player, or the rotating rear player.
Once the calls are consistent, add target zones. The aim is not just to survive the middle ball; it is to place the next shot into the lane that weakens the opponents’ formation. For more ideas on where to aim in doubles, see the badminton doubles shot placement guide.
Gear note for these drills. Left/right doubles defence depends on fast lateral push-offs and stable landings. Check live availability in badminton footwear, and if your pair is building a rear-court attack role, compare options in the badminton rackets collection.
Which Setup Should a Left/Right Doubles Pair Choose?
| If this is your pair’s problem | Choose this default | Why it fits a left/right pair | Guardrail |
|---|---|---|---|
| Both players attack the same middle shuttle | Choose a pre-match middle priority. Usually, the player with the stronger forehand takes middle shots. | A left/right pair can make the centre a shared-forehand zone, but that advantage only works when the responsibility is agreed before the rally. | Use the rule explained in the Middle-Ball Calls section rather than inventing a new call pattern mid-match. |
| You are defending smashes, drives, and fast drops | Choose side-by-side defence with both forehands protecting the centre. Each player owns one half, then both lean toward the side the attack is coming from. | Side-by-side defence covers the full court width, and the left/right pairing can make the middle more comfortable because both players can guard it on forehand. | Do not stand flat-footed in the middle. For spacing details, see the badminton defence ready position guide. |
| You have won the attack and one player is stronger from the rear court | Choose rear power plus front-court control. The rear player smashes, drops, or clears; the front player covers net replies and cross-court interceptions. | This keeps the standard front/back attacking shape while letting the pair keep forehands available through the middle when the rear player attacks toward the front partner’s side. | Choose rackets by role, not by handedness: compare rear-court power and front-court speed in our doubles racket guide, then check live availability. |
| Serve and return positions feel confusing because one player is left-handed | Choose the score-law first, then layer your coverage plan on top. Even score serves from the right service court; odd score serves from the left. | Handedness changes the preferred first-three-shot plan, not the service law. Partners may stand anywhere legal as long as they do not block the server’s or receiver’s sight. | Low serve remains the usual doubles default because it starts falling below net height after crossing the net. For first-shot structure, see the doubles low and flick serve guide and doubles return of serve guide. |
| Opponents keep turning your defence into easy interceptions | Choose the defensive angle rule. The straight defender plays cross-court drives; the cross-court defender plays straight drives. | The front attacker is usually biased toward the smasher’s side, so driving away from that bias makes the interception harder. | Avoid soft pushes through the centre, and lift away from the smasher when you must lift. For execution, use the flat drive technique guide and doubles shot placement guide. |
| You only have limited practice time together | Choose transition discipline first. Practise entering front/back after a serve and splitting side-by-side after a lift. | Formation is dictated by the rally: attack when you hit downward, defend as soon as you are forced to lift. | Keep the rotation simple before adding deception or trick plays. For the full framework, read doubles positioning and rotation and defence-to-attack transition. |
Get 10% off your first order
Join the Badminton House list and we’ll email you a 10% welcome code — plus subscriber-only restock alerts, giveaways, and honest gear advice from players.
By subscribing, you agree to receive Badminton House emails and can unsubscribe anytime.
A left-handed and right-handed badminton doubles pair can be awkward in the best way: forehands in the middle, different attacking angles, and clear roles that make opponents hesitate. We play badminton ourselves, so if you are trying to match your racket, shoes, or string setup to your doubles role, contact Badminton House and we will help you think it through like a real court problem, not a generic gear quiz.
Get player-focused advice for your doubles role · Canadian badminton specialty shop

Leave a comment
This site is protected by hCaptcha and the hCaptcha Privacy Policy and Terms of Service apply.